
If you have spent any time watching software tutorials, coding walkthroughs, or SaaS product demos lately, you have probably noticed a major shift in how they look.
A developer clicks on a specific line of code, and the camera seamlessly glides in to magnify the syntax. A creator clicks a tiny dropdown menu in Photoshop, and the screen smoothly pans to make the options perfectly clear. There are no abrupt, choppy cuts just a fluid, cinematic motion that looks like a live camera operator is tracking the mouse cursor.
This isn't the result of creators suddenly spending ten extra hours keyframing transitions inside Adobe Premiere or DaVinci Resolve. Instead, elite tutorial makers are deploying algorithmic auto-zoom.
And they aren't just doing it because it looks pretty. They are doing it because it fixes a massive algorithmic problem, driving longer watch times and higher view counts. Here is how auto-zoom is changing the tutorial ecosystem and how you can use it to grow your audience.
1. Crushing the Mobile Readability Crisis
The single biggest obstacle facing tutorial creators is the shift in where people watch videos.
If you record a software workflow on a 27-inch 4K desktop monitor, everything looks perfectly legible to you while filming. But over half of all educational video content is now consumed on mobile devices. When a massive desktop layout is compressed onto a 6-inch smartphone screen, your text shrinks aggressively. The moment a viewer has to squint to see what button you are clicking or what line of code you just typed, they swipe away.
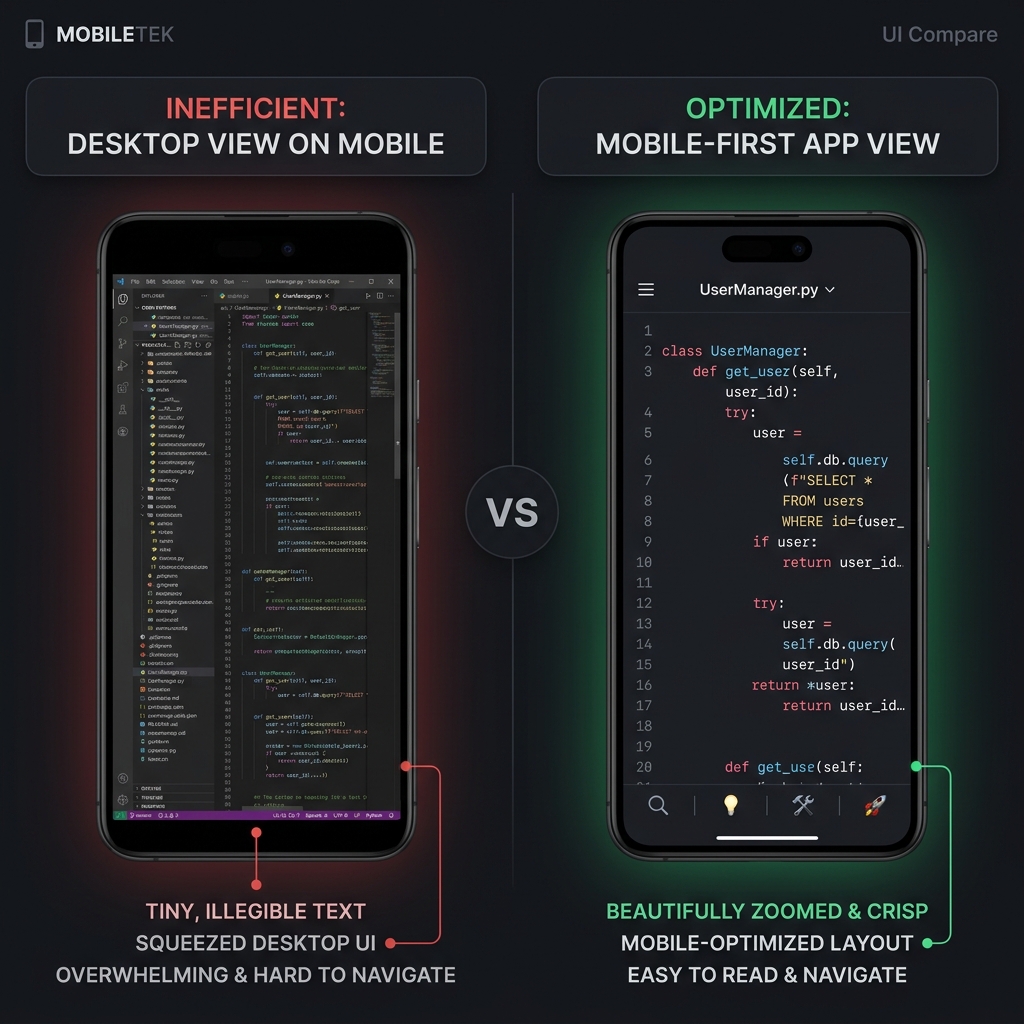
Auto-zoom engines solve this natively. By automatically tracking your mouse clicks and cursor coordinates, platforms like Cubix Capture smoothly magnify the active workspace while you talk. This keeps your content flawlessly legible on small screens, preventing the immediate viewer drop-off that kills your video's reach in recommendation algorithms.
2. Eliminating Visual Fatigue and "Aesthetic Boredom"
Human eyes are naturally drawn to motion. When a tutorial consists of a completely flat, stationary full-screen capture for ten straight minutes, the viewer's brain quickly treats it like a static image. Visual fatigue sets in, attention drifts to other browser tabs, and the audience drops off.
Auto-zoom introduces dynamic pacing. The subtle camera glides, gentle pans, and focus shifts mimic the cinematic language of a real film. This gentle visual stimulation keeps the viewer's brain active and locked onto the screen, resulting in a dramatic spike in Average View Duration (AVD)—the golden metric that YouTube and course platforms use to decide which videos to promote.
Enjoying this read?
Get weekly insights on video editing, AI workflows, and creator growth straight to your inbox.
3. Masking Raw Trackpad Jitters
When we use a computer naturally, our hand movements are incredibly frantic. We flick the cursor across the screen, circle things erratically while trying to remember our script, or shake the mouse out of pure habit. Under the close scrutiny of a macro video tutorial, these erratic movements look highly unprofessional and create visual anxiety for the student.
Modern auto-zoom tools don't just zoom; they bundle in AI Cursor Path Smoothing. The software intercepts your chaotic physical tracking data and translates it into an elegant, fluid visual sweep. By combining stabilized mouse paths with automatic focal zooms, your brand instantly projects the polished authority of a high-end production studio.
Production Velocity: The Real Secret to More Views
In content creation, views are a volume game. The faster you can ship high-retention tutorial modules, the more real estate you claim on the internet.
The old way of achieving zoom effects was incredibly inefficient. Creators had to record raw pixels, dump the heavy file onto a complex linear video timeline, slice the clip into dozens of fragments, and manually animate camera scales step-by-step. This heavy post-production tax meant a 5-minute video took two hours to edit.
By shifting to an automated presentation recorder, your entire creation pipeline scales down to a single, continuous sweep:
-
Sanitize Your Active Workspace: Prune background distractions before filming. Hide your physical desktop icons, clear out unrelated browser tabs, and hide your browser bookmarks bar (
Ctrl + Shift + B). Toggle your operating system configuration into Do Not Disturb mode to block personal alerts from hijacking your visual focus. -
Slow Down Your Physical Choreography: Gives real-time tracking engines clean data points. Move your mouse cursor across your application layout at half-speed. When approaching a button, settings block, or dropdown menu, hover over it for one full second before clicking, and leave your pointer resting there for a split second afterward. This deliberate pacing provides clean triggers for automated focus zooming engines.
-
Deploy the 'Clap and Repeat' Framework: Handle errors continuously without stopping the clock. If you stumble over a technical term or misclick an option, do not stop the recording. Pause for three seconds, clap your hands loudly near your microphone to create a giant visual spike on your audio waveform, reset your cursor, and repeat the step. You can easily spot and slice out those visual spikes later.
-
Publish via Instant Cloud Handoff: Skip the manual editing timeline completely. Hit stop. Because modern recorders handle your canvas backdrops, cursor smoothing, and algorithmic focal zooming automatically while you speak, there is no heavy editing phase. Your video is fully polished, styled, and ready to share the exact millisecond you finish presenting.
Summary Matrix: The Value of Smart Capture
| Viewing & Production Metrics | Traditional Flat Captures | Automated Auto-Zoom Captures |
|---|---|---|
| Mobile Screen Delivery | Microscopic text (High viewer bounce rate) | Dynamically magnified (High retention) |
| Cursor Path Presentation | Jittery, rapid, and distracting movements | AI-smoothed, elegant cinematic sweeps |
| Visual Framing Layout | Full desktop chaos (Tabs & folders exposed) | Isolated windows over sleek studio backdrops |
| Editing Time Investment | Hours of manual timeline keyframing | Zero (Processed in real-time while speaking) |
Ultimately, maximizing your view count isn't about working longer hours on an editing timeline; it's about respecting your viewer's viewport and your own creative calendar. By letting an automated recording engine like Cubix Capture handle the cinematography, framing, and auto-zooms for you dynamically, you can deliver elite, mobile-friendly tutorials that hold attention and rack up views on autopilot.
Related reading:
- What Is Auto-Zoom Screen Recording? A Complete Guide
- How Auto-Zoom Technology Actually Works
- The Psychology of Zoom and Viewer Retention
📖 Keep reading: put these gains to work against the drop-off in why your tutorial videos lose viewers after 30 seconds.
Don’t miss the next one.
Join our newsletter for exclusive tips, product updates, and the latest from the Cubix team.