Have you ever tapped on a YouTube tutorial or a product demo on your phone, only to realize you cannot read a single word on the screen? You squint, turn your phone sideways, and eventually just give up and click away.
As a creator, educator, or founder, there is nothing more frustrating than spending hours recording a highly valuable video, only to lose your audience because they simply cannot see what you are doing. The culprit? Standard, raw screen recording.
As our computer monitors have gotten larger and more high-resolution, the standard method of capturing the entire screen has become obsolete. To keep viewers engaged in 2026, your video needs to guide their eyes. This is where auto-zoom screen recording has completely revolutionized the industry.
Here is the complete guide to what auto-zoom is, why it is the new standard for professional video, and how it can save you hundreds of hours of video editing.
If you already know you want automatic zoom and just need a short setup path, start with How to Add Auto-Zoom to Screen Recordings (No Editing). If you are comparing tools first, read Top 5 Auto-Zoom Screen Recorders Compared.
What Exactly Is Auto-Zoom?
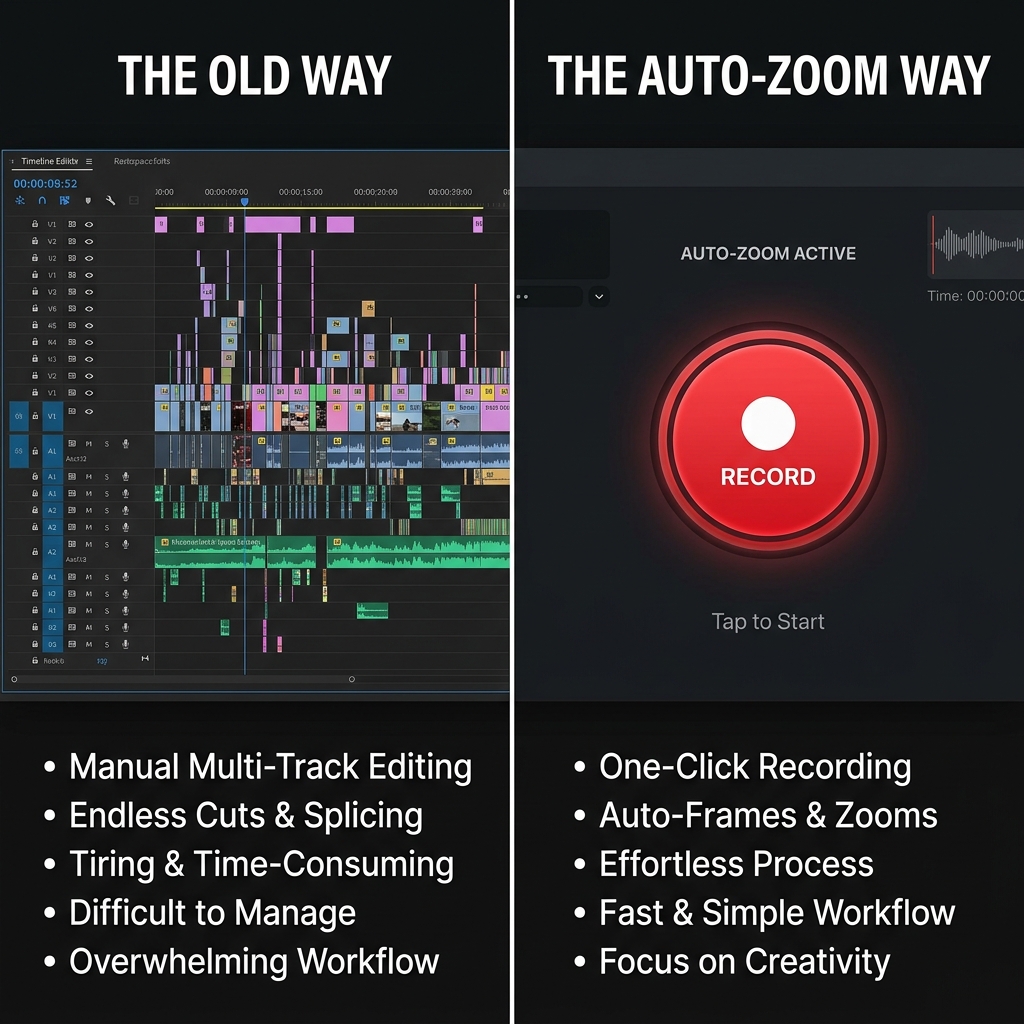
In the past, screen recorders were dumb. They simply placed a static box over your desktop and recorded every pixel inside it.
Auto-zoom is an intelligent recording technology that acts as an automated camera operator.
Instead of showing a wide, static shot of your entire monitor for the duration of the video, an auto-zoom screen recorder tracks your mouse movements, clicks, and typing in real-time. When you navigate to a specific menu or click a button, the software automatically triggers a smooth, cinematic zoom into that exact area of the screen. When you move to a different side of the application, the camera elegantly pans over to follow your action.
Why You Absolutely Need It Today
If you are creating content for public consumption, an auto-zoom tool is no longer a luxury; it is a requirement. Here is why the most successful creators and teams have completely transitioned to this technology.
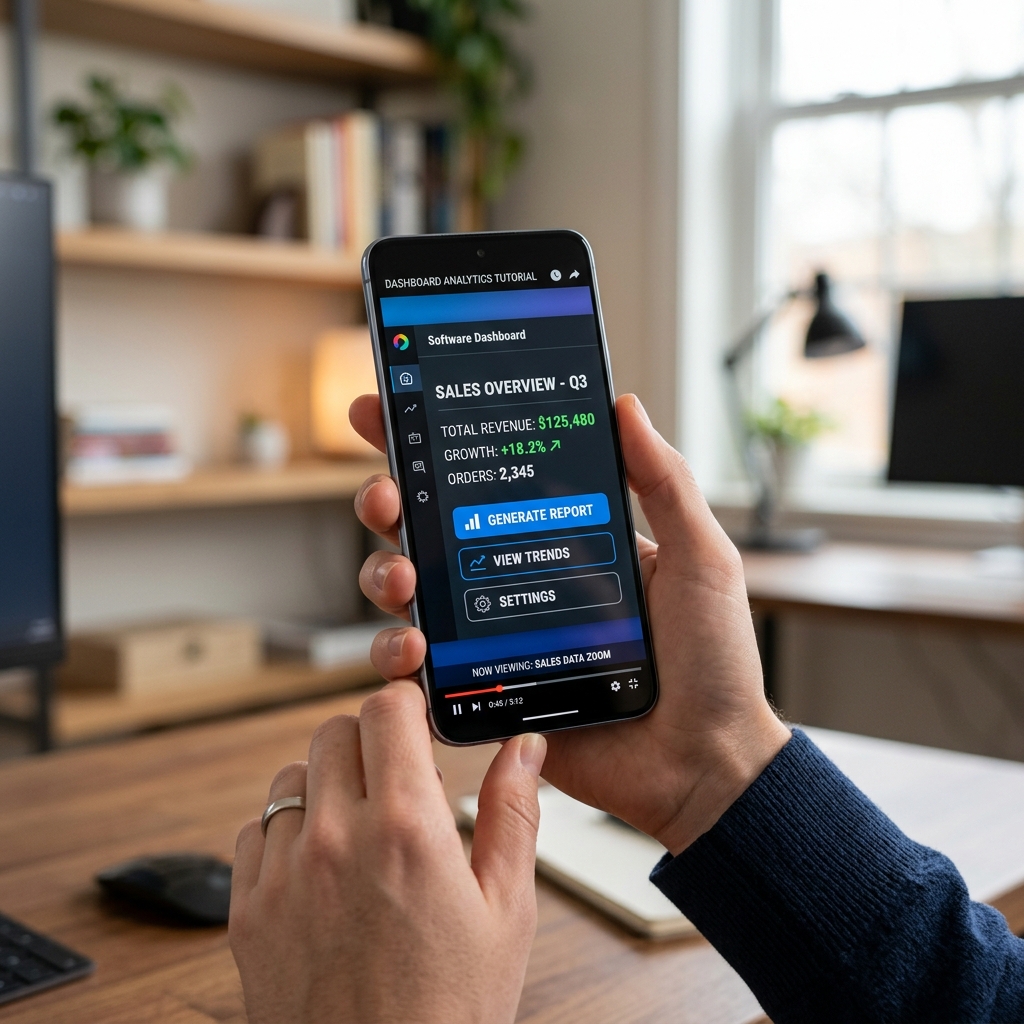
1. The Mobile-First Reality Over half of all video content is consumed on mobile devices. If you capture a massive 4K desktop monitor and shrink it down to fit a 6-inch phone screen, your UI becomes microscopic. Auto-zoom solves the mobile viewing problem instantly by making sure the active area of your screen is always magnified, legible, and front-and-center.
2. Eliminating Visual Noise When you teach a complex software workflow, your viewer only needs to see the specific buttons you are interacting with. Seeing your computer's taskbar, your browser's bookmark bar, and the blank white space of the application is distracting. Auto-zoom crops out the noise, ensuring your audience is 100% focused on the lesson.
3. The "Zero-Edit" Workflow Historically, if you wanted camera movement in a screen recording, you had to record a raw video, open a heavy editor like Premiere Pro or Camtasia, and spend hours manually adding zoom keyframes to the timeline. Auto-zoom technology does all of this heavy lifting natively while you speak. You hit stop, and the video is already perfectly edited. That is the same "no-edit" philosophy behind Best Screen Recorders That Don't Require Editing—you ship the file when you stop recording, not after a second editing project.
Enjoying this read?
Get weekly insights on video editing, AI workflows, and creator growth straight to your inbox.
Auto-Zoom vs Manual Zoom Keyframes (Which Should You Use?)
Manual keyframing gives you maximum control: you can exaggerate a pause, hold on a label, or choreograph a reveal. The cost is time. For weekly tutorials, support clips, and founder-led product demo updates, that cost compounds fast.
Auto-zoom trades some micromanagement for speed. The best implementations still feel intentional because they track click targets, typing regions, and cursor paths rather than randomly punching in on the screen.
If your goal is consistent tutorial clarity and you publish often, auto-zoom is usually the better default. If you are producing a one-off flagship launch film, you might still combine both: auto-zoom for capture, then light tweaks in an editor.
How Auto-Zoom Upgrades Different Industries
Auto-zoom is not just for YouTubers. The technology has fundamentally changed how different professional sectors communicate:
- Customer Support: Agents can send rapid, highly readable videos showing customers exactly where to click to resolve an issue, completely eliminating the confusion of wide-screen recordings.
- Product Managers & SaaS Founders: When launching a new feature, auto-zoom allows founders to create studio-quality promotional demos that look expensive and highly produced, all without hiring a video editor.
- Online Course Creators: Educators can ensure their students never get lost or frustrated trying to find a hidden menu during a complex software lesson. Course creators often pair this workflow with the ideas in Best Screen Recorder for Online Course Creators and Online Course Video Workflow for Higher Completion.
Poor framing is one reason viewers bounce early; if you want the psychology spelled out, read Why Your Tutorial Videos Lose Viewers in the First 30 Seconds.
How to Get Started with Auto-Zoom
Because this technology requires deep integration with your operating system to track your mouse path and clicks perfectly, standard browser extensions usually cannot handle true auto-zoom. You need a dedicated desktop application.
If you are a strict macOS user, Screen Studio is a fantastic tool that helped popularize this cinematic format. However, it is locked entirely to the Apple ecosystem.
For creators, remote teams, and founders who need dependable auto-zoom on Windows and Mac, Cubix Capture is built for presentation-first capture: it pairs automatic zoom with cursor smoothing and live backgrounds so UI stays readable on phones without a second editing pass. For the full "floating window" aesthetic without a timeline, see How to Create Cinematic Screen Recordings Without a Video Editor.
By utilizing auto-zoom, you are respecting your viewer's time and attention. You stop forcing them to search your screen, and you start delivering a crystal-clear, professional message every single time you hit record.
Related reading:
- How to Add Auto-Zoom to Screen Recordings (No Editing)
- Top 5 Auto-Zoom Screen Recorders Compared
- Best Screen Recorders That Don't Require Editing
- Why Your Screen Recordings Look Unprofessional (And How to Fix Them)
- The Complete Guide to Recording Product Demos
Don’t miss the next one.
Join our newsletter for exclusive tips, product updates, and the latest from the Cubix team.