Gaming is the largest entertainment industry in the world, and YouTube is completely packed with gaming content. But there is a massive difference between recording a high-action "Let's Play" and recording a high-quality gaming tutorial.
If you are trying to teach your audience how to optimize their graphics settings, how to install a complex mod, or how to navigate a massive skill tree in an RPG, your goal is clarity.
Unfortunately, most new creators approach tutorials the exact same way they approach live streaming: they just capture their entire screen and start talking. The result is usually a chaotic, confusing video where the viewer has absolutely no idea what they are supposed to be looking at.
If you want your gaming guides to stand out, rank highly in search results, and actually help your viewers, you need to present them like a professional. Here is why standard screen recordings fail for gaming tutorials, and the exact recipe to make your videos look incredibly polished.
The "Microscopic HUD" Problem
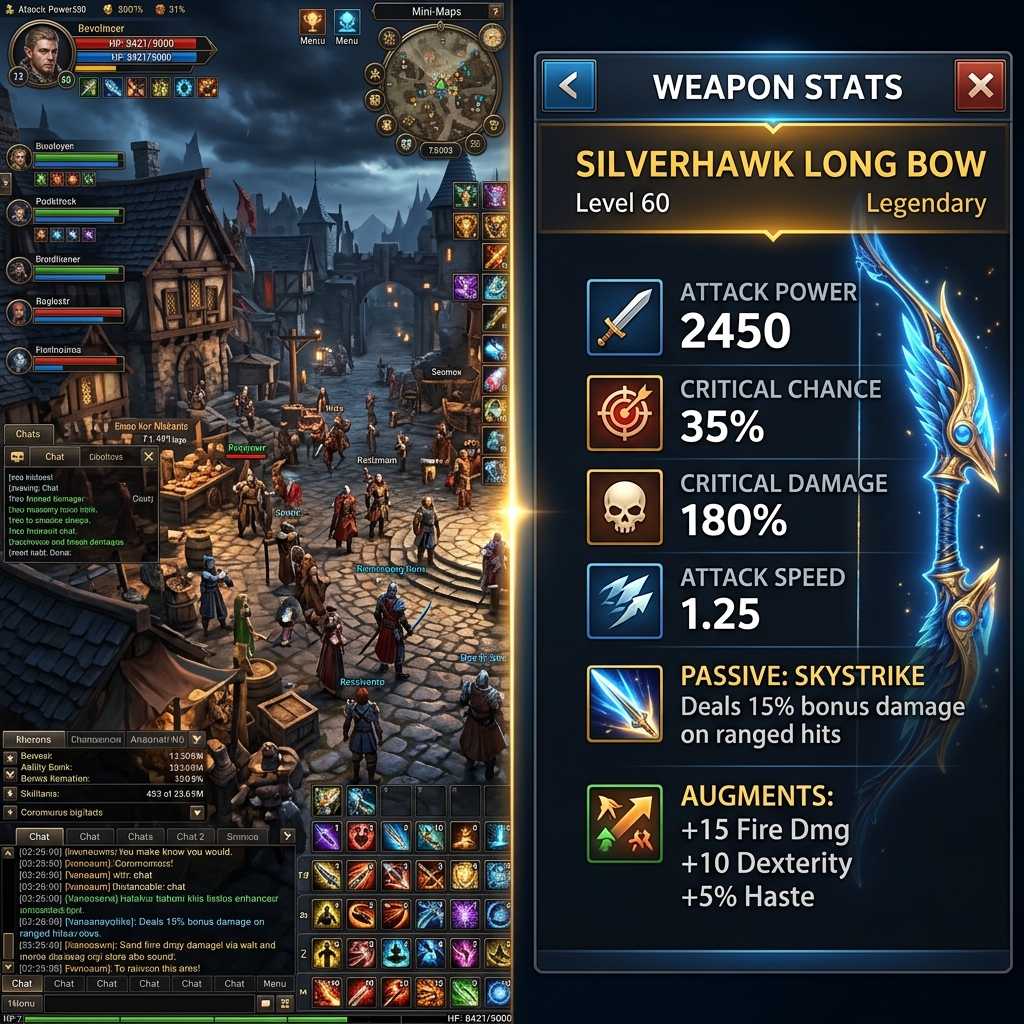
Modern video games are designed to be played on massive, 27-inch monitors or 65-inch televisions. Because of this, game developers pack the screen with information. Health bars, mini-maps, inventory slots, and complex settings menus are squeezed into the corners.
The problem arises when you record that massive screen and upload it to YouTube. Over 70% of YouTube viewers are watching on a mobile phone.
When your giant 4K gameplay footage is squished down to a 6-inch vertical screen, the intricate skill tree you are explaining becomes a blurry, unreadable mess. If a viewer cannot read the specific settings you are recommending, or cannot see which tiny mod file you are dragging into a folder, they will immediately click away to find a better video.
The "High DPI" Gamer Mouse
Gamers love high-sensitivity mice. A fast, twitchy mouse is exactly what you need to hit a flick-shot in a competitive shooter.
However, it is the absolute worst thing you can use when recording a tutorial. When you are navigating a complex game menu or showing viewers how to configure a desktop application like Discord or OBS, a hyper-fast cursor running at 1600+ DPI is exhausting to watch. Every micro-correction your hand makes is amplified across the recording, and the process you are teaching ends up looking three times more complicated than it actually is.
If you want to look like a professional educator, your presentation needs to feel calm, deliberate, and smooth—closer to the cursor pacing of a Linus Tech Tips deep dive than the snap aim of a CS2 highlight clip.
The 3 Rules of a Pro Gaming Tutorial
To create a guide that garners thousands of likes and subscribers, you need to guide your viewer's eyes perfectly. Top-tier YouTube creators follow this three-step recipe:
1. Spotlight the Action (The Zoom Rule)
If you are explaining how to adjust a specific graphics setting, the video should not show your character standing in the game world. The camera must smoothly zoom in tightly on the settings menu itself. If you are showing a Windows folder to install a mod, the camera must zoom in on the specific file names. This guarantees total readability on any device.
2. Tame the Cursor (The Smooth Rule)
When navigating menus, your mouse should act like an elegant presentation pointer, not a weapon. The movements from one button to the next should be smooth and calculated, completely eliminating nervous hand twitches.
3. Clean the Environment (The Background Rule)
If your tutorial requires you to show your Windows desktop (like a server hosting guide or a mod installation), you cannot show your messy personal wallpaper, your cluttered taskbar, and your open browser tabs. You need to isolate the important window and place it over a clean, premium background.
The "OBS and Premiere" Trap
Knowing this recipe is easy, but actually doing it used to be a nightmare.
Most gamers use OBS Studio to record their screens. While OBS is incredible for streaming, it only outputs raw, static video. To get the professional zoom effects and smooth pacing, creators had to take that raw OBS file, drag it into Adobe Premiere Pro, and spend hours manually adding zoom keyframes to every single menu click.
If you want to spend your time actually playing games and growing your channel, you do not have hours to waste on tedious video editing.
The Ultimate Tool for Gaming Guides
If your channel focuses on educational gaming content—settings optimizations, modding guides, HUD walkthroughs, builder tutorials, controller-binding overlays—you need a tool that handles the presentation work without requiring you to leave OBS and learn Premiere on top of it.
This is exactly why smart creators are moving to Cubix Capture for tutorial content specifically (the broadcast stack stays the same for live streams).
Here is how it maps to the gaming-tutorial problem set:
- HUD-aware framing. Modern games stuff information into every corner—buff bars, mini-maps, ability cooldowns, target frames. Instead of capturing all of that as background noise, the camera tightens on whichever HUD element you are actually referencing, so a mobile viewer can read the buff icon you are explaining without pausing the video.
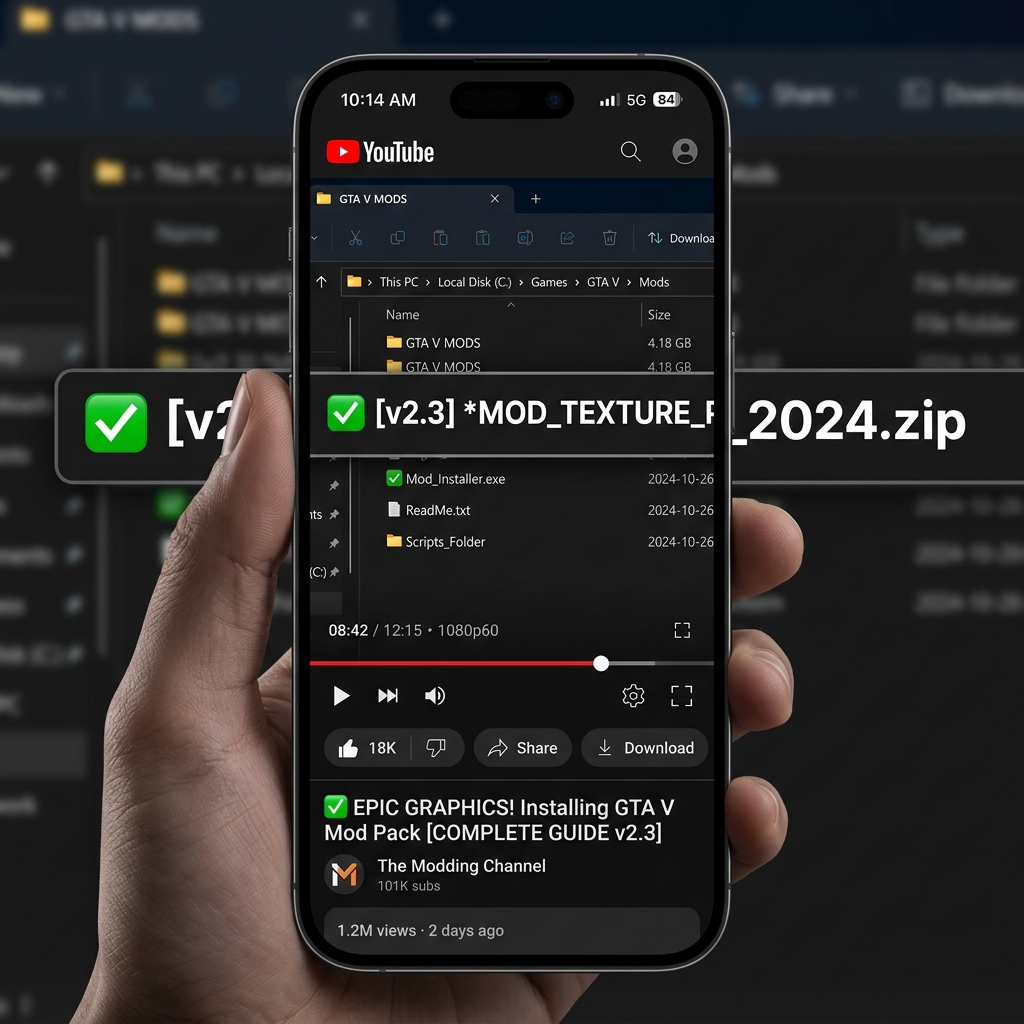
- Mod-folder and settings-menu zoom. When you flip from in-game to a Windows folder showing the exact
.pakor.zipfile to drag, the framing automatically follows the file name. Same for graphics settings menus, controller binding panels, and registry edits—every viewer who paused on those tiny rows in past tutorials now reads them at a glance. - Calmed gamer-mouse input. Your 1600 DPI competitive setup keeps working in-game, but during menu navigation the recorder interprets the raw input into a deliberate, weighted motion path. It is the visual difference between a coach explaining a build and a player flailing through it.
- Desktop staging for installation guides. When the tutorial leaves the game and walks through a Nexus Mods install, a Vortex setup, or a Discord/OBS configuration, the cluttered Windows taskbar and personal wallpaper are hidden behind a clean stage. The result is a guide that looks like a tech-review production, not a teammate's screen share.
Level Up Your Content
Your knowledge is valuable to the gaming community, but a bad presentation will bury your video in the algorithm—watch-time and average-view-duration are the metrics YouTube uses to decide whether your modding guide gets surfaced to the next 100,000 players or dies at 800 views.
Stop forcing your viewers to squint at microscopic HUDs and twitchy cursor paths. By pairing automatic zooms, calm cursor motion, and a clean desktop stage, you drastically increase retention and build a loyal audience of subscribers who trust your guides over the next person uploading the same tier list.
If you are ready to stop doing manual video editing and want to effortlessly create breathtaking, highly engaging gaming tutorials instantly, upgrade your creator toolkit with Cubix Capture.
Related reading: