You took a screenshot of a confusing error message, a strange line of code, or a funny typo on a website. But when you look at the raw image, you realize the person you are sending it to won't know exactly what they are supposed to be looking at.
Sending a plain screenshot to a coworker and saying, "Look at the tiny button in the bottom left," is a recipe for miscommunication. You need to draw an arrow, circle the problem, or perhaps block out a sensitive password before you hit send.
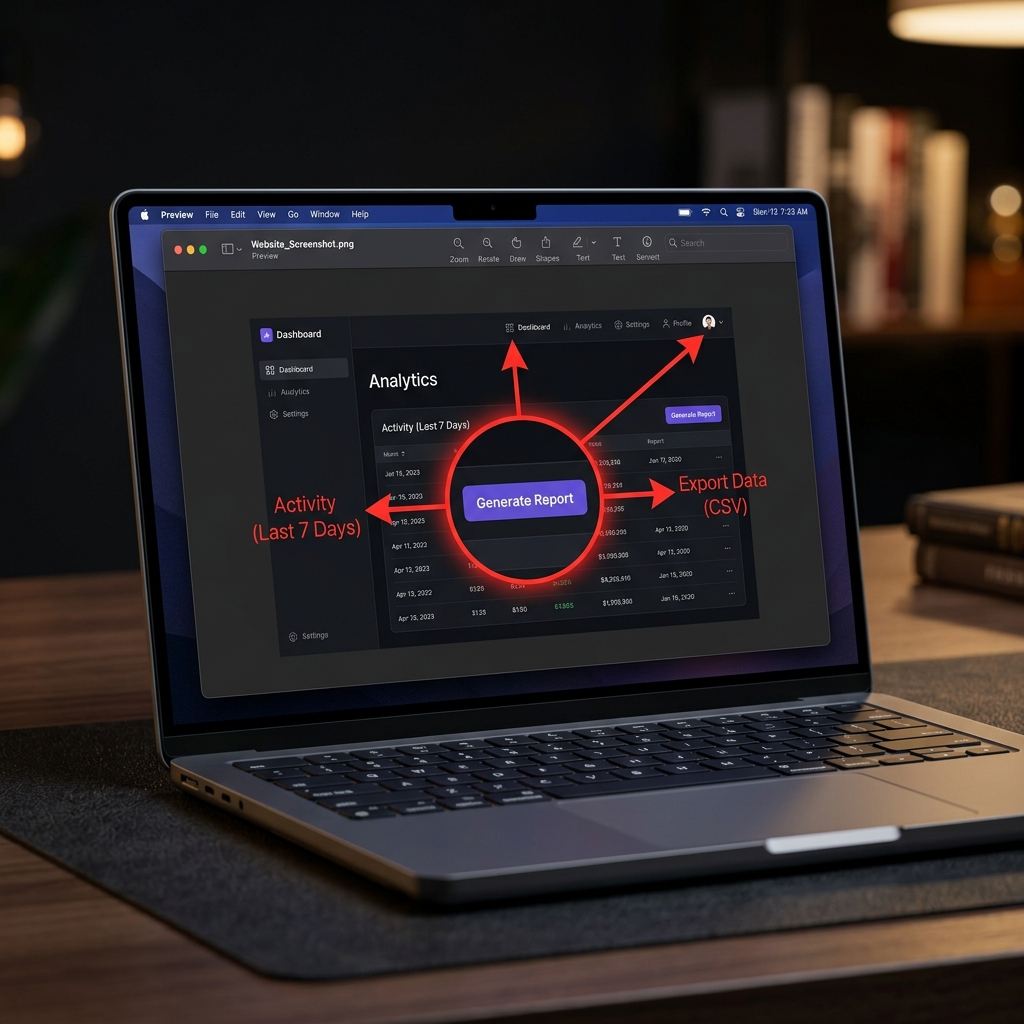
For a long time, Mac users had to rely on third-party software like Skitch just to draw a red arrow on an image. Today, Apple has baked an incredibly powerful suite of markup tools directly into the operating system. Here is the definitive guide to annotating your screenshots on a Mac.
Method 1: The Instant Markup (The Fast Way)
If you just took a screenshot and want to immediately draw on it before sending it away, macOS has a built-in workflow designed specifically for speed.
How to do it:
- Take a screenshot of your selected area using
Command + Shift + 4. - The moment you capture the screen, a small floating thumbnail will appear in the bottom right corner of your monitor.
- Click that thumbnail quickly before it slides off the screen.
- This instantly opens the Apple Markup interface. From here, you can use the toolbar at the top to draw arrows, add text, and drop shapes onto your image.
- When you are finished, click Done (to save it to your desktop) or click the Share icon to send it directly to an email or AirDrop.
(Bonus Trick: If you don't want to clutter your desktop with the file, just press Command + C while in the Markup window to copy the annotated image to your clipboard, then click the Trash Can icon to delete the file!)
Method 2: The Preview App (For Existing Images)
What if you missed the floating thumbnail, or you want to annotate a screenshot that is currently sitting on your clipboard or saved in a folder? You do not need to download an editor—you just need Apple's default image viewer, Preview.
How to do it:
- If the image is a saved file: Double-click the screenshot to open it in Preview.
- If the image is on your clipboard: Open the Preview app, go to the top menu bar, and click File > New from Clipboard (or press
Command + N). - Once the image is open, look at the top toolbar and click the Show Markup Toolbar button (it looks like a small pen tip inside a circle).
- The full suite of annotation tools will drop down, allowing you to edit the image.
Enjoying this read?
Get weekly insights on video editing, AI workflows, and creator growth straight to your inbox.
The Essential Annotation Tools
Once you have the Markup toolbar open, you have access to a surprising amount of editing power. Here is how to use the most important tools:
- Arrows & Shapes: Click the Shapes icon (a square behind a circle) to drop perfect arrows, stars, speech bubbles, and boxes onto your image. You can click the Line Style button to make your arrows thicker or change them to dashed lines.
- The Text Tool: Click the "T" icon to drop a text box. You can change the font, size, and color using the "Aa" menu.
- The Signature Tool: If you screenshot a PDF document, you can click the Signature icon to instantly drop your pre-saved signature onto the dotted line.
- The Highlight / Zoom Tool: Hidden inside the Shapes menu at the very bottom are two powerful tools. The "Loupe" (magnifying glass) creates a circular zoom effect over a specific part of your screenshot, while the "Highlight" tool darkens the rest of the image to draw attention to one specific area.
Pro-Tip (The Privacy "Blur" Hack): Unlike Windows, the native Mac Markup tool does not have a dedicated "Blur" or pixelate button. If you need to hide a password or an email address, the best native workaround is to select the Rectangle shape, place it over the sensitive text, and change the Fill Color to solid black.
When to Use Third-Party Power Tools
Apple’s built-in Markup is fantastic for basic shapes and text. But if your job requires you to take and annotate dozens of screenshots every day (for QA testing, technical writing, or customer support), the native tools can feel a bit tedious.
For heavy users, downloading a dedicated Mac screenshot app is a game-changer.
- CleanShot X or Shottr: These apps completely replace the default Mac screenshot tools. They offer vastly superior annotation features, including automatic numbered step counters (perfect for tutorials), dedicated blurring/pixelation tools, and the ability to instantly add beautiful backgrounds and drop shadows to your images.
Upgrade Your Digital Communication
Drawing a red circle on a static screenshot is a great way to point out a typo or highlight a funny comment. But when you are dealing with professional workflows—like explaining a multi-step software bug to a developer, or walking a new client through a complex digital portal—a heavily annotated, messy image is incredibly hard to follow.
If you find yourself taking five different screenshots, drawing chaotic arrows all over them, and typing out long paragraphs just to explain a simple idea, you are wasting your valuable time. Modern professional communication requires dynamic, high-quality video.
When you are ready to graduate from static images and want to start instantly generating breathtaking, auto-zoomed cinematic video presentations without ever opening a video editing timeline, explore the ultimate digital workflow toolkit right here: Cubix Capture.
Don’t miss the next one.
Join our newsletter for exclusive tips, product updates, and the latest from the Cubix team.