You took the perfect screenshot of a software bug, a confusing email, or a funny map route. But when you look at the raw image, you realize the person you are sending it to won't know exactly what they are supposed to be looking at.
Sending a plain screenshot and saying, "Look at the tiny button in the bottom left corner," is a recipe for miscommunication. You need to draw an arrow, circle the problem, or perhaps blur out a sensitive password before you hit send.
For years, Windows users had to download clunky third-party software just to draw a red box on a picture. Today, Windows 11 has a suite of powerful, built-in annotation tools that can handle almost anything you throw at them. Here is the definitive guide to marking up your screenshots on a PC.
Method 1: The Modern Standard (The Snipping Tool Editor)
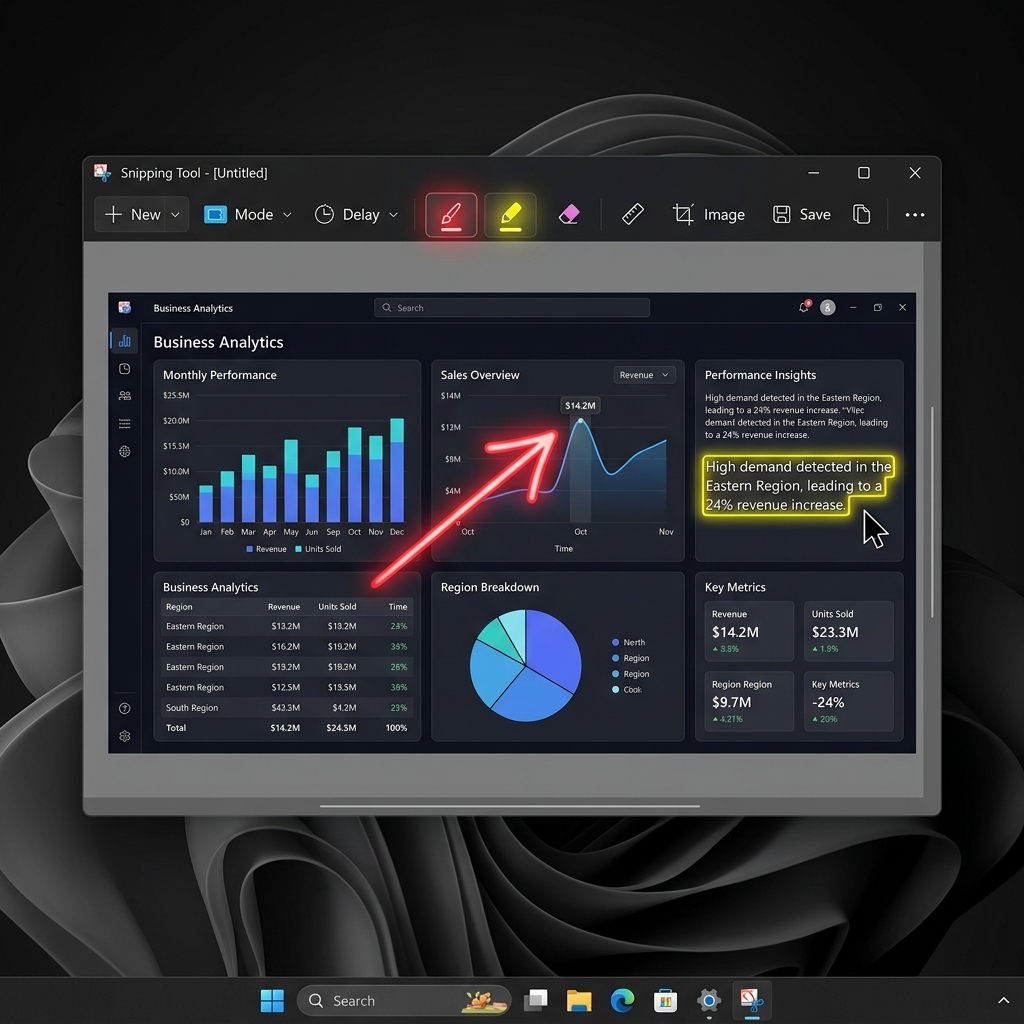
If you use the Windows + Shift + S shortcut to capture your screen, the absolute best annotation tool is already built into that workflow. Microsoft has transformed the Snipping Tool from a basic cropping utility into a surprisingly robust editor.
How to access it:
- Take a screenshot using
Windows + Shift + S. - A small notification will pop up in the bottom right corner of your screen. Click it immediately.
- This opens the Snipping Tool editor workspace.
The Essential Annotation Tools:
- The Ballpoint Pen: Found at the top left. Click it to draw freehand circles or arrows. Click it twice to change the color and thickness.
- The Highlighter: Perfect for emphasizing text without covering it up.
- The Ruler / Protractor: If your freehand lines look messy, click the Ruler icon. A digital ruler will appear on your screen. You can use your mouse scroll wheel to rotate it, then trace along its edge with the Pen for a perfectly straight line.
- Shapes: Click the Shape icon to instantly drop perfect squares, circles, and straight arrows onto your image.
Pro-Tip (The Privacy Blur): Need to hide an email address or an account balance? Click the Text Actions button on the top toolbar. It will scan your image for text. You can then click Quick Redact to instantly black out sensitive information before you share it.
Method 2: The "Heavy Duty" Native Option (Microsoft Paint)
The Snipping Tool is great for quick, messy circles and highlighters. But what if you need to type actual paragraphs of text onto the screenshot, or you want thick, solid-color arrows?
Do not overlook Microsoft Paint. It recently received a massive overhaul in Windows 11, complete with dark mode and layer support.
How to use it:
- Take a screenshot using the
PrtScnkey (which copies it to your clipboard). - Press the Windows key, type Paint, and open the app.
- Press
Ctrl + Vto paste your screenshot onto the blank canvas.
Why Paint is sometimes better:
- The Text Tool: Click the "A" icon at the top. You can now drag a text box anywhere on your screenshot, choose your font, and type clear, readable instructions directly onto the image.
- Thick Outlines: You can draw perfectly geometric boxes around elements and easily adjust the line thickness and fill colors, making your annotations look much more professional than a freehand pen.
Enjoying this read?
Get weekly insights on video editing, AI workflows, and creator growth straight to your inbox.
Method 3: The Web Browser Hack (Microsoft Edge)
If the screenshot you need to annotate is a webpage, you can skip the desktop apps entirely. Microsoft Edge has a brilliant capture and markup tool built directly into the browser.
How to do it:
- Open the webpage in Microsoft Edge.
- Press
Ctrl + Shift + S. - Choose either Capture area or Capture full page.
- The moment you make your selection, Edge immediately opens a built-in markup window.
- You can use the pen tools to draw directly on the webpage, and then click the Save or Copy icons in the top right corner to export your finished, annotated image.
When to Use Third-Party Power Tools
If your job requires you to take and annotate dozens of screenshots every single day (for QA testing, technical writing, or customer support), native Windows tools might still feel a bit too slow.
For heavy users, downloading a free, open-source tool like ShareX is a game-changer.
- Why it helps: ShareX allows you to bypass the editing phase entirely. You can configure it so that the moment you take a screenshot, it automatically adds a custom watermark, draws a red border around the image, blurs out specific predefined areas, and uploads the final image to a secure server.
Upgrade Your Digital Communication
Drawing a red circle on a static screenshot is a great way to point out a typo or highlight a funny comment. But when you are dealing with professional workflows—like explaining a multi-step software bug to a developer, or walking a new client through a complex digital portal—a heavily annotated, messy image is incredibly hard to follow.
If you find yourself taking five different screenshots, drawing chaotic arrows all over them, and typing out long paragraphs just to explain a simple idea, you are wasting your valuable time. Modern professional communication requires dynamic, high-quality video.
When you are ready to graduate from static images and want to start instantly generating breathtaking, auto-zoomed cinematic video presentations without ever opening a video editing timeline, explore the ultimate digital workflow toolkit right here: Cubix Capture.
Don’t miss the next one.
Join our newsletter for exclusive tips, product updates, and the latest from the Cubix team.