You are trying to create a tutorial for your team, record a webinar you can't attend live, or capture a funny moment from a YouTube video. You press the familiar Apple shortcut, record your screen, and hit stop.
But when you play the video back, there is a massive problem: it is completely silent. Or worse, the only sound on the video is the muffled echo of your laptop speakers bleeding back into your microphone, accompanied by the frantic clicking of your keyboard.
Capturing your screen on a Mac is incredibly easy. Capturing the audio on your Mac requires knowing exactly which buttons to press and, in some cases, bypassing Apple’s strict privacy walls.
Here is the definitive, step-by-step guide to screen recording with audio on your Mac in 2026.
Method 1: The Built-in Way (Microphone Audio Only)
If you are just trying to narrate a presentation or walk a coworker through a new software portal using your own voice, you do not need to download any extra software. Apple’s built-in capture tool handles this perfectly.
How to do it:
- Press
Command + Shift + 5to summon the master screenshot and recording toolbar at the bottom of your screen. - Click the Options button on the toolbar.
- Under the "Microphone" section, you will see a list of available inputs. Select your MacBook Pro Microphone (or your plugged-in external USB mic).
- Select either Record Entire Screen or Record Selected Portion.
- Click Record.
How to Stop: When you are finished talking, press Command + Control + Esc or click the small Stop icon in the top right of your Mac's menu bar. The video will save directly to your desktop.
The Big Catch: The Internal Audio Problem
Apple makes amazing hardware, but under the hood, macOS is a locked-down security fortress. For privacy reasons, Apple’s core audio architecture explicitly prevents third-party apps—and even its own built-in tools like QuickTime—from silently tapping into the "system audio."
What this means: The Command + Shift + 5 method above will only record your voice. It will absolutely not record the sound of the Zoom meeting, the Spotify track, or the YouTube video currently playing on your screen.
If you want to capture pristine, internal system audio without the sound of your loud typing ruining the clip, you have to use a workaround.
Enjoying this read?
Get weekly insights on video editing, AI workflows, and creator growth straight to your inbox.
Method 2: The Free Workaround (BlackHole)
For years, Mac creators have relied on "virtual audio cables" to trick their computers into recording internal sound. In 2026, the undisputed king of this free software is BlackHole.
It takes a few minutes to set up, but once you do, it solves the audio problem forever.
Step 1: Route the Audio
- Download and install BlackHole 2ch (it is free and open-source).
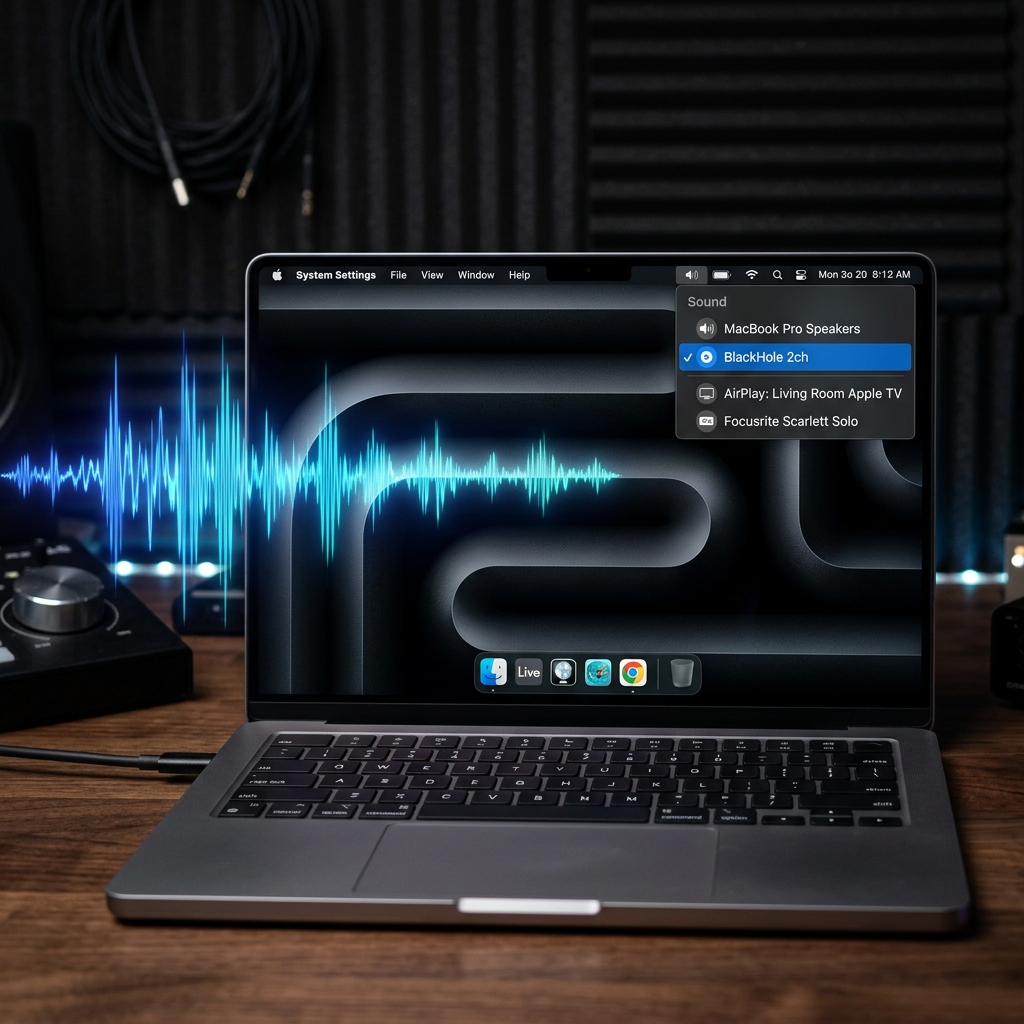
- Open your Mac's System Settings > Sound.
- Change your Output to BlackHole 2ch. (Note: You will temporarily lose the ability to hear sound out of your speakers while this is active).
Step 2: Record the Screen
- Press
Command + Shift + 5to open the recording toolbar. - Click Options.
- Under the "Microphone" menu, select BlackHole 2ch.
- Hit Record. Your Mac is now silently routing the pristine internal audio directly into the video file.
(If you want to be able to hear the video through your headphones while BlackHole is simultaneously recording it, you will need to open your Mac's Audio MIDI Setup app and create a "Multi-Output Device." Select both your headphones and BlackHole on the checklist).
Method 3: The All-in-One Powerhouse (OBS Studio)
If messing with MIDI settings and virtual drivers sounds like a headache, there is a better way for heavy users. Recently, Apple introduced a developer framework called ScreenCaptureKit, and software companies are finally taking advantage of it to bypass the old audio restrictions.
OBS Studio is a free, open-source broadcasting app that uses this framework to record internal audio natively—no BlackHole required.
How to do it:
- Download and open OBS Studio.
- Under the "Sources" box at the bottom, click the + icon.
- Select macOS Screen Capture.
- A properties window will open. Check the box that says Capture Audio (or select "Application Audio Capture" to isolate the sound of just one specific app, like Google Chrome, while ignoring your Slack notification dings).
- Click Start Recording on the right-side control panel.
Upgrade Your Digital Workflow
Figuring out how to route virtual audio cables to capture a basic video is a great technical skill. But when it comes to professional communication, handing someone a raw, unedited .mov file with unpolished audio is rarely the best way to present a complex idea.
If you find yourself recording your screen, fumbling with audio settings, and then spending hours in Final Cut Pro trying to zoom in on your mouse clicks or edit out your mistakes, you are wasting your valuable time.
When you are ready to graduate from clunky workarounds and start instantly generating breathtaking, auto-zoomed cinematic video presentations with flawless audio routing—without ever opening a video editing timeline—explore the ultimate professional toolkit right here: Cubix Capture.
Don’t miss the next one.
Join our newsletter for exclusive tips, product updates, and the latest from the Cubix team.