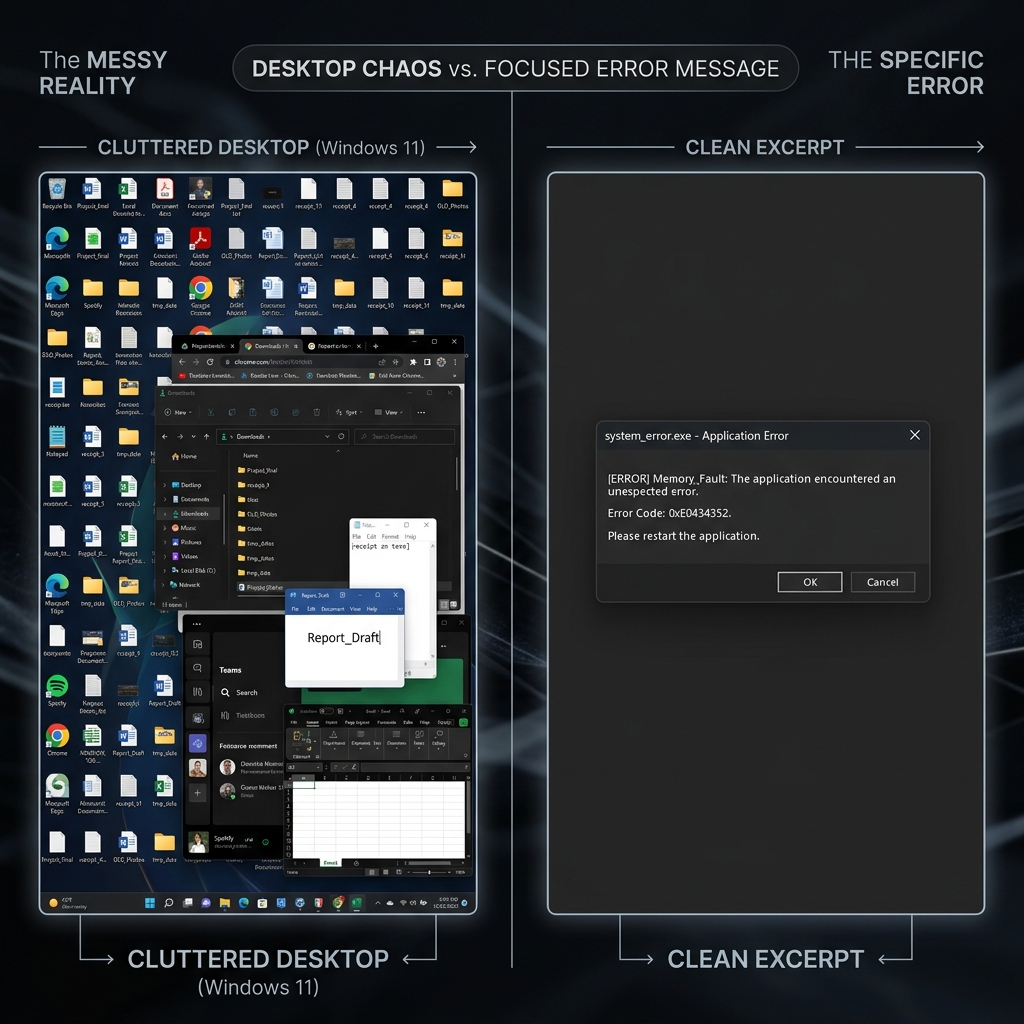
You are reading a long report and find the one paragraph that matters. You spot a funny reply buried deep in a crowded social feed. You hit a very specific error code on your dashboard that your development team needs to see.
You do not want to send a massive picture of your entire monitor. Nobody needs to see your cluttered desktop background, your messy taskbar, or the thirty tabs you have open in Google Chrome. You just want to grab that one exact thing and send it on.
For years, Windows users had to press "Print Screen," paste a massive image into Microsoft Paint, and manually crop out the garbage. Fortunately, those days are over. Microsoft has built an incredibly precise, elegant cropping tool directly into the operating system.
Here is exactly how to screenshot a specific area on Windows, plus a few hidden tricks that will instantly speed up your workflow.
The Ultimate Shortcut: The Snipping Tool
The Shortcut: Windows + Shift + S
If you only memorize one keyboard shortcut for your Windows PC, make it this one. This instantly brings up the modern Snipping Tool overlay, allowing you to draw a box over exactly what you want to save.
How to do it:
- Press and hold the Windows key, then Shift, then S.
- Your entire screen will instantly dim, and a small, sleek toolbar will appear at the top center of your monitor.
- Your mouse cursor will transform into a crosshair.
- Click and drag a box over the specific paragraph, image, or graph you want to capture.
- Release the mouse button. The screen will return to normal.
Where did the image go? (The Clipboard Magic)
When you release your mouse, the image does not automatically save to your Desktop or a folder. Instead, Windows copies it directly to your invisible Clipboard.
This is designed for speed. You can immediately open an email, a Slack channel, or a Google Doc and press Ctrl + V to paste the perfectly cropped image exactly where you need it.
Pro-Tip (Clipboard History): If you take three different screenshots in a row using
Windows + Shift + S, you don't lose the first two! PressWindows + Vto open your Clipboard History menu. A small window will appear showing a list of everything you have recently copied or screenshotted, allowing you to click and paste whichever one you need.
Enjoying this read?
Get weekly insights on video editing, AI workflows, and creator growth straight to your inbox.
How to Edit and Save Your Cropped Image
Sometimes you need to draw a red arrow pointing to a specific button, or you actually want to save the cropped image as a permanent file on your hard drive.
How to do it:
- Immediately after taking your screenshot with
Windows + Shift + S, look at the bottom right corner of your monitor. - A small notification pop-up will appear saying "Screenshot copied to clipboard."
- Click that notification.
- This opens the Snipping Tool editor. From here, you can use the pen and highlighter tools to mark up your image.
- Click the Floppy Disk icon in the top right corner (or press
Ctrl + S) to save it as a PNG or JPEG file.
(Note: In modern Windows 11 updates, this editor also includes a "Text Actions" button. If you cropped an image of a Zoom slide or an uncopyable PDF, you can click this button to instantly extract the text from the image).
Alternative: Capture a Clean Application Window
The Shortcut: Alt + PrtScn
Drawing a box with your mouse is great, but sometimes you want to capture a specific application—like a calculator, an Excel spreadsheet, or a web browser—and you want the edges to be absolutely perfect. You do not need to manually trace the window with the crosshairs.
How to do it:
- Click on the application window you want to capture so it is active and brought to the very front.
- Press Alt + PrtScn.
- Windows will snap a perfect image of only that specific application window, completely ignoring your desktop background. Just like the Snipping Tool, it is instantly copied to your clipboard so you can paste it with
Ctrl + V.
Coming soon: Cubix Snap. We're cooking up a lightweight tool that turns a plain Windows snip into something you'd actually want to share — stylish backdrops, clean annotations, and instant background removal, without ever opening Photoshop.
Beyond the Crop
The Snipping Tool is unbeatable for grabbing a paragraph, an error box, or a chart to drop into a chat. But a single frame can only show one moment, never a sequence of clicks, a hover state, or the exact path someone needs to follow.
When a workflow runs to more than a couple of steps, a quick screen recording communicates it far better than a stack of cropped images and red circles. If you would like to capture your Windows screen and turn it into a clean, auto-zoomed video without learning a video editor, that is exactly what Cubix Capture is built to do.
Don’t miss the next one.
Join our newsletter for exclusive tips, product updates, and the latest from the Cubix team.