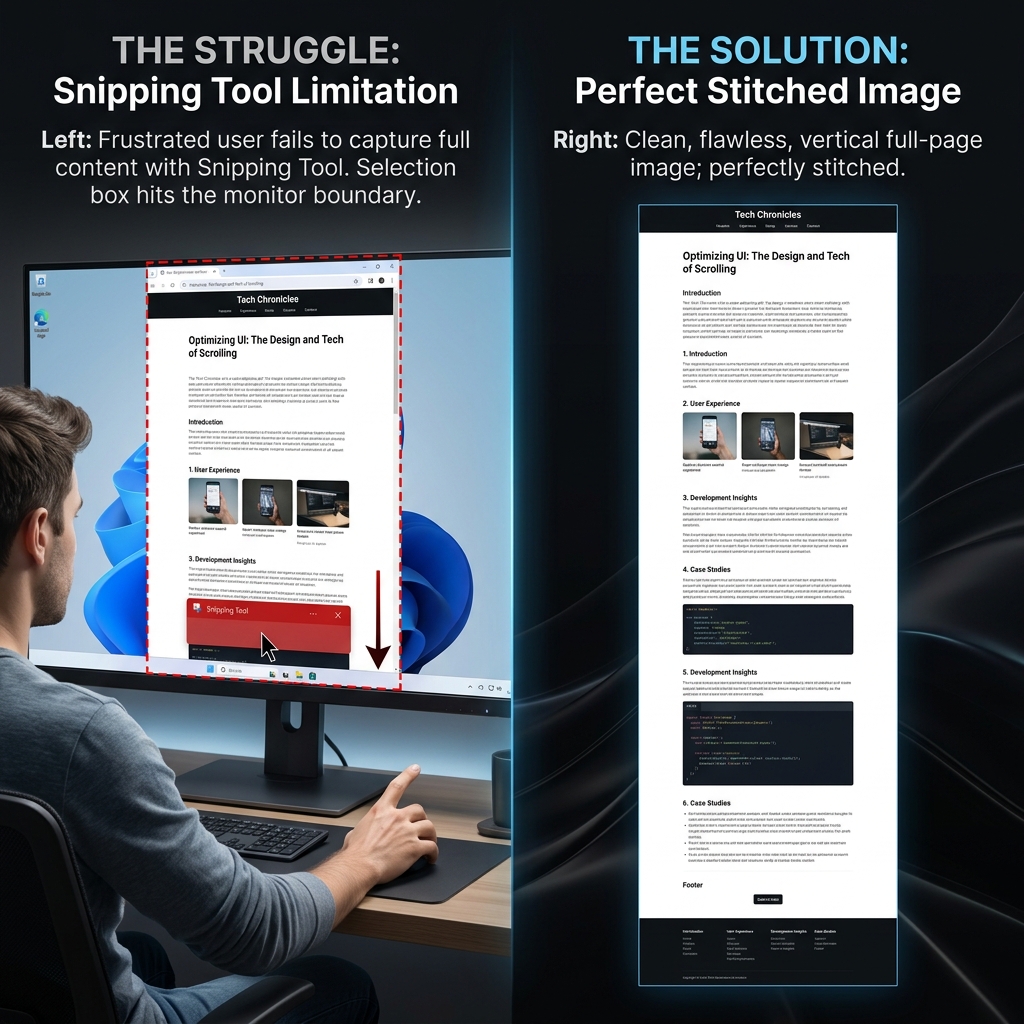
You are reading a massive web article, reviewing an endless email thread, or looking at a towering spreadsheet, and you want to save the entire thing as a single image.
You press Windows + Shift + S to bring up the Snipping Tool, click your mouse, start dragging downward... and hit the bottom of your monitor. The page simply refuses to scroll.
It is one of the most frustrating limitations in the Microsoft ecosystem: Windows does not have a native, system-wide scrolling screenshot feature. Even in 2026, the built-in Snipping Tool can only capture exactly what is currently visible on your screen.
But do not panic. You do not have to take five different screenshots and awkwardly stitch them together in MS Paint. Depending on what you are trying to capture, there are several incredibly fast workarounds. Here is the definitive guide to capturing a scrolling screen on Windows.
Method 1: The Easiest Way (Microsoft Edge)
If the thing you are trying to capture is a webpage, you are in luck. While Windows itself cannot take scrolling screenshots, Microsoft's default web browser handles them beautifully.
How it works:
- Open the long webpage you want to capture in Microsoft Edge.
- Press
Ctrl + Shift + S(or right-click anywhere on the page and select Web Capture). - A small menu will appear at the top of the screen. Click Capture full page.
- Edge will instantly scan the entire page from top to bottom and open it in a built-in markup editor.
- Click the Floppy Disk icon (Save) to download the massive image as a high-quality JPEG file to your Downloads folder.
Method 2: The Google Chrome Hack (No Extensions Required)
If you are a dedicated Google Chrome user and do not want to download a sketchy third-party screenshot extension, Chrome actually has a full-page capture tool hidden deep inside its developer menu.
How it works:
- Open the webpage you want to capture in Google Chrome.
- Press
Ctrl + Shift + I(or F12) to open the Developer Tools panel. A window with code will pop up on the right side of your screen. - Press
Ctrl + Shift + Pto open the Developer Command Menu. - Type the word "screenshot" into the search bar.
- You will see an option pop up that says Capture full size screenshot. Click it.
Chrome will silently scroll through the page and automatically download a seamless PNG image of the entire site directly to your computer.
Enjoying this read?
Get weekly insights on video editing, AI workflows, and creator growth straight to your inbox.
Method 3: The Ultimate Fix for Desktop Apps (ShareX)
The browser tricks above are perfect for capturing websites. But what if you need to take a scrolling screenshot of a long Slack conversation, an Excel spreadsheet, or a Windows Settings menu?
Because the native Snipping Tool cannot do this, you have to use a third-party application. Fortunately, the Windows developer community has built the perfect tool, and it is completely free.
How to do it using ShareX:
- Download ShareX (a free, ad-free, open-source capture tool) from the Microsoft Store or their official website.
- Open the app you want to capture (like a long Slack thread).
- Open ShareX, click Capture on the left menu, and select Scrolling capture.
- Hover your mouse over the window you want to capture. It will highlight in a dashed box. Click once.
- A menu will appear. Simply click Start scrolling capture.
- Take your hands off the mouse. ShareX will automatically scroll down the app, take multiple photos, and seamlessly stitch them together into one long image.
Coming soon: Cubix Snap. Keep an eye out for our screenshot companion — it makes a plain capture look sharp in moments, with beautiful backgrounds, quick annotations, and effortless background removal.
When Stitched Images Stop Working
Edge, Chrome, and ShareX make it easy to save a long webpage or chat as one tall picture. But static captures hit a wall the moment you need to demonstrate motion, like a setting that changes on click, a dropdown, or a process that spans several screens.
For anything with steps, a quick recording is clearer than the cleanest stitched image. If your work involves explaining software to teammates or clients, Cubix Capture records your Windows screen and outputs a polished, auto-zoomed video for you, with no manual editing involved.
Don’t miss the next one.
Join our newsletter for exclusive tips, product updates, and the latest from the Cubix team.