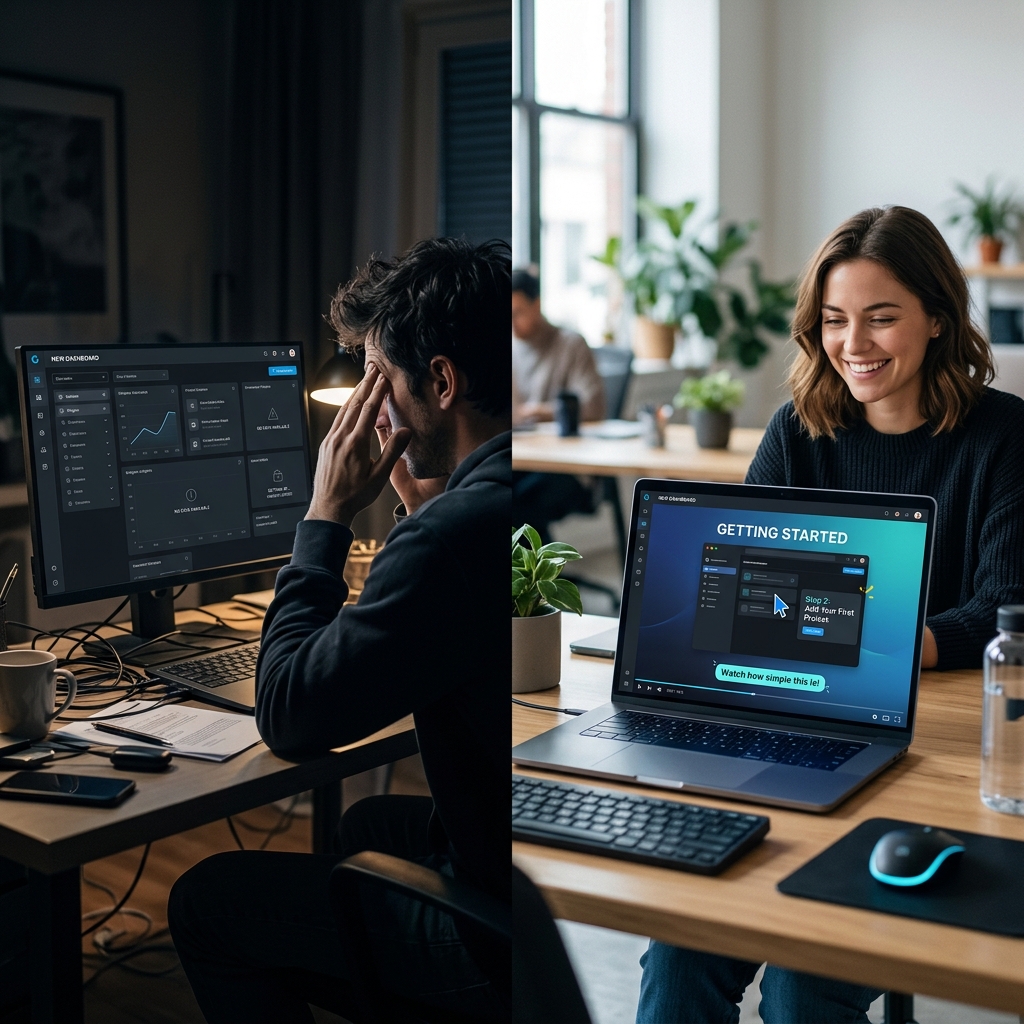
They paid. Now the first five minutes decide retention.
If a new customer lands on a dense dashboard with no path to value, they churn quietly. A 15-page doc will not save you—they need a visual concierge that delivers one completed outcome fast.
Record the Quick Win once, reuse forever: Cubix Capture auto-zooms on clicks, smooths cursor motion, and stages your product UI—embed-ready when you stop. Get started free · Windows · Mac
Fast production recipe for teams: How to Record SaaS Onboarding Videos in 30 Minutes. This article focuses on customer-facing welcome videos after purchase—not internal activation docs.
1. Script the "Quick Win" (Not a Tour)
The biggest mistake companies make with onboarding videos is treating them like a real estate tour. They spend 10 minutes pointing out every single button, settings menu, and dropdown option in the app. This overwhelms the user.
Your onboarding video should have one goal: getting the user to their first "Quick Win" as fast as possible.
The 3-Part Onboarding Script:
- The Welcome (0:00 - 0:15): Validate their purchase. Welcome them warmly and restate the core problem your software solves to reinforce their buying decision.
- The Aha! Moment (0:15 - 1:30): Show them the exact steps to achieve one immediate, tangible result. If you sell an invoicing app, show them how to send their first invoice. Ignore the "dark mode" settings for now.
- The Next Step (1:30 - 2:00): Tell them exactly what to do when the video ends. Direct them to complete the action you just showed them on screen.
2. The Danger of "Raw" Screen Recordings
Once you have your script, you need to record your screen. If you just hit record using a basic tool like QuickTime, OBS, or Loom, you are going to capture a raw, wide shot of your entire desktop.
For a new user who has never seen your interface before, a static, zoomed-out video is incredibly intimidating.
| The Problem with Raw Video | The Customer's Perception |
|---|---|
| Microscopic Text | "This looks too complicated. I can't even read the menu on my phone." |
| Frantic Mouse Movements | "The creator is rushing. This software is overwhelming and chaotic." |
| Cluttered Browser Tabs | "This company isn't professional. Why am I seeing their personal bookmarks?" |
If your user has to squint to understand where you are clicking, the onboarding has failed.
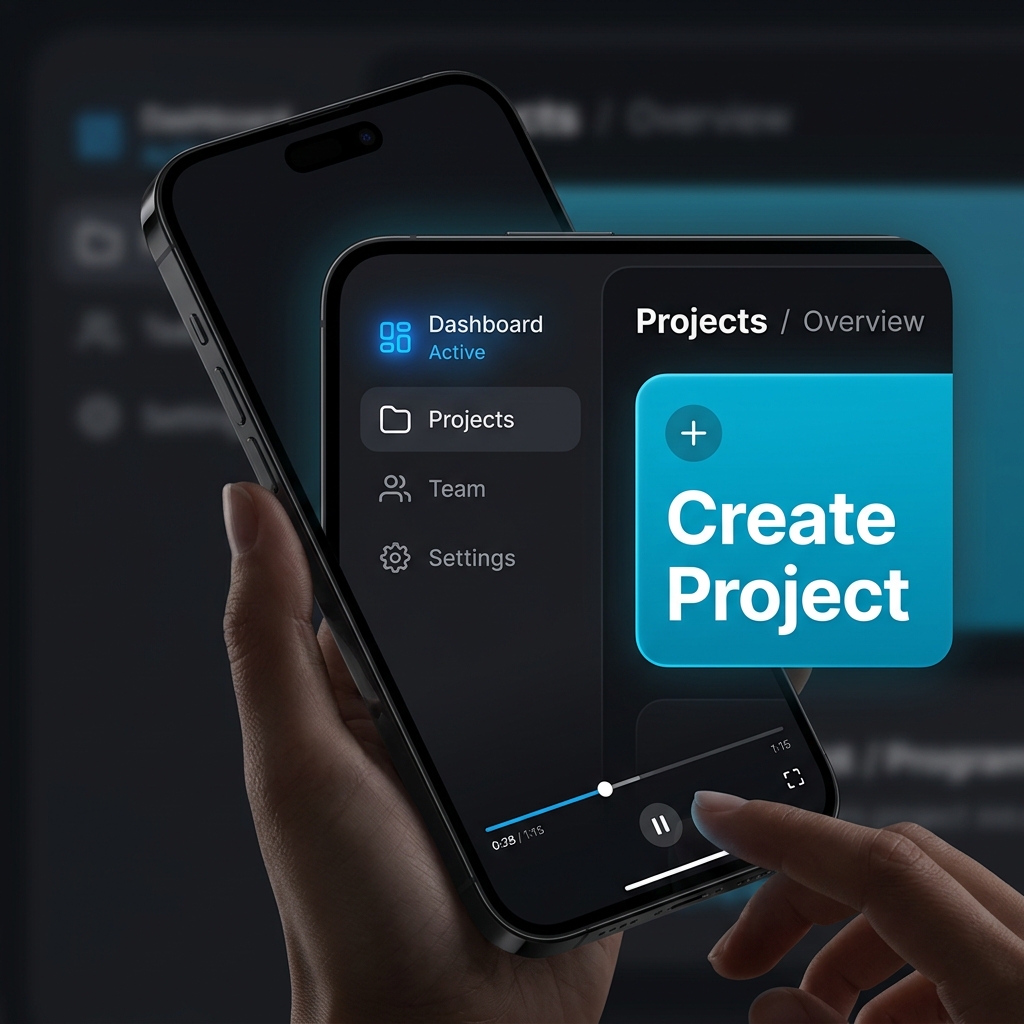
3. Guide Their Eyes with Cinematic Focus
To create an onboarding video that actually teaches the user, you must dictate their focus. You cannot show them the entire screen at once.
If you are telling them to click the "Create Project" button in the top right corner, the camera needs to smoothly zoom in on that exact button. If you are showing them how to fill out a form, the camera needs to follow your cursor down the page.
In the past, achieving this level of visual clarity meant recording your screen, importing the video into a heavy editor like Premiere Pro, and spending hours manually adding zoom keyframes. If your app updated its UI a month later, you had to start the tedious process all over again.
Enjoying this read?
Get weekly insights on video editing, AI workflows, and creator growth straight to your inbox.
Record with presentation capture (not raw Loom)
CS and founders cannot re-keyframe every UI refresh. Cubix Capture applies:
| Need | Capture-time fix |
|---|---|
| Find "Create project" on mobile | Auto-zoom on click target |
| Calm, trustworthy motion | Smooth cursor |
| No personal tabs in frame | Live backgrounds / window isolation |
Where to embed: welcome email, in-app modal day 0, billing success page, help center hero.
When UI changes: re-record one take (~10 min)—still faster than fixing dozens of screenshots in a doc.
Onboarding video checklist
- Under 2–3 minutes
- One Quick Win only
- Spoken + on-screen CTA to repeat the action
- Preview on a phone at 50% brightness
- Captions added if muted autoplay matters (auto-captions)
Use-case cluster
- How to Create an App Explainer Video (Free Method)
- How to Record Your Workflow as a Video SOP
- Online Course Video Workflow for Higher Completion
Related reading:
- Best Screen Recorder for Online Course Creators
- Why Your Tutorial Videos Lose Viewers in the First 30 Seconds
Don’t miss the next one.
Join our newsletter for exclusive tips, product updates, and the latest from the Cubix team.