If you are a software educator, a tech YouTuber, or a founder building product walkthroughs, the standard for digital content has shifted dramatically. The days of dragging a raw screen recording into an editor, spending hours manually keyframing zoom effects, and hoping your microphone doesn't echo are officially over.
In 2026, viewer attention spans are shorter than ever, and tolerance for poor production value is zero. Audiences expect crisp audio, a visually engaging layout, and immediate clarity especially when watching on mobile devices.
Building the ultimate tutorial production engine doesn’t mean spending thousands of dollars on Hollywood-grade camera gear. It’s about choosing highly efficient, professional gear and matching it with intelligent, automated software. Here is the definitive guide to the best screen recording setup for tutorial creators this year.
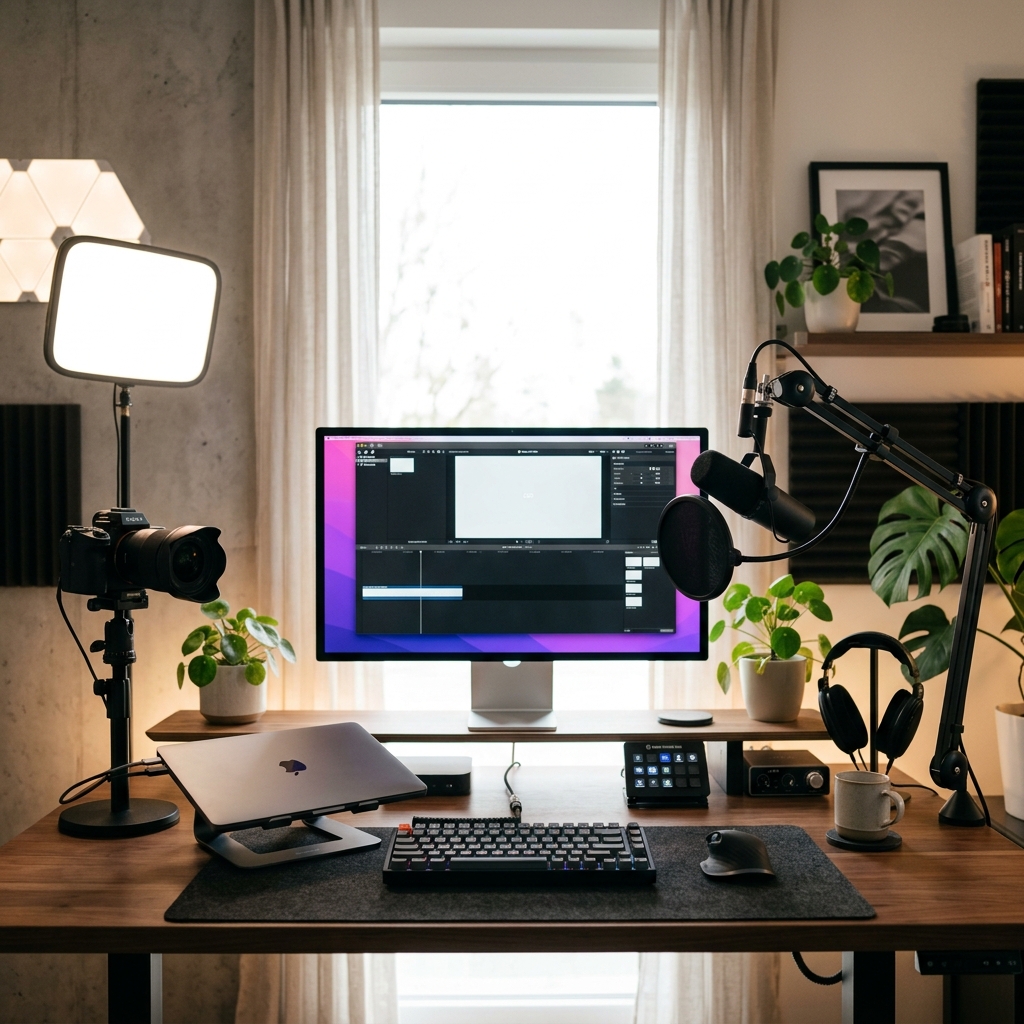
The Hardware: Crisp Audio and Clean Staging
Your hardware's job is simple: remove distractions and ensure you sound authoritative. If your audio echoes or your facecam is grainy, viewers will click away before you even finish your introduction.
1. Audio: The Supreme Priority
Viewers will forgive a slightly blurry screen; they will instantly abandon terrible audio. Do not use your computer's built-in microphone or wireless earbuds.
- The Gold Standard: Shure MV7+ or Røde PodMic USB. Both microphones offer dual USB-C and XLR outputs, allowing you to plug them directly into your computer without a separate audio interface. They feature excellent built-in digital signal processing (DSP) to automatically eliminate background fan noise and room echo.
- Placement: Mount your microphone on an adjustable boom arm so it sits roughly 4 to 6 inches away from your mouth, slightly off-axis to avoid harsh "P" and "B" popping sounds.
2. Video: Crisp Facecam Delivery
You don't need a $2,000 cinema camera for a small facecam bubble, but a standard 720p laptop webcam will look horribly muddy on high-definition YouTube uploads.
- The Smart Choice: Insta360 Link 2 or Logitech MX Brio. These 4K webcams feature large image sensors that perform exceptionally well in low-light environments and offer hardware-level auto-framing to keep you perfectly centered.
- Lighting: Position a simple key light (like an Elgato Key Light Air or a basic softbox) at a 45-degree angle in front of you. Never sit with a bright window directly behind you, or you will look like a silhouette.
The Software: The Automated Video Producer
Once your hardware is dialed in, the absolute biggest bottleneck in the tutorial creation pipeline is post-production.
Traditionally, creators used passive software like OBS Studio to capture a flat, static video file of their massive monitors. Because over 60% of YouTube audiences watch tutorials on smartphones, shrinking a massive desktop interface down to a 6-inch screen makes the text microscopic. Creators were forced to spend hours inside a complex editing timeline manually slicing clips, zooming in on menus, and trying to smooth out jittery mouse tracking.
In 2026, the elite setup completely eliminates the video editor. High-performing tutorial creators use an intelligent virtual camera platform that handles the design and cinematography while you speak.
The undisputed leader in this setup is Cubix Capture. It functions as an automated digital director, delivering a polished, studio-grade video the exact millisecond you click stop.
- Context-Aware Algorithmic Zooming: You no longer need to touch a manual zoom keyframe. Cubix Capture tracks your active cursor paths and clicks. The moment you click an application field or a code block, it smoothly glides and magnifies that specific area, ensuring your video is instantly mobile-optimized.
- AI Cursor Fluidity: Physical mouse movements are naturally frantic and jerky. The software intercepts your tracking data and smooths it into a beautiful, elegant sweep that gracefully guides the viewer's focus.
- Instant Studio Aesthetics: Forget complex source layering. It automatically takes your open application window and places it against gorgeous, dynamic canvas backdrops. Concurrently, it frames your webcam feed inside a clean floating geometric bubble and automatically blurs your physical room.
Enjoying this read?
Get weekly insights on video editing, AI workflows, and creator growth straight to your inbox.
The Creator Workflow Checklist
When your hardware is paired with an automated director tool, your workflow becomes incredibly fast and frictionless.
-
Script with Intention: The baseline for zero-edit video production. Winging a tutorial leads to filler words and disjointed timelines. Write out a brief outline separating your spoken cues from your on-screen mouse movements.
-
Prune Your Digital Canvas: Eradicate distractions before you record. Hide your desktop icons, close unnecessary browser tabs, hide your browser bookmarks bar, and place your operating system into "Do Not Disturb" mode to prevent personal notifications from popping up mid-sentence.
-
Execute Slow Choreography: Give the tracking software clean data signals. Move your mouse at half-speed. Hover over a button or drop-down menu for one full second before clicking, and hold it there for a second afterward. This gives the auto-zoom algorithm perfect triggers and helps your audience naturally absorb the action.
-
Publish Instantly via the Cloud: Skip the rendering timeline entirely. Because tools like Cubix Capture handle the zooms, smooth pointers, and webcam background blurring in real-time, there is no rendering wait. The moment you click stop, an elite, polished cloud link is generated instantly, ready to be sent to your team or uploaded directly to YouTube.
Summary
The ultimate screen recording setup in 2026 isn't about buying the most complicated broadcast gear, it's about maximizing your efficiency. By securing a crisp USB microphone to protect your audio quality, maintaining a clean digital desktop, and upgrading to an intelligent recording platform like Cubix Capture to handle the cinematic visual heavy lifting, you can produce pristine, high-retention tutorials in a fraction of the time.
📖 Keep reading: How to record software tutorials that look cinematic, how to start a tutorial YouTube channel, and the best screen recorder for tutorial videos.
Don’t miss the next one.
Join our newsletter for exclusive tips, product updates, and the latest from the Cubix team.