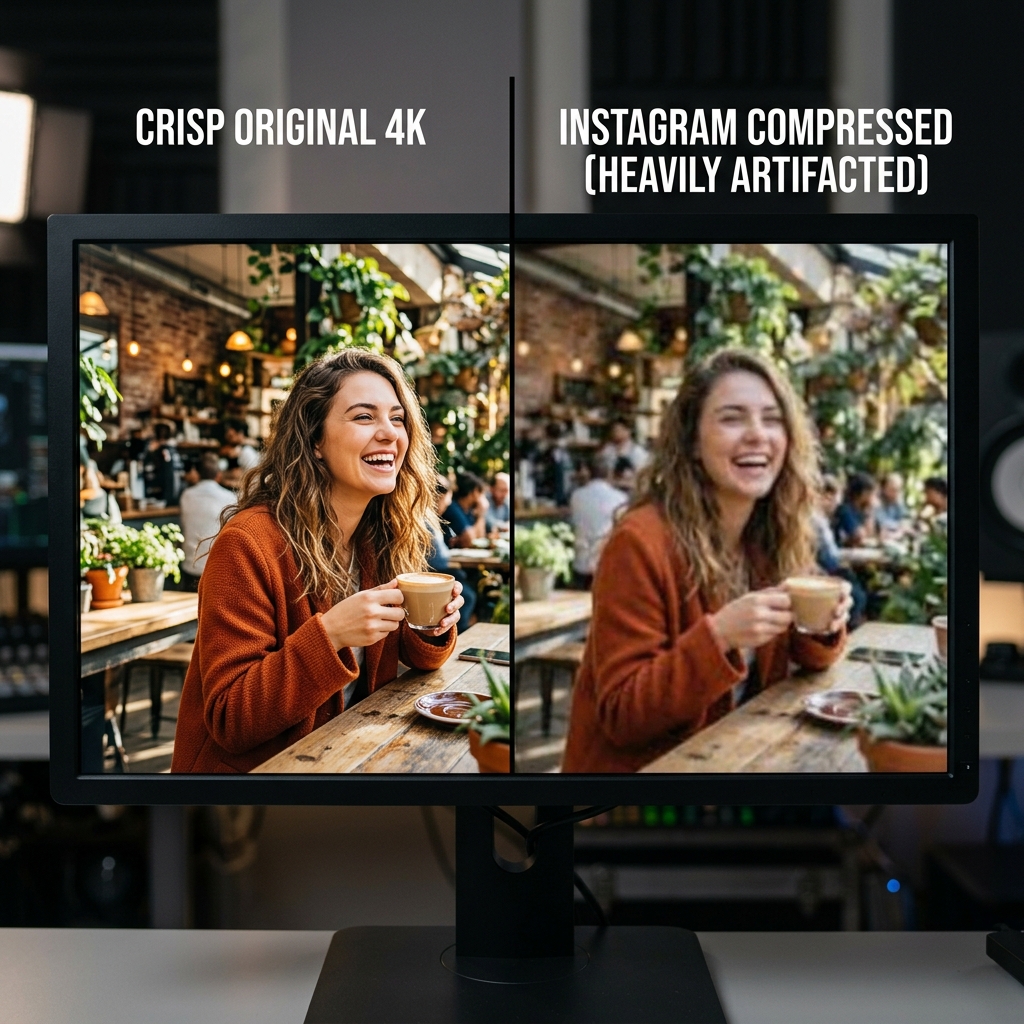
You know the feeling. You spend hours filming the perfect video. The lighting is flawless, the edits are crisp, and the 4K resolution looks stunning on your phone or computer monitor.
You proudly upload it to Instagram as a Reel or a feed post. But when you watch it back five minutes later, your heart sinks. The video looks like it was filmed on a potato. The edges are blurry, the text is pixelated, and the colors look muddy.
What happened to your beautiful 4K masterpiece?
The culprit is Instagram’s aggressive native compression. If you want your videos to look sharp, professional, and high-quality on the platform, you have to play by the algorithm's rules. You cannot just upload a massive file and hope for the best. You have to compress it before you upload it.
Here is exactly why Instagram destroys your video quality, and the step-by-step guide to compressing your videos properly so they look flawless every time.
The 4K Trap: Why Instagram Ruins Your Video
When you upload a massive 4K video file to Instagram, you are handing your beautiful footage over to a server that is managing millions of uploads every minute.
Instagram does not want to store massive files, and it wants videos to load instantly for users on slow cellular networks. To achieve this, Instagram's servers take your giant 4K video and ruthlessly crush it down to size. Because the server does this as fast as possible, it does a terrible job. It strips away data, ruins the bitrate, and leaves you with a blurry mess.
The Secret: If you want a high-quality video on Instagram, you must give the platform exactly what it asks for. If you compress your video to Instagram's preferred settings before uploading, the servers will leave your video alone.
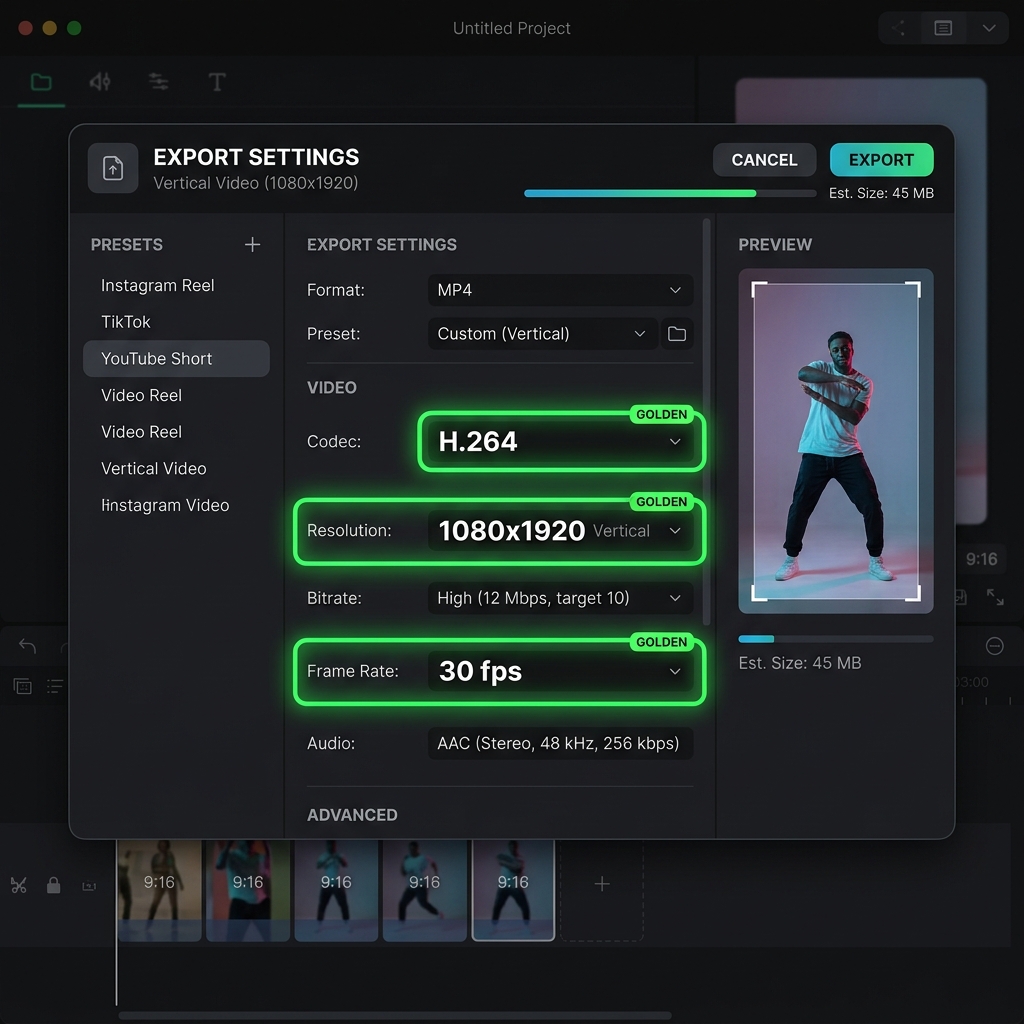
The "Golden Settings" for Instagram
To compress your video without losing visual quality, you need to use a video editor or a free compression tool (like HandBrake or FreeConvert.com) to match these exact specifications:
- Resolution: 1080p. Do not upload in 4K! For Reels and Stories, your dimensions should be 1080 x 1920 pixels.
- Frame Rate: 30 frames per second (fps) is the standard. You can use 60 fps for highly active content, but 30 fps is safer for compression.
- Codec: H.264. This is the most widely accepted, high-quality video format on the internet.
- Format: .MP4
- Bitrate: Aim for around 3 to 5 Mbps (Megabits per second). If your bitrate is over 15 Mbps, Instagram will violently compress it.
Step 1: Turn On the Hidden Instagram Setting
Before you even compress your file, you need to make sure your Instagram app is actually allowed to upload high-quality videos. By default, Instagram turns this off to save your cellular data.
How to fix it:
- Open your Instagram profile and tap the three lines (hamburger menu) in the top right corner.
- Go to Settings and privacy.
- Scroll down and tap on Media quality (or Data usage and media quality).
- Toggle the Upload at highest quality switch to ON.
If this switch is off, Instagram will ruin your video regardless of how perfectly you compressed it.
Step 2: Use a Dedicated Compressor (For Camera Footage)
If you shot a massive video on your iPhone or DSLR, you need to shrink it.
For Desktop Users: Open your master file in HandBrake (free, open-source). Pick a 1080p preset, switch the encoder to H.264, and tune the Average Bitrate to around 5,000 kbps—that comfortably stays under Instagram's compression threshold while keeping detail in your highlights. Set the container to MP4 and encode. A 4K editor export typically drops to about 60–80MB without any visible quality loss in a Reel.
For Mobile Users: Use a free web tool like FreeConvert.com or our Instagram video compressor. Upload your video, choose "MP4", and in the advanced settings, select "1080p." Download the compressed file back to your camera roll and upload it directly to Instagram.
A Smarter Way for Digital Creators (Screen Recordings)
Compressing camera footage is one thing, but what if you are a creator trying to upload a software tutorial or a coding demo to Instagram Reels?
Screen recordings are notoriously difficult to post on vertical platforms like Instagram. A horizontal computer screen shrunk down to fit a vertical phone screen makes the text microscopic. Even if you use the perfect compression settings, your video will be unreadable.
A more sustainable workaround is to stop fighting the wide-to-vertical conversion at the export stage and solve it at the recording stage. A desktop recorder built around mobile playback—like Cubix Capture—frames the active region of your software while you record, so when the final clip is cropped into a 9:16 Reel, the buttons, code, and labels are already large enough to read on a phone. Because the export bitrate is already in Instagram's preferred 3–5 Mbps range, your post-record compression step often becomes optional.
Beat the Algorithm
You put too much effort into your content to let a server algorithm ruin how it looks.
By flipping the hidden high-quality toggle in your app, ditching 4K uploads, and feeding Instagram the exact 1080p MP4 files it craves, your Reels and posts will instantly look sharper, more professional, and more engaging.
For one-off compressions, our Instagram video compressor handles the right preset automatically.
Related reading: