Chromebooks long ago outgrew the "cheap browsing laptop" reputation — they're now the main machine for millions of students, teachers, and remote workers. And the moment you're collaborating in Google Docs, sitting through a remote lecture, or trying to explain a bug to support, a short screen recording communicates in thirty seconds what a wall of text and screenshots can't.
Here's the good news for 2026: you don't need the Chrome Web Store or a single extension. ChromeOS has a capable recorder built right in. This is the complete walkthrough — every mode, audio, webcam, where files land — plus the one thing the built-in tool can't do for you.
Opening the Built-In Recorder
The native Screen Capture tool has shipped on every Chromebook since ChromeOS 89. It's free, has no watermark, and imposes no time limit. There are two ways in:
- Keyboard: press Shift + Ctrl + Show Windows (the Show Windows key sits in the top row and looks like a rectangle trailed by two lines).
- Quick Settings: click the clock in the bottom-right corner, then choose Screen Capture.
Either opens a small toolbar at the bottom of the screen.
Choosing What to Capture
The toolbar can take photos or video, so your first move is to click the video camera icon — not the still-camera one. Then pick a capture mode:
| Mode | What it records | Best for |
|---|---|---|
| Full screen | Your entire display | Multi-app walkthroughs |
| Partial | A box you drag out | Hiding a messy desktop |
| Window | One app only | Clean single-app demos |
Adding Voice, System Sound, and Your Webcam
Before recording, open the gear (Settings) on the toolbar. There you can switch on your microphone for narration, system audio to capture sound the Chromebook itself is playing, and the front camera to drop a webcam bubble into the corner. (Audio specifically trips a lot of people up — recording a Chromebook screen with audio goes deeper on getting both voice and system sound right.)
Recording and Finding Your File
Click anywhere — or inside your selected box — to start a three-second countdown. To stop, hit the red square in the shelf by the clock. Your video saves automatically as a .webm file in Downloads, ready to drop into Classroom, Drive, or an email.
If you'd rather skip extensions entirely as a rule, recording on a Chromebook without an extension covers why the native route is usually the better default.
Where the Built-In Tool Falls Short
The native recorder is excellent for a quick clip. For anything you actually want people to learn from, it has one structural weakness: it captures a flat, full-size image of your screen. Watched back on a phone — which is how most people will watch — your tabs and menus shrink to the point of squinting. And a Chromebook trackpad produces small, darting cursor movements that look frantic on playback. Hard to read plus hard to follow equals a tutorial that doesn't teach.
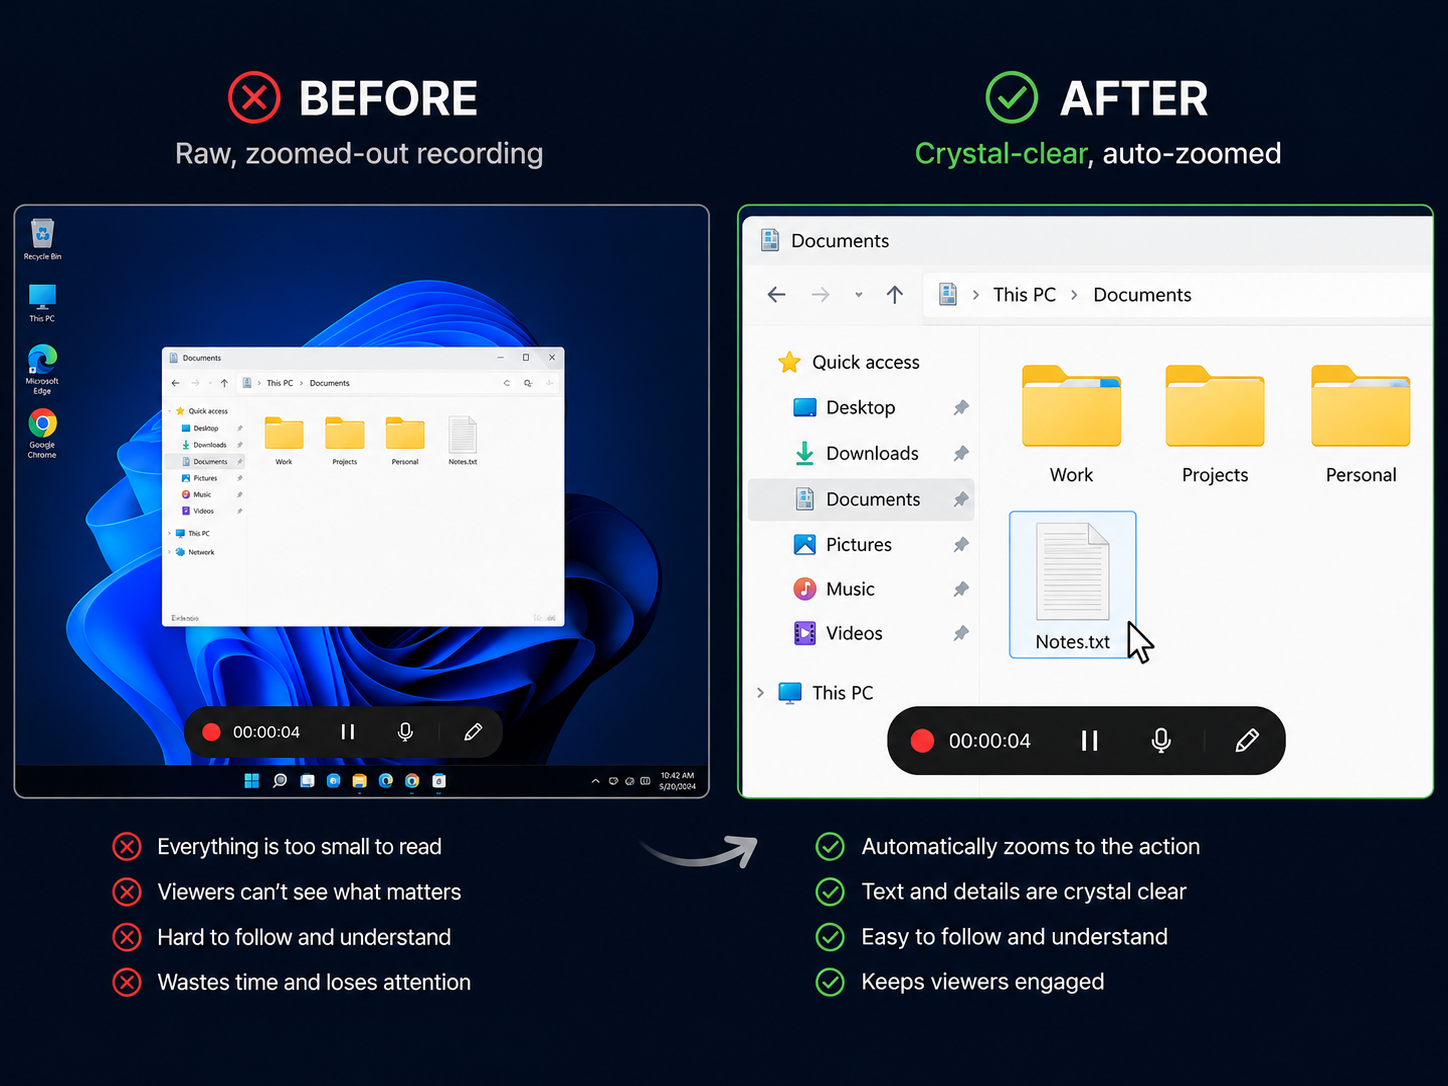
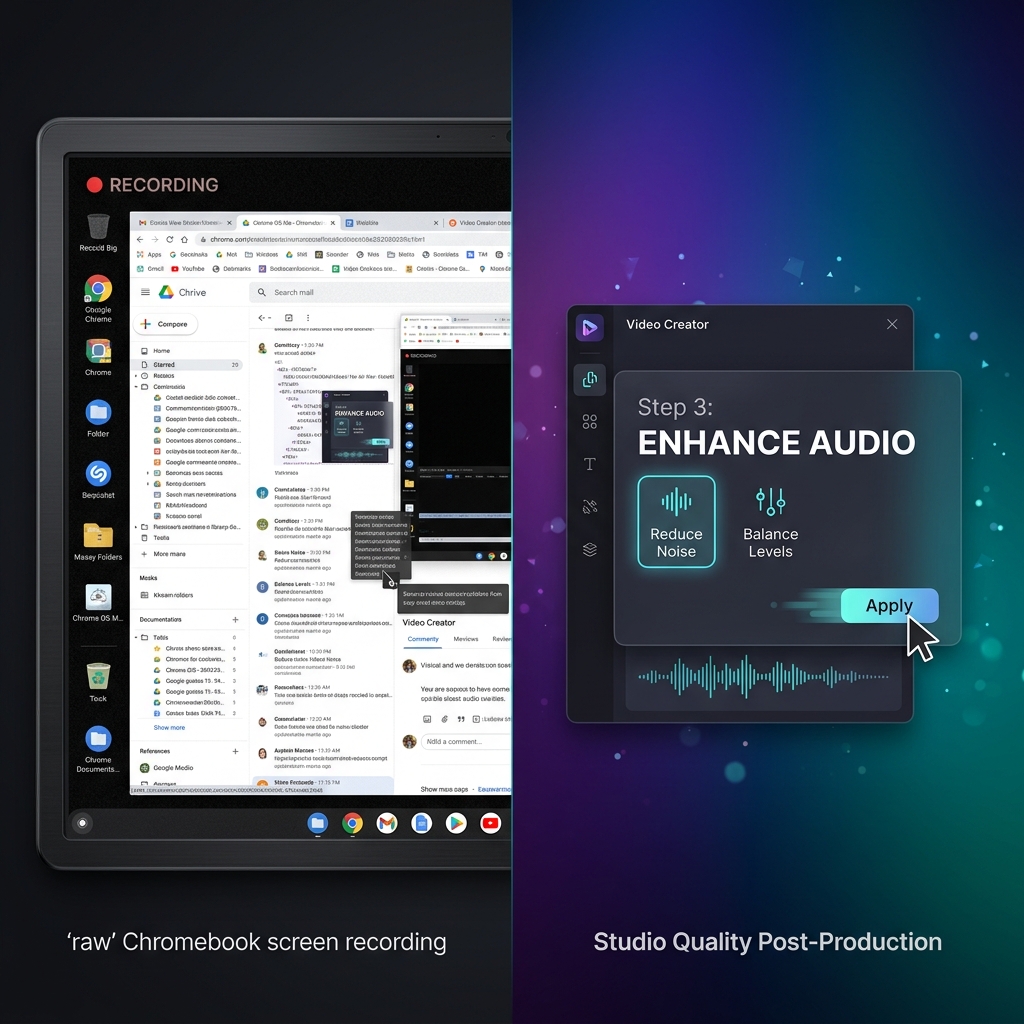
Making the Footage Actually Watchable
The fix isn't learning a heavy editor — Chromebooks aren't built for post-production anyway. It's recording with a tool that polishes the footage as you go. That's the role Cubix Capture plays: it records your screen and automatically produces the kind of clarity a manual editor would add afterward.
- Automatic zoom glides in on whatever you're clicking, so a phone viewer reads every menu without pinching.
- Smoothed cursor motion replaces jittery trackpad movement with a steady, easy-to-follow glide.
- Tidy framing keeps notifications and clutter out of an otherwise professional-looking recording.
Knowing the built-in route is the right foundation for everyday clips. When the recording has to teach a class, onboard a teammate, or impress a client, recording with a tool that builds in clarity is what makes the difference between footage people tolerate and footage they actually follow.