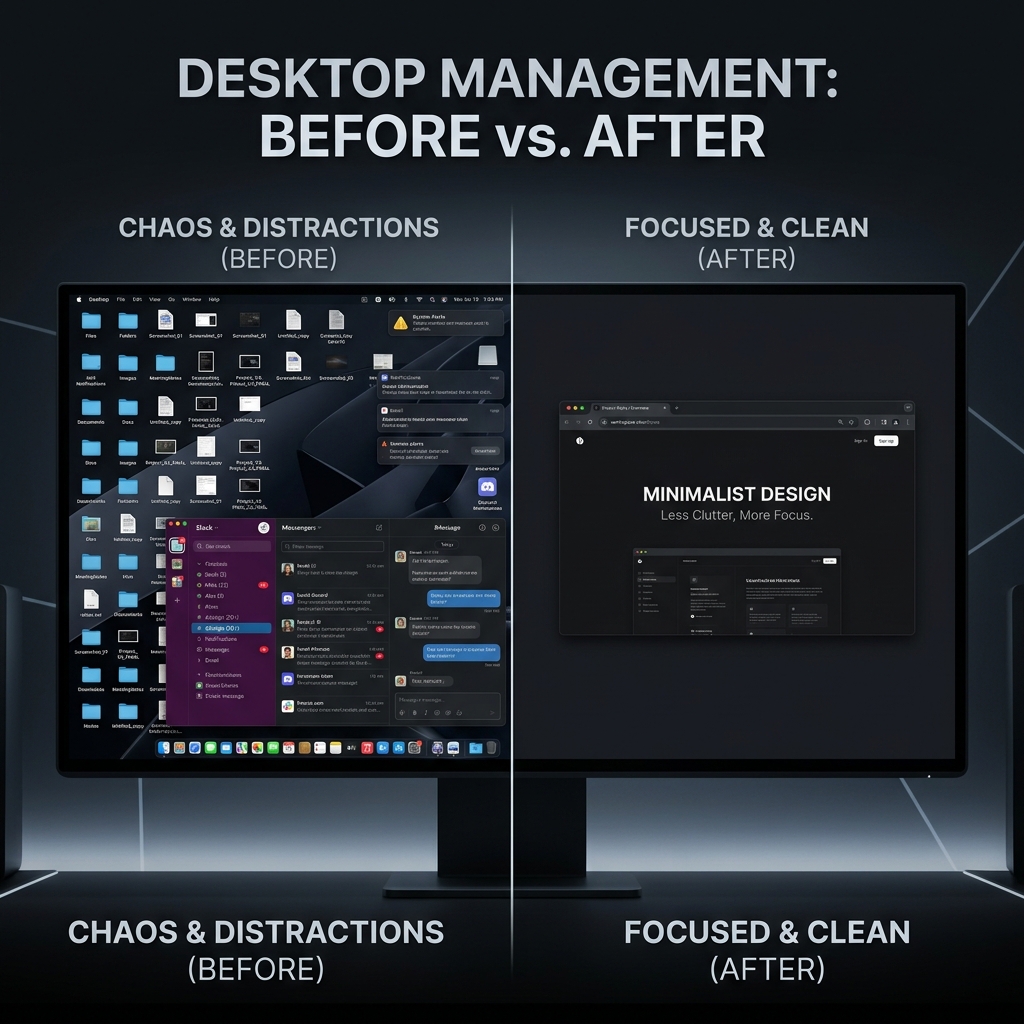
Have you ever started a screen recording to show a coworker how to use a software tool, only to realize your personal messages just popped up in the corner? Or maybe your desktop is covered in dozens of saved files, and you do not want your audience to see the clutter.
Recording your entire computer screen can be risky and incredibly distracting for the viewer. When you are trying to provide a real-life solution or teach a clear lesson, the best approach is to hide everything else and focus the viewer’s attention solely on the application you are talking about.
Here is the straightforward recipe to screen record a specific window on your Mac, keeping your private files hidden and your presentation looking clean.
The Recipe: Framing Your Application
While macOS has a magic button to take a picture of a specific window, recording a video of a specific window requires you to manually draw a frame around it. Here is the step-by-step guide to getting it right using the built-in Mac tools.
- Prepare Your Screen: Before you start, open the specific application or web browser window you want to record. Make it the size you want, and bring it to the center of your screen.
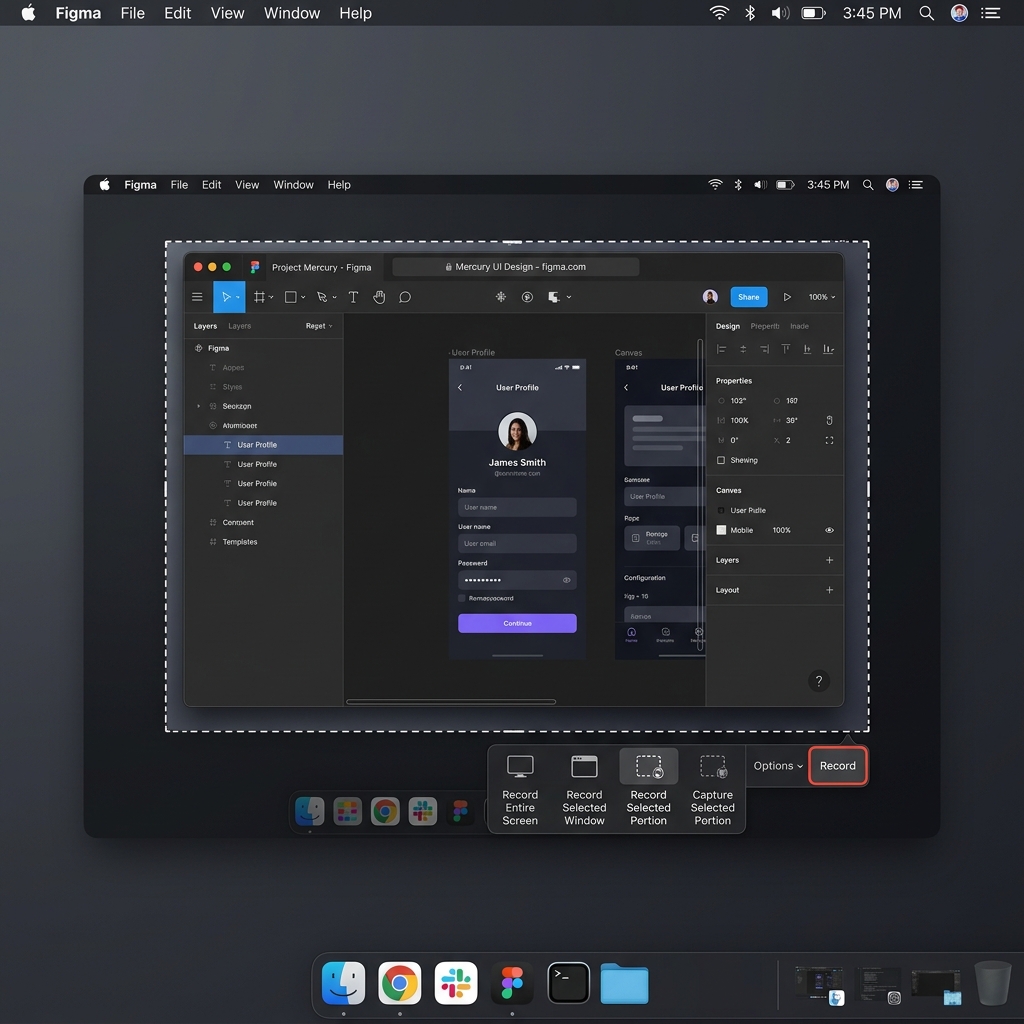
- Open the Capture Menu: Press Command + Shift + 5 on your keyboard. The screen recording toolbar will appear at the bottom of your display.
- Choose the Frame Tool: Look at the middle of the toolbar and click the icon for Record Selected Portion (it looks like a box with dashed lines).
- Draw the Box: A highlighted dashed box will appear on your screen. Click and drag the edges of this box so it perfectly surrounds only the window you want to share. Everything outside of this box will be darkened and excluded from the video.
- Start Recording: Click the Options menu to make sure your microphone is turned on if you need to speak, then click Record.
As long as you keep the application inside that dashed box, your viewers will only see what you want them to see.
Recording a Window vs. Screenshotting One
This is the detail that trips most people up. macOS can screenshot a single window perfectly: press Command + Shift + 4, tap the Space bar, and click the window. It captures that one window, drop shadow and all, with no manual cropping. But the built-in video recorder has no equivalent "click a window" mode. For video, you have to draw the Record Selected Portion box yourself and keep the window inside it for the entire recording.
Enjoying this read?
Get weekly insights on video editing, AI workflows, and creator growth straight to your inbox.
Tips for a Clean Single-Window Capture
- Resize the window first. Set the app to the exact size you want before you draw the box, so the frame hugs the window with no awkward dark border around the edges.
- Silence interruptions. Turn on Do Not Disturb or a macOS Focus so a notification banner never slides into frame mid-recording.
- Mind multi-window apps. Browsers with pop-up dialogs, or design tools with floating panels, can open new windows outside your box. Keep every panel you need inside the frame, or select a slightly larger region to be safe.
- Watch readability. A large window captured at full Retina resolution still looks microscopic on a phone. If viewers will watch on mobile, you either zoom in during editing or use a recorder that zooms in on the action automatically.
The Problem with the Fixed Frame
Using the native Mac tool to frame a specific window solves the privacy problem, but it introduces a new challenge.
Once you hit record, that dashed box is locked in place. If you accidentally drag your application window outside of the box while you are working, your application disappears from the video. Furthermore, if you are recording a large window, the text and buttons inside it will still look incredibly small to anyone watching the video on a mobile phone.
To make your content truly useful, you need your recording to be dynamic, not static. The viewer needs to easily follow your mouse, read the text without squinting, and stay completely focused on the lesson.
Elevating the Viewer Experience
You could spend hours in video editing software trying to manually zoom in on the important parts of your specific window, but time is valuable. If you want to create human-friendly, highly engaging tutorials without the headache of post-production, the smartest choice is to use a tool that intelligently adapts to what you are doing.
This is where Cubix Capture completely changes the way you share information. Instead of relying on a rigid, manually drawn box, it provides automatic visual clarity that makes your videos feel professional and effortless.
- Auto-Zoom: You do not need to worry about the size of your window. The software intelligently tracks your actions and automatically zooms in on the important menus and buttons. Your audience always gets a perfect, close-up view.
- Smooth Cursor: It removes the frantic, shaky trackpad movements, replacing them with a calm, smooth cursor glide that tells the viewer exactly where to look.
- Live Backgrounds: If you are using your webcam to talk to your audience while showing the window, it instantly removes your physical room and applies a clean, distraction-free background.
Screen recording a specific window on a Mac is a great way to protect your privacy and reduce clutter. But by using tools designed to automatically focus on the action and provide visual clarity, you elevate your video from a simple recording to a truly helpful, professional solution that viewers will love to watch.
Related reading:
- How to Screenshot a Specific Area on Mac
- How to Screen Record on Mac: All Methods for 2026
- Where Do Screen Recordings Go on Mac?
Don’t miss the next one.
Join our newsletter for exclusive tips, product updates, and the latest from the Cubix team.