"How can I screenshot on Mac?" — if you just unboxed a MacBook or moved over from a Windows PC, this is one of the first things you'll Google. On Windows you mashed the PrtScn key; on a Mac there's no Print Screen key anywhere on the keyboard, and that throws nearly every new switcher.
Here's the reassuring part: macOS actually makes screenshots easier than Windows once you know the keys — and the only one you truly need takes about ten seconds to learn. Let's answer the question fast, then cover the handful of variations worth knowing.
The Quick Answer
To take a screenshot on a Mac, press:
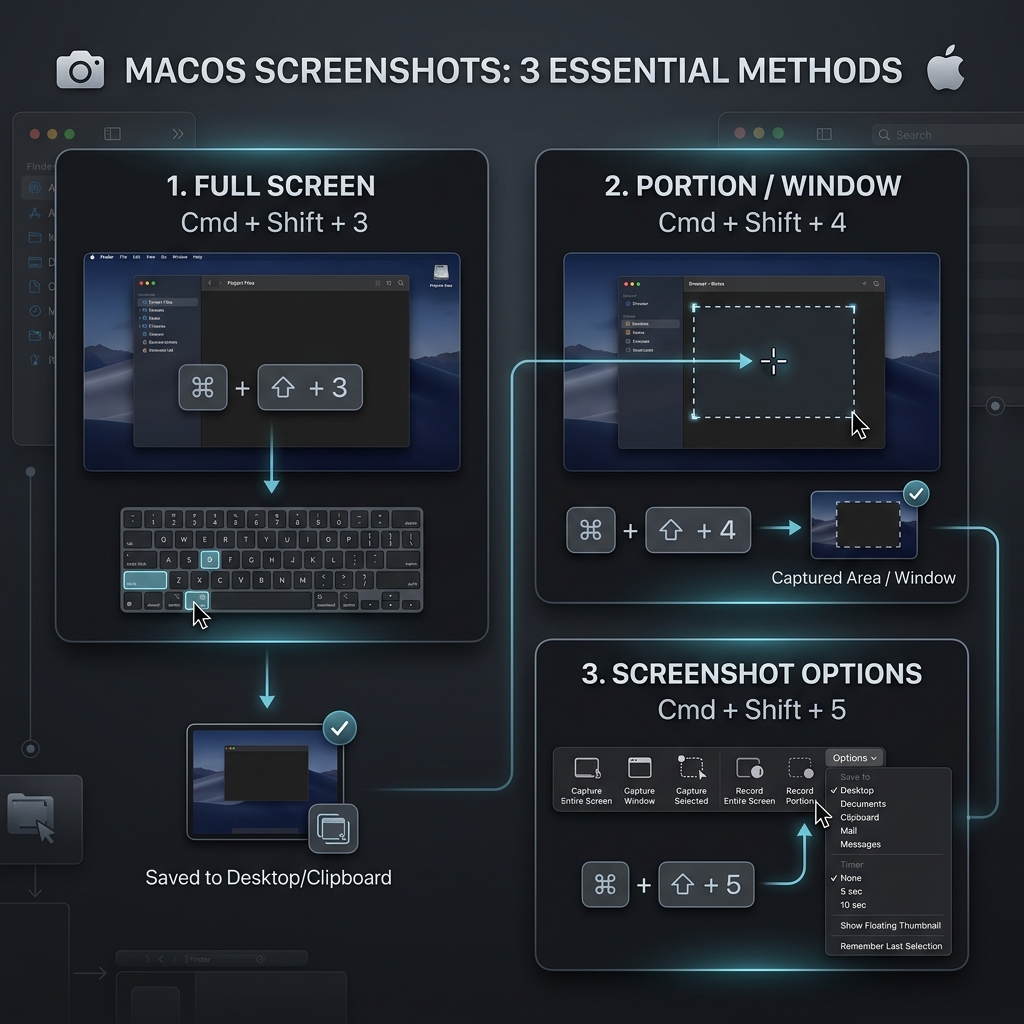
Command + Shift + 3→ captures the whole screen.Command + Shift + 4→ lets you drag a box around just the part you want.
That's it. By default the image saves to your Desktop as a .png file, and a small thumbnail pops up in the bottom-right corner for a few seconds so you can quickly mark it up or drag it somewhere.
If you remember nothing else, remember Command + Shift + 4 — it's the one you'll use most.
Coming From Windows? Here's the Translation
If your fingers are trained on a PC, this cheat sheet will get you up to speed instantly:
PrtScn(whole screen) →Command + Shift + 3Windows + Shift + S(snip an area) →Command + Shift + 4Alt + PrtScn(one window) →Command + Shift + 4, then tap Spacebar and click the windowWindows + PrtScn(auto-save a file) → already the default on Mac; every shot saves to the Desktop automatically
Still switching between machines day to day? Keep our full guide to capturing a screenshot on Windows bookmarked too.
Grabbing Just One Window (Cleanly)
This is the trick that makes new Mac users fall in love with the system:
- Press
Command + Shift + 4. - Tap the Spacebar — the crosshair turns into a little camera.
- Hover over any window (it lights up blue) and click.
macOS captures that window perfectly, complete with a soft drop shadow that looks like you designed it on purpose. Want it without the shadow? Hold Option while you click.
Enjoying this read?
Get weekly insights on video editing, AI workflows, and creator growth straight to your inbox.
Paste It Without Saving a File
Tired of files piling up on your Desktop already? Add the Control key to any shortcut — for example Command + Control + Shift + 4 — and instead of saving a file, the Mac copies the image straight to your clipboard. Just press Command + V to paste it into Slack, an email, or a doc.
One Shortcut to Rule Them All
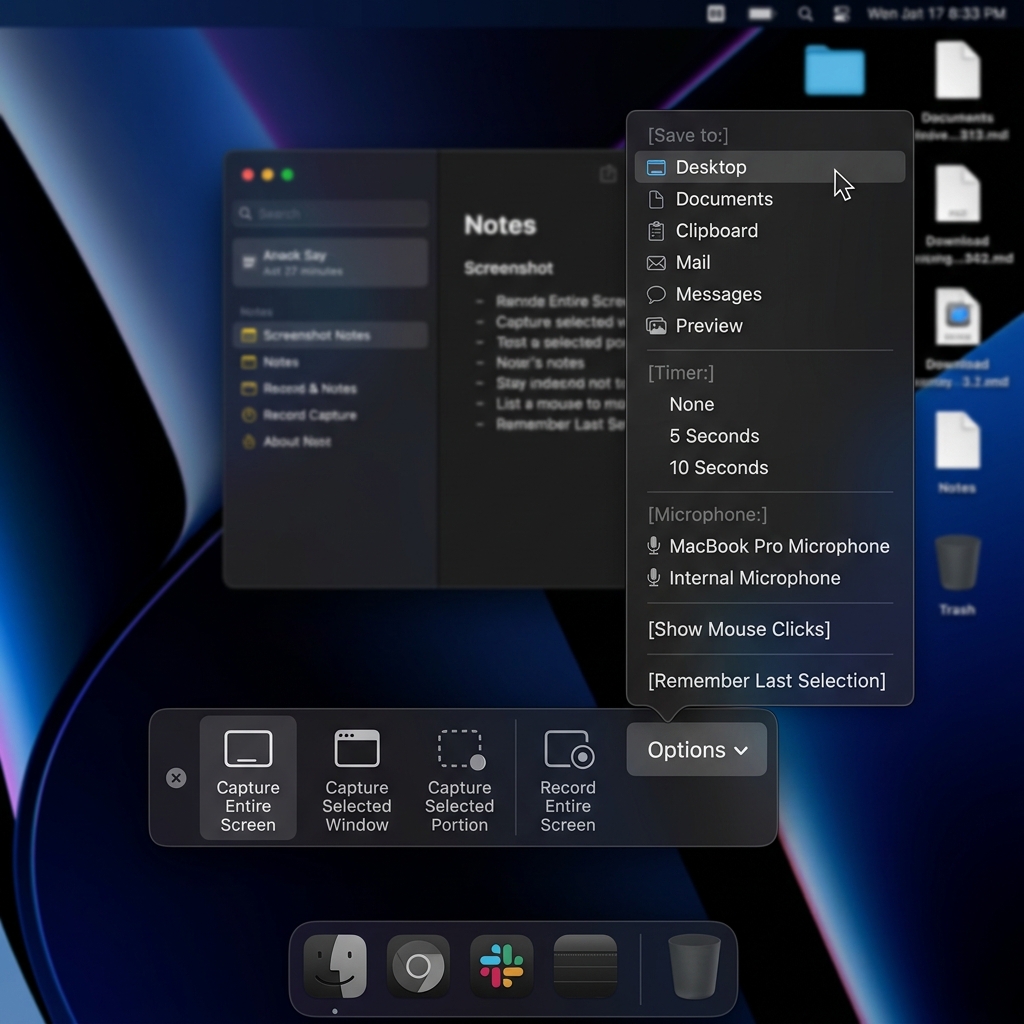
If you'd rather not memorize anything, press Command + Shift + 5. A small toolbar appears at the bottom of your screen with clickable buttons for full screen, a single window, or a selected area — plus a built-in screen recorder and an Options menu where you can set a timer or change where files save.
Want Every Single Method?
This covers everything a new Mac user needs day to day. But macOS hides even more under the hood — changing the default save folder, switching the file format, timed captures, annotation tools, and fixes for when screenshots stop working. When you're ready to go from "I can take a screenshot" to "I've mastered screenshots," read the complete reference: how to take a screenshot on Mac — every method.
When a Picture Isn't Enough
Sometimes a still image just can't explain what you mean — especially when you're walking someone through a process with several steps. Instead of firing off five screenshots with arrows scribbled on them, you can record a quick, polished video of your screen.
Cubix Capture turns a raw screen recording into a clean, auto-zoomed, cinematic walkthrough automatically — no video editor required. It's the natural next step once static screenshots stop cutting it. And if you also use a phone or PC, here's how to screenshot on any device.
Don’t miss the next one.
Join our newsletter for exclusive tips, product updates, and the latest from the Cubix team.