"How do I capture a screenshot on Windows?" sounds like it should have one answer — but the honest reply is "it depends which Windows you're on." Microsoft has changed screenshots more in the last few years than in the previous decade, so a tip that works flawlessly on Windows 11 might behave differently on a Windows 10 machine at the office.
This guide covers every reliable way to capture a screenshot across both Windows 10 and Windows 11, calls out exactly where they differ, and points you to the right method for your situation — no third-party app required. (If you're specifically on the latest OS and want the newest tricks like OCR and built-in video, jump to our Windows 11 screen capture guide. Just want the keystrokes at a glance? See the every keyboard combo cheat sheet.)
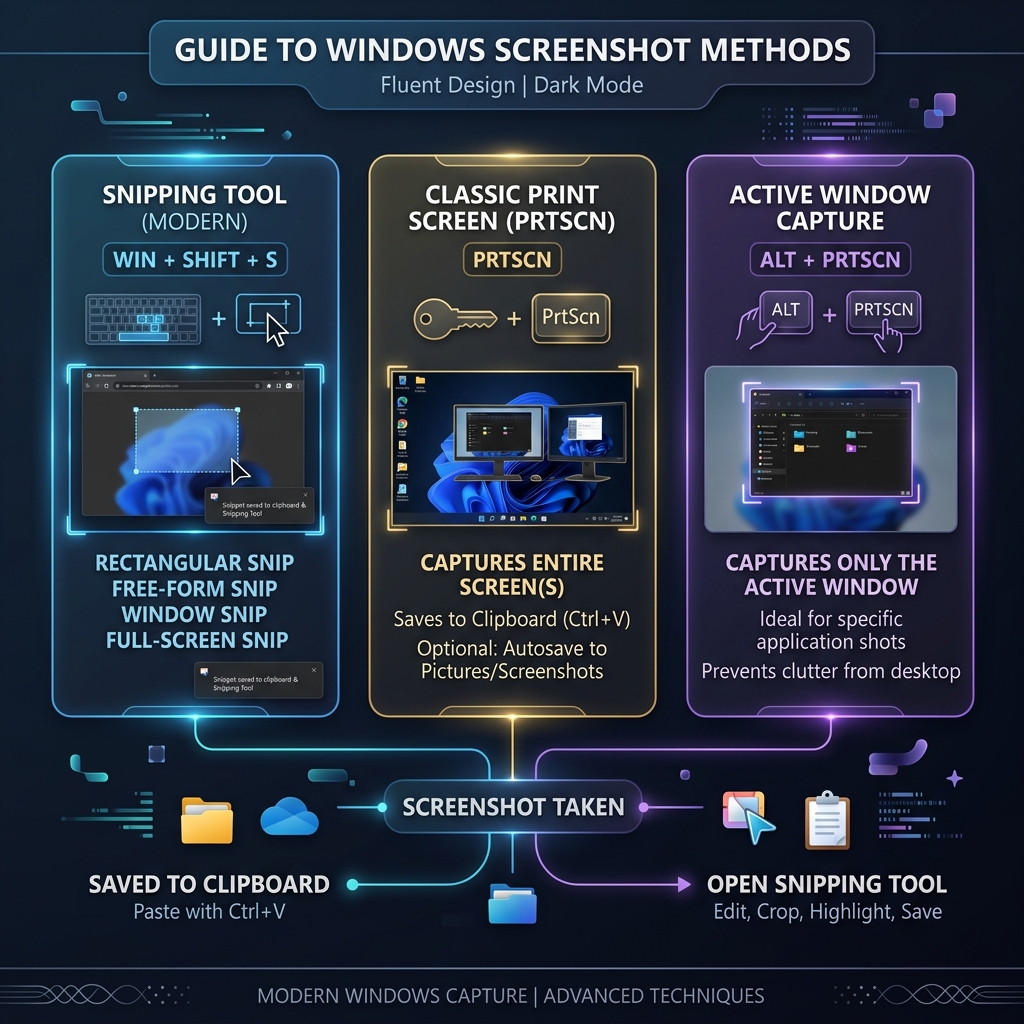
The Method That Works on Every Modern Windows: Windows + Shift + S
If you only learn one shortcut, make it this. It works on Windows 10 (version 1809 and later) and Windows 11, which makes it the safest bet on any PC you sit down at.
Press Windows + Shift + S, the screen dims, and a capture toolbar appears with four modes:
- Rectangular Snip — drag a box to capture a specific area.
- Freeform Snip — draw a custom shape around the object you want.
- Window Snip — hover over any open application to cleanly capture just that window.
- Full-Screen Snip — instantly grab your entire monitor.
The image copies to your clipboard immediately, so you can paste it into an email, Google Doc, or Slack. A notification also pops up — click it to open an editor where you can draw arrows or highlight text.
Version note: On Windows 10 this opens the older "Snip & Sketch" editor; on Windows 11 it's the unified Snipping Tool. They look slightly different, but the shortcut and core behavior are identical — and only Windows 11 adds the Text Actions OCR and Quick Redact features.
The Classic Key: PrtScn
The Print Screen key sits on virtually every Windows keyboard, and it behaves differently depending on your version and settings:
- The original behavior: copies the entire screen to your clipboard silently. Paste it into Paint, Word, or an email with
Ctrl + V. - The new default (recent Windows 11 builds): pressing
PrtScnopens theWindows + Shift + Ssnip toolbar instead.
Want to switch which one happens? Go to Settings → Accessibility → Keyboard and toggle "Use the Print screen key to open screen capture."
Auto-Save a File: Windows + PrtScn
Press Windows + PrtScn and the screen dims for a moment as a full-screen PNG saves itself — no pasting required. Find every shot in Pictures → Screenshots.
Heads up if you use OneDrive: with OneDrive backup enabled, these auto-saved screenshots may route to OneDrive → Pictures → Screenshots in the cloud instead of your local folder. If your screenshots seem to "vanish," check OneDrive first.
Enjoying this read?
Get weekly insights on video editing, AI workflows, and creator growth straight to your inbox.
Grab a Single Window: Alt + PrtScn
Click the window you want so it's in focus, then press Alt + PrtScn. Windows copies a clean image of just that application to your clipboard, leaving out your wallpaper and taskbar. Paste it wherever you need it.
The Legacy Tools (Still There If You Need Them)
On older or unattended machines, you may still run into:
- The classic Snipping Tool (Windows 10 and earlier) — the original app with a simple New → drag → save flow and an optional capture-delay timer.
- Snip & Sketch (Windows 10) — the in-between app Microsoft introduced before merging everything into the Windows 11 Snipping Tool.
You don't need to seek these out, but it helps to recognize them on a shared or work computer that hasn't been updated.
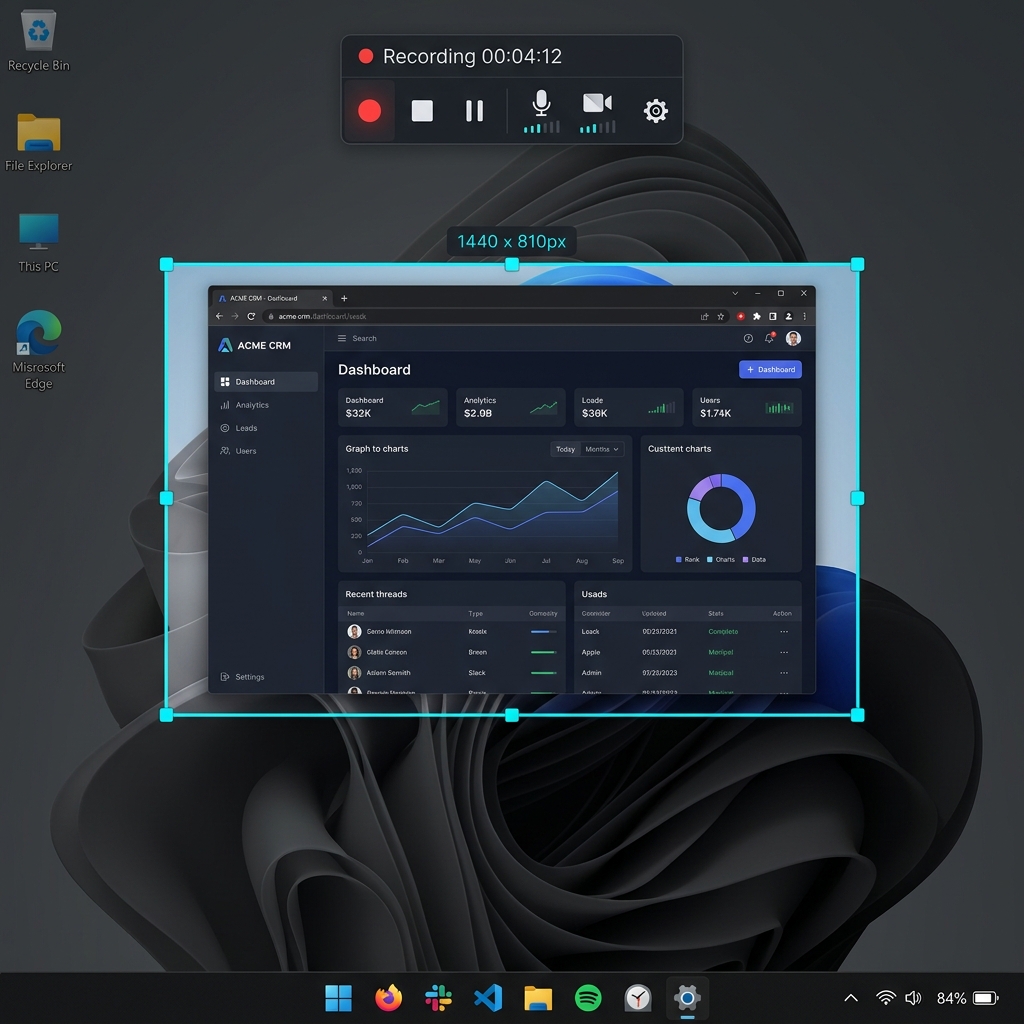
Recording Video Instead of a Still
Sometimes a sequence of clicks needs motion, not a static frame. On Windows 11 you can record screen video right inside the Snipping Tool (Windows + Shift + R); on Windows 10, the Xbox Game Bar (Windows + G) handles app recording. Not sure which you actually need? Here's screen recording vs. screen capture explained simply.
Going Beyond the Static Image
Once you've mastered these shortcuts, you'll never open MS Paint to crop an image again. But for anything with more than a step or two — a product demo, an onboarding flow, a detailed bug report — a still image leaves too much unsaid.
Cubix Capture records your screen and automatically transforms it into a smooth, auto-zoomed, cinematic walkthrough that looks edited by a pro — no editor, no learning curve. It's where to turn when screenshots stop being enough. And if you also work on a Mac or phone, here's how to screenshot on any device.
Don’t miss the next one.
Join our newsletter for exclusive tips, product updates, and the latest from the Cubix team.