Whether you are streaming on Twitch, recording a gaming video for YouTube, or building a high-end software tutorial for work, adding your face to the corner of the screen completely changes the dynamic. It builds an immediate personal connection with your viewers, allowing them to see your expressions, gestures, and reactions in real-time.
But if you drag your raw camera feed into OBS Studio and drop it over your desktop, it can look unpolished. The hard squares and messy edges can feel less like a professional broadcast and more like an intrusive Zoom meeting.
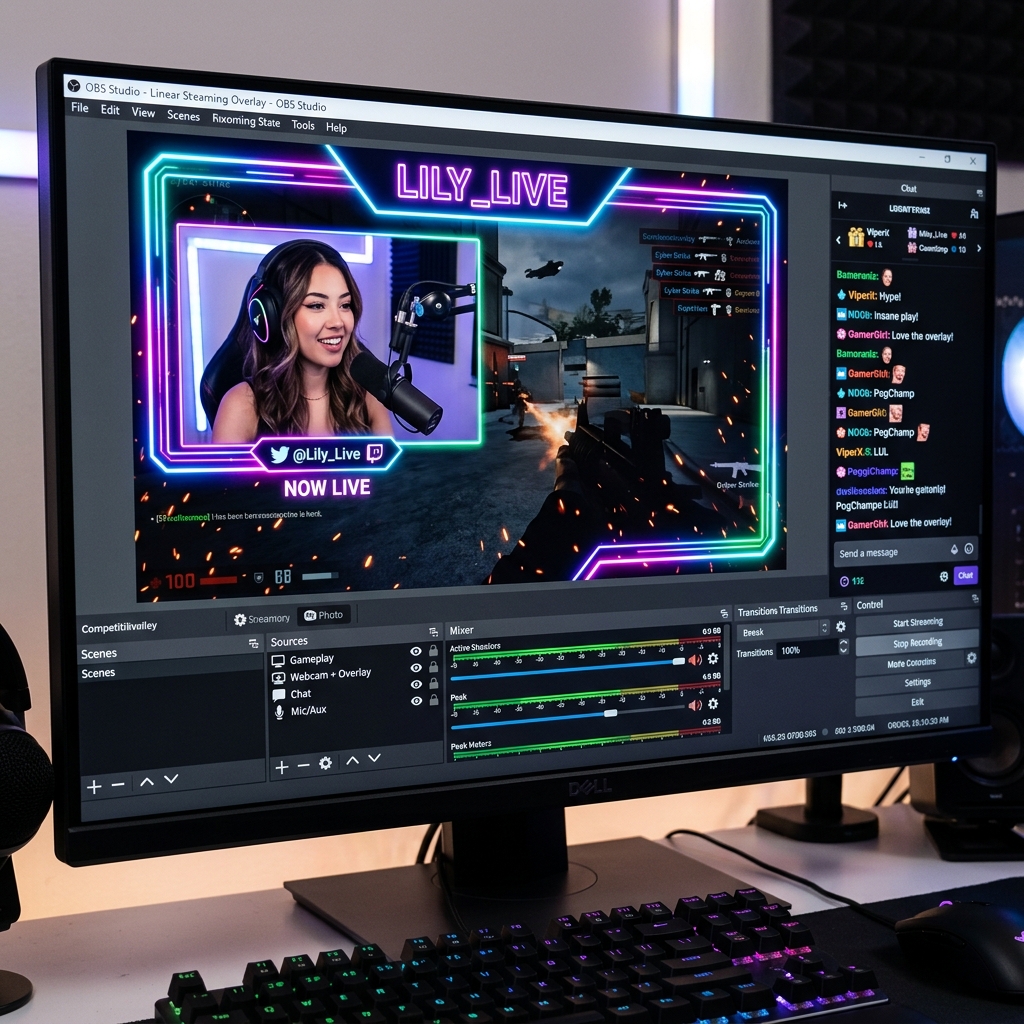
To create a clean, modern look, you need a webcam overlay, a designed frame or a shaped border that encapsulates your camera feed. Here is the step-by-step guide to adding your camera and locking down a perfect webcam overlay in OBS Studio.
Step 1: Add Your Raw Webcam Feed
Before you can add a frame or an overlay, your computer needs to recognize your physical camera.
- Open OBS Studio and select the Scene where you want to add your camera.
- Go to the Sources dock at the bottom left, click the (+) icon, and select Video Capture Device.
- Name the source "My Webcam" and click OK.
- In the Properties window, click the Device dropdown menu and select your plugged-in USB webcam or DSLR capture card.
- Scroll down to Resolution/FPS Type, switch it to Custom, and choose 1920x1080. Set the frame rate to 30 (or 60 if your camera supports it). Click OK.
Step 2: Add Your Webcam Overlay (Static PNG Frame)
The easiest way to make your facecam look exceptional is by using a transparent graphic frame. You can find free webcam borders online or make your own in Canva just ensure the file is saved as a transparent PNG.
-
Import the Overlay Image: Imports your transparent graphic asset. In the Sources dock, click the (+) icon again and select Image. Name it "Webcam Border" and click OK. Click Browse, select your transparent PNG frame from your computer files, and hit OK.
-
Position the Overlay Frame: Locks in your overall composition layout. Use the red box handles around your overlay image in the main OBS preview canvas to shrink or expand the frame. Drag it to the exact corner or location where you want your facecam to permanently sit.
-
Arrange Your Source Layers: Critical structural logic for OBS sources. Look at your Sources list. OBS reads sources like a deck of cards whatever is at the top covers whatever is below it. Click and drag the "Webcam Border" source so it sits directly above the "My Webcam" source.
-
Fit Your Camera Inside the Border: The final visual alignment. Select your "My Webcam" source in the list. Use the corner nodes to scale your face to fit the inside of the frame.
- Pro-Tip: If your camera feed is spilling over the edges of your overlay, hold down the Alt key (Windows) or Option key (Mac) while dragging the red edges to manually crop out the unwanted borders.
Enjoying this read?
Get weekly insights on video editing, AI workflows, and creator growth straight to your inbox.
The Unseen Friction of Broadcast Management
Once you align your camera and frame perfectly, your OBS scene looks great. However, this traditional approach highlights why open-source broadcasting software can quickly become a massive chore for daily professionals and digital educators.
The camera frame and the border image are completely independent assets. If you accidentally click and drag your webcam source across the screen while presenting, your face will move away, leaving the border floating emptily behind. To move or scale your setup safely, you have to group the sources together, lock their dimensions, and constantly toggle visibility layers.
Furthermore, if your primary goal isn't live gaming but creating professional tutorials, standard webcam boxes still suffer from severe visual clutter. Your messy background remains completely visible unless you go out and buy a physical green screen or run heavy background-blurring software that bogs down your computer's processor.

The Intelligent, Zero-Configuration Alternative
If your goal is to share information, guide clients, or build world-class educational content without spending your day managing layers, grouping sources, and cropping canvas pixels, the modern solution is Cubix Capture.
Instead of forcing you to build complex multi-layered environments from scratch, Cubix Capture operates as an automated digital producer right while you talk, handling your webcam effortlessly:
- Instant Face Masking: You don't need to manually design or upload PNG overlays. Cubix Capture automatically isolates your camera feed and frames your face inside a pristine, floating geometric bubble natively.
- Algorithmic Background Isolation: Forget buying expensive physical backdrops or configuring chroma keys. The platform utilizes built-in depth-sensing models to instantly erase or elegantly blur your messy room, replacing it with a clean studio space.
- Contextual Screen Panning: To make sure your webcam bubble never covers important on-screen elements, the software intelligently reads your desktop layout. As you click through software menus, the platform dynamically pans and zooms the active display area, ensuring your text remains beautifully legible on any mobile device.
Mastering source management and transparency layers in OBS Studio is an invaluable technical skill if you are streaming a highly customized live broadcast to Twitch. But when it is time to build a professional tutorial, onboard a team member, or record a polished product demo without wrestling with manual graphic overlays, upgrading to a platform designed for automated visual clarity ensures your message is delivered effortlessly.
📖 Keep reading: How to record only one window in OBS, the best OBS settings for screen recording, and how to record your screen and webcam at once.
Don’t miss the next one.
Join our newsletter for exclusive tips, product updates, and the latest from the Cubix team.