If you have ever typed "how to film my screen on Mac" into Google, you are almost certainly in one of two situations: a teacher or relative asked you to "just send a video of what you're seeing," or you are trying to show someone a problem that is impossible to describe in words.
Good news: you do not need to download anything, pay for anything, or understand anything technical. Your Mac can film its own screen out of the box, and once you have done it once, it takes about five seconds every time after that.
This guide skips the jargon. We will not say "screencast" or "codec" or "frame rate." We will just film your screen.
First, What "Filming Your Screen" Actually Means
When you film your screen, your Mac records a video of everything that happens on your display, exactly as you see it. If you move your mouse, scroll a page, click a button, or play a video, all of it gets saved into a single video file you can replay or send to someone.
It is different from a screenshot. A screenshot freezes one single moment. Filming your screen captures the whole sequence, with movement and (if you want) your voice narrating over the top.
The One Shortcut You Need
Apple put every screen-filming tool behind a single keyboard shortcut:
Hold down Command + Shift + 5 at the same time.
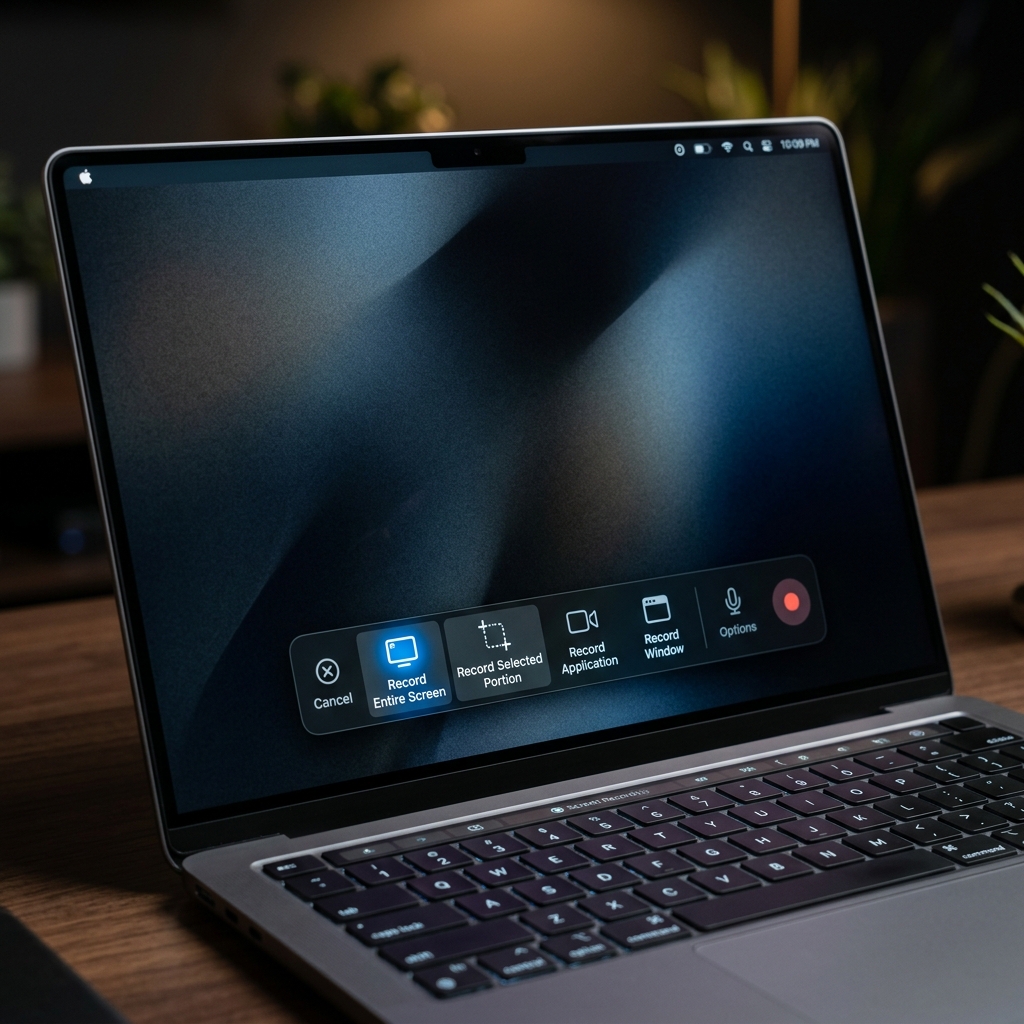
The moment you press all three, a small gray toolbar slides up from the bottom of your screen. That toolbar is your entire control panel. Take a breath and look at it before clicking anything.
From left to right, the toolbar has two groups of buttons:
- The first three icons take still screenshots. Ignore these for now.
- The next two icons are the ones that film video. One films your entire screen, and one films just a box you draw on the screen.
Step-by-Step: Filming the Whole Screen
- Press
Command+Shift+5. - Click the fourth icon (a solid rectangle with a little circle in the corner). This is "Record Entire Screen."
- Your pointer turns into a little camera. Click anywhere on the screen, or click the Record button on the toolbar, to begin.
- Do whatever you wanted to show. The recording is now capturing it all.
That is genuinely it. You are filming.
Step-by-Step: Filming Just One Part of the Screen
Sometimes you do not want your whole messy desktop in the video, just one window or corner.
- Press
Command+Shift+5. - Click the fifth icon (a dashed rectangle with a circle). This is "Record Selected Portion."
- A floating box appears. Drag its edges to cover only the area you want to film.
- Click Record.

Enjoying this read?
Get weekly insights on video editing, AI workflows, and creator growth straight to your inbox.
The Part Everyone Panics About: Stopping
Here is the single most common moment of confusion. Once you start filming, the toolbar vanishes, and new users freeze, unsure how to make it stop.
Relax. Look at the very top-right corner of your screen, near the clock and battery icon. You will see a small stop button (a square inside a circle). Click it once, and your film ends instantly.
If you cannot find it, just press Command + Control + Escape and the recording stops immediately.
A little thumbnail of your finished video will pop up in the bottom-right corner for a few seconds. The full video file saves automatically to your Desktop unless you changed it.
Want Your Voice in the Video?
By default, your Mac films the picture but no sound from you. If you want to talk over your video and explain what you are doing:
- Press
Command+Shift+5. - Click Options on the toolbar.
- Under Microphone, choose your Mac's built-in microphone.
Now your narration records along with the picture. (Capturing the sound coming from your Mac, like music or a video's audio, is a separate trick. We cover that in How to Record Screen on Mac With Internal Audio.)
Finding and Sharing Your Film
Your finished video lands on your Desktop with a name like "Screen Recording 2026-06-14." Double-click it to watch it back. To send it, attach it to an email or drag it into a message like any other file.
One heads-up: screen films can be large. A few minutes of full-screen video can easily be hundreds of megabytes, which is sometimes too big to email. If that happens, our video compressor shrinks it down in your browser.
When You Want It to Look Genuinely Good
Filming your screen with Command + Shift + 5 is perfect for a quick "here, look at this" clip. But the moment you film something other people will judge you on, a tutorial for customers, a walkthrough for your team, a demo for a client, raw footage starts to feel a little rough. The mouse darts around, the important details are tiny, and there is no easy way to zoom in on what matters.
If you would rather skip the fiddly editing entirely and have your screen films come out clean, zoomed, and polished automatically, take a look at Cubix Capture. It films your Mac screen and instantly smooths the cursor and zooms into your clicks, no editing timeline required.
Once you are comfortable filming, the natural next step is learning every built-in method on Mac and how to record and edit your clip.
Don’t miss the next one.
Join our newsletter for exclusive tips, product updates, and the latest from the Cubix team.