This is the single most searched-for problem in Mac screen recording: you record a video, you play it back, and the sound that was coming out of your Mac, the YouTube clip, the Zoom call, the app notification, the game audio, is completely missing.
You are not doing anything wrong. By default, macOS deliberately does not capture internal system audio. It records what comes in through a microphone, but it will not record what goes out through your speakers. Apple restricts this for copyright and privacy reasons.
The good news: there are reliable ways around it. Let me explain why it happens, then walk through each fix from most powerful to simplest.
Why Mac Blocks Internal Audio
When you record with Command + Shift + 5 and pick a microphone, you are recording an input device. Your speakers are an output device. macOS has no built-in bridge that lets a recorder "listen" to an output.
The classic bad workaround is to just let your laptop speakers play out loud and record them back through the microphone. Do not do this. You get echo, room noise, a hollow tone, and your own keyboard clicks. To capture clean internal audio, you have to create a software bridge that routes your Mac's output back in as an input.
Method 1: BlackHole (Free, Most Reliable)
BlackHole is a free, open-source "virtual audio cable." It creates a fake audio device that other apps can both play into and record from, the bridge macOS is missing.
Step 1, Install BlackHole. Download BlackHole (the 2ch version is fine) from its official site and run the installer.
Step 2, Create a Multi-Output Device. You want to hear the audio and route it to BlackHole at the same time.
- Open Audio MIDI Setup (search for it with Spotlight,
Command+Space). - Click the + in the bottom-left corner and choose Create Multi-Output Device.
- In the list, tick both your regular speakers/headphones and BlackHole 2ch.
- Set this new Multi-Output Device as your Mac's sound output (in System Settings, Sound, or the menu bar).
Now everything your Mac plays goes to your speakers (so you still hear it) and to BlackHole simultaneously.
Step 3, Record from BlackHole.
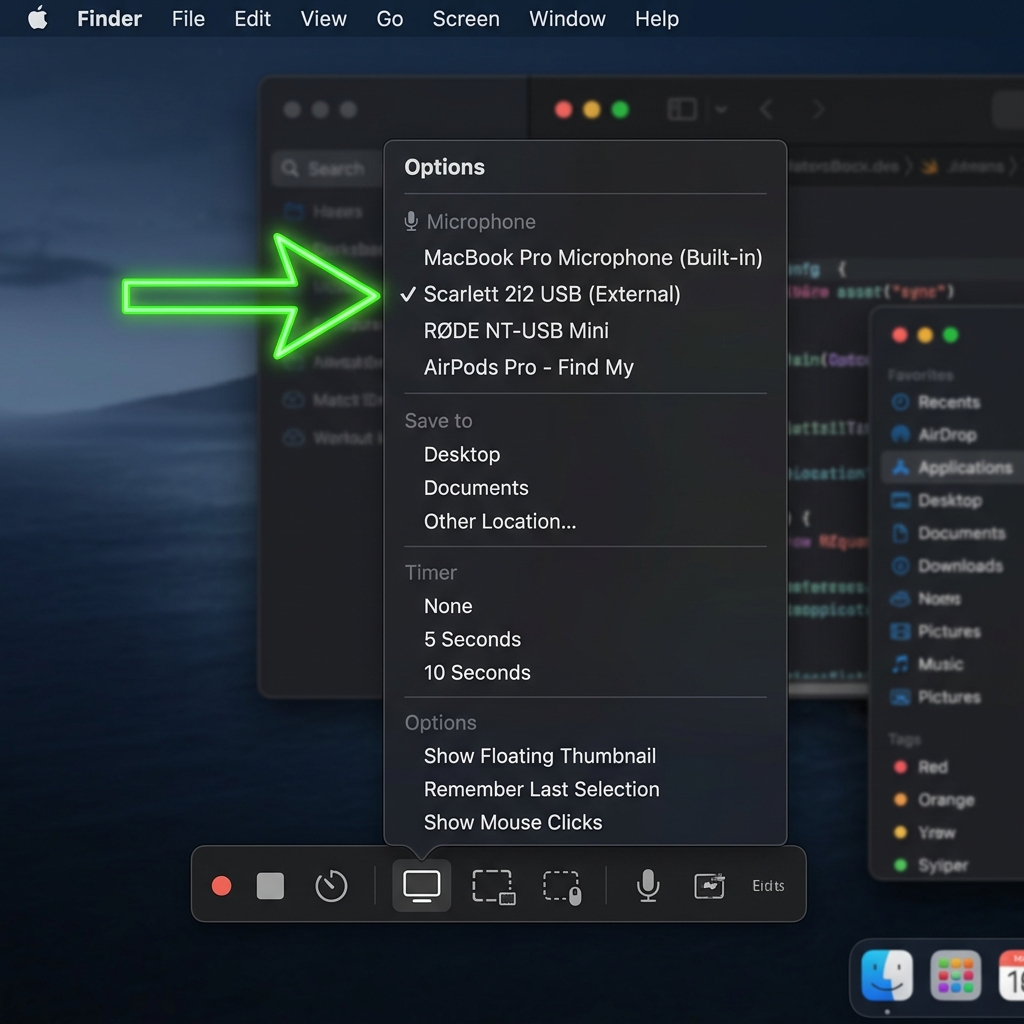
- Press
Command+Shift+5. - Click Options.
- Under Microphone, select BlackHole 2ch.
- Record as normal.
Your recording now contains the actual internal audio. When you are done, switch your output back to your normal speakers.
Method 2: Capturing Internal Audio AND Your Voice Together
For a tutorial, you often want both the app's sound and your own narration. The trick is an Aggregate Device that combines BlackHole with your microphone.
- In Audio MIDI Setup, click + and choose Create Aggregate Device.
- Tick both BlackHole 2ch and your microphone.
- In the recorder's Options, select that Aggregate Device as the microphone.
Now both streams record into one track. (If you would rather not wrestle with routing at all, there is a cleaner path, see our guide on capturing system audio on Mac without installing drivers.)
Enjoying this read?
Get weekly insights on video editing, AI workflows, and creator growth straight to your inbox.
Method 3: Loopback (Paid, Easiest of the Manual Tools)
If audio routing matters to you regularly and you would rather not manage Multi-Output and Aggregate devices by hand, Loopback by Rogue Amoeba gives you a visual, drag-and-connect interface to wire app audio and microphones into a single virtual device. It costs money, but it removes nearly all of the fiddliness of the BlackHole route.
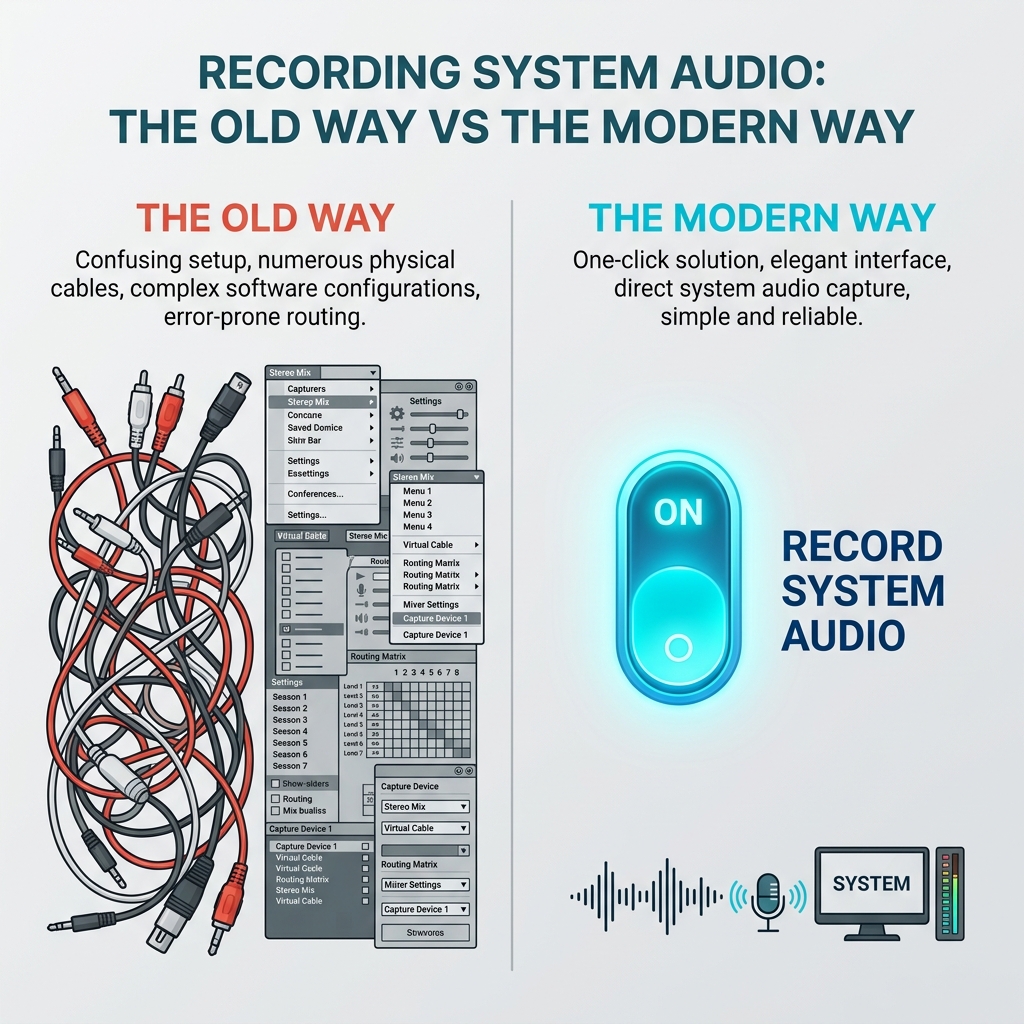
Method 4: Skip the Setup Entirely
Every method above is a workaround for the same gap, your Mac will not natively record its own output. The alternative is to use a recorder that captures internal system audio directly, with no virtual devices, no Audio MIDI Setup, and no aggregate trickery.
Cubix Capture records your Mac screen and its internal audio together in one click. There is nothing to install beyond the app itself, and no risk of forgetting to switch your output device back afterward (the classic BlackHole mistake where your next video call has no sound).
A Common Trap After Using BlackHole
If you set a Multi-Output Device and later notice that AirPods volume control stops working, or a meeting has no sound, it is almost always because your output is still set to BlackHole or a Multi-Output Device. Switch your Mac's sound output back to your normal speakers or headphones and it resolves instantly.
If audio is missing for a different reason, walk through our full diagnostic in Mac Screen Recording Has No Sound, How to Fix It. And if you just want microphone narration rather than system sound, see How to Screen Record on Mac With Audio.
Don’t miss the next one.
Join our newsletter for exclusive tips, product updates, and the latest from the Cubix team.