Recording your screen is the easy part. The reason most screen recordings still look amateur is that people stop there, they share the raw file, dead air at both ends, mouse skittering around, important details too small to read.
The gap between "I recorded it" and "this looks professional" is editing. The good news is that for screen recordings, editing is mostly a handful of simple, repeatable moves. This guide covers the whole journey: record cleanly, then edit efficiently, whether you use Apple's free tools or skip editing altogether.
Part 1: Record With Editing in Mind
A few seconds of discipline while recording saves you minutes of editing later.
- Press
Command+Shift+5and open Options. - Set the microphone (so you do not end up with a silent recording).
- Turn on "Show Mouse Clicks" so your clicks are visible, this matters enormously for tutorials.
- Use the 5-second timer so you can get your windows ready before it rolls.
- Pause before and after your main content. Those few seconds of silence give you clean, easy points to trim.
New to recording itself? Start with the beginner's guide to filming your Mac screen.
Part 2: The Four Edits That Matter Most
Almost every great screen recording comes down to four edits. Master these and you are 90% of the way there.
Edit 1, Trim the Dead Ends
The fastest improvement you can make: cut the fumbling at the start and the "okay, how do I stop this" at the end.
In the free Apple way: open your .mov file in QuickTime Player, choose Edit, Trim, and drag the yellow handles to keep only the good part. For cuts in the middle, use iMovie: drag your clip in, position the playhead, and use Modify, Split Clip, then delete the segments you do not want.
Edit 2, Zoom Into What Matters
This is the biggest visual upgrade and the one people skip. On a full Retina screen, the button you are clicking is tiny. Zooming in on the action makes your video instantly more watchable and more professional.
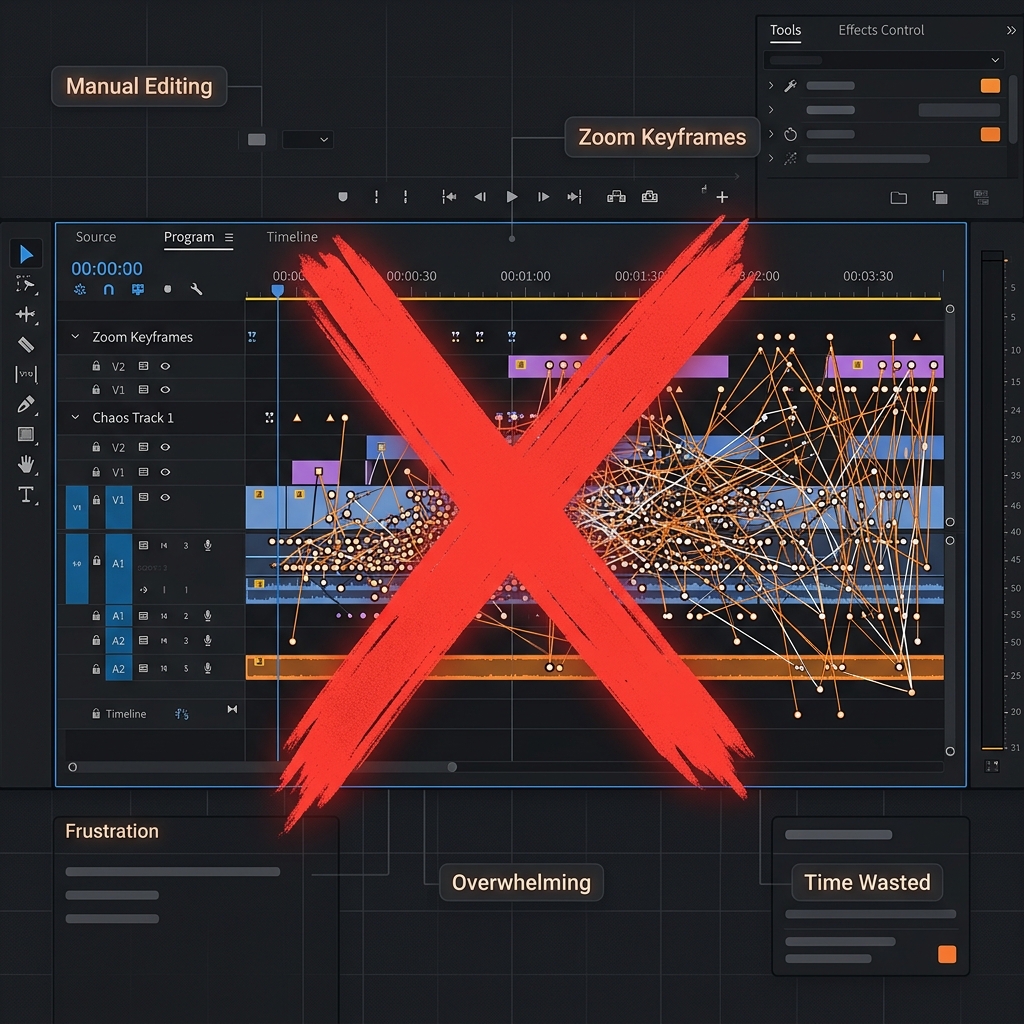
In iMovie: select the clip, click the crop (magnifier) control above the viewer, choose Crop to Fill, and frame the area you want enlarged. To create a zoom movement, you would split the clip and crop different sections, this is tedious by hand, which is exactly why automated tools exist.
Enjoying this read?
Get weekly insights on video editing, AI workflows, and creator growth straight to your inbox.
Edit 3, Add Captions or Text
A surprising share of viewers watch on mute. Burned-in captions and the occasional text label ("Click here", "Settings tab") dramatically improve comprehension.
iMovie has a basic Titles tab for text overlays. For real word-by-word captions, you will want a dedicated tool, our video subtitle adder can generate them.
Edit 4, Tidy the Audio
Trim breaths and long pauses, and normalize the volume so your narration is consistent. If you recorded the system audio too, balance it against your voice so neither drowns the other.
Part 3: Exporting Without Wrecking the Quality
A common mistake is doing great edits and then exporting a soft, oversized file.
- In iMovie: choose File, Share, File, set resolution to match your recording (1080p or 4K), and pick High quality.
- Keep it sharp. If your final video looks fuzzy, see why screen recordings look blurry and how to fix it.
- Then shrink it for sharing. Editing exports are large. Run the result through our video compressor so it is small enough to email or upload quickly, without visible quality loss.
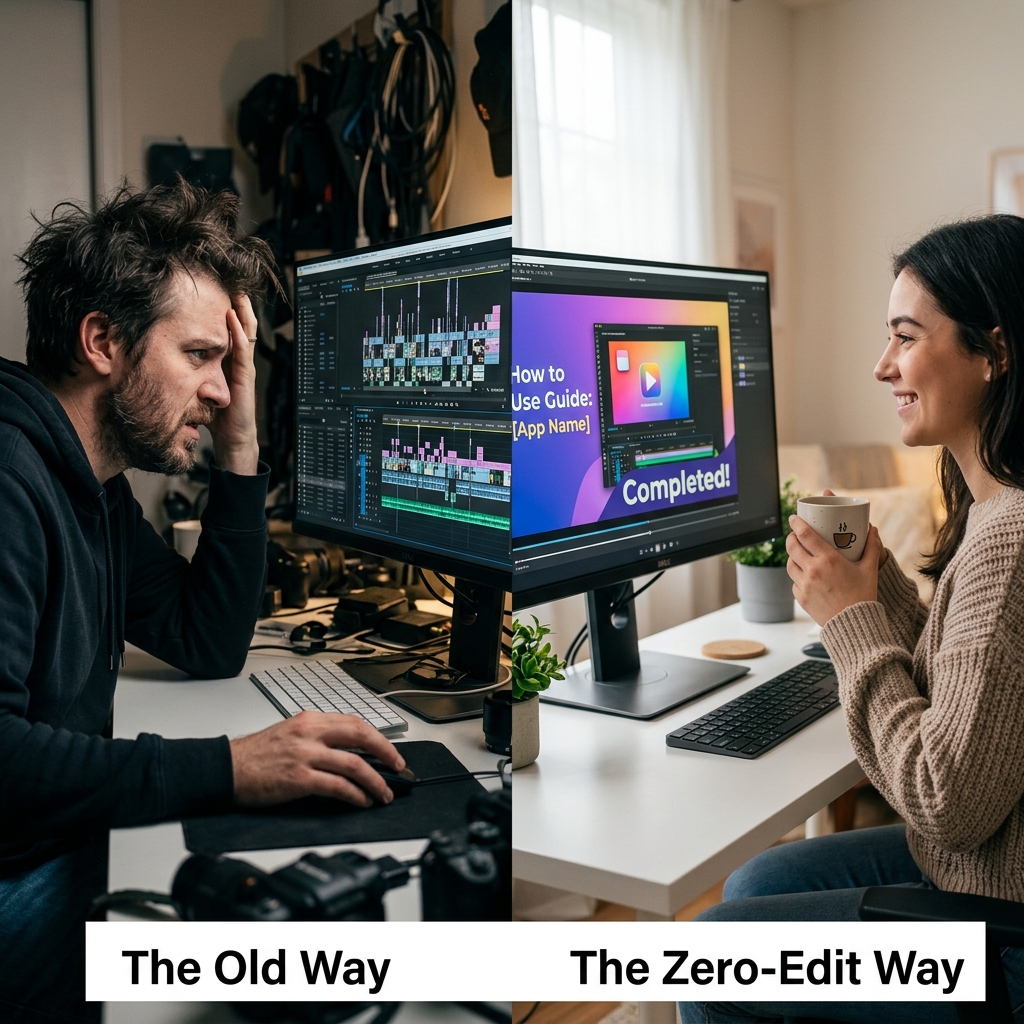
Part 4: The Honest Truth About Manual Editing
Here is the reality after you have done this a few times: the recording takes five minutes, and the editing, especially the zooming, takes an hour. Cropping clip by clip to fake a smooth zoom-in is genuinely tedious, and the result still looks a little stiff.
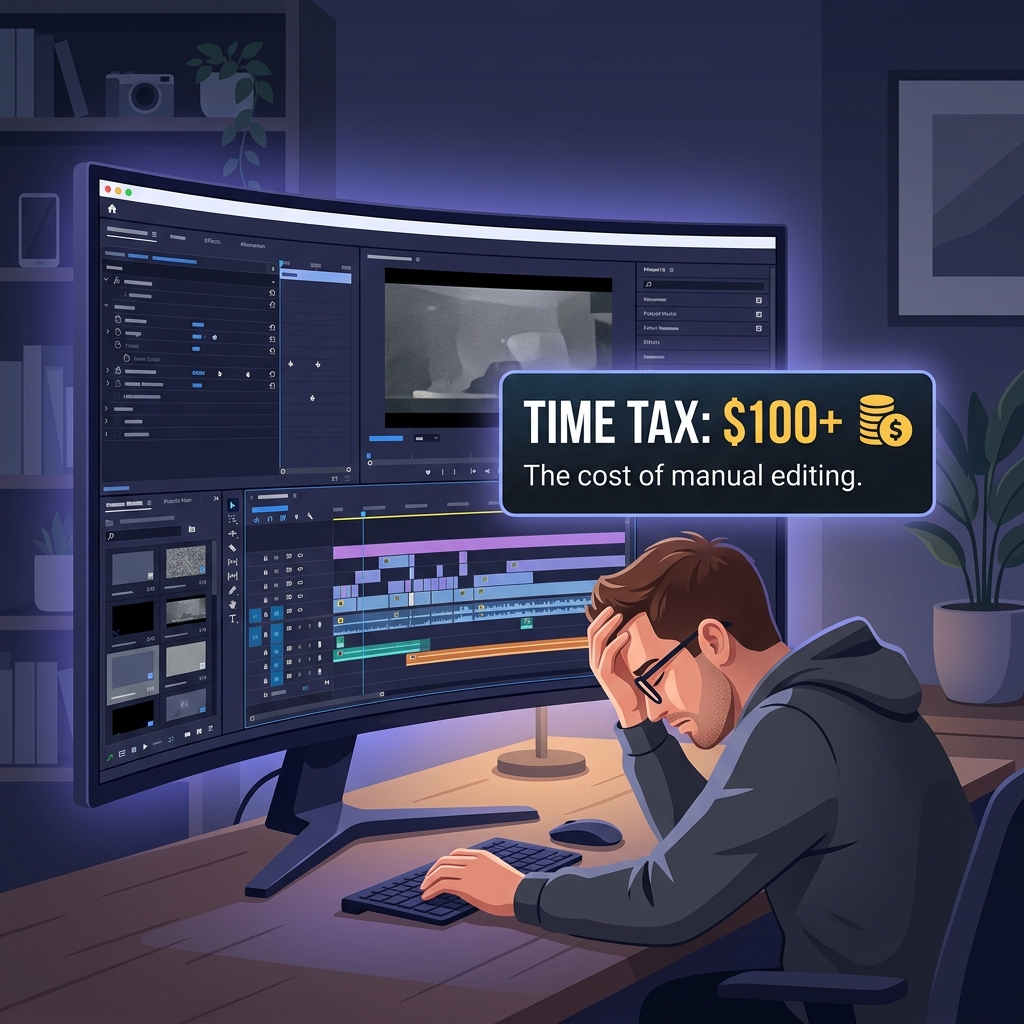
If you only make the occasional video, the iMovie route is perfectly fine. But if you record tutorials, demos, or walkthroughs regularly, the manual editing becomes the bottleneck, and it is the reason a lot of good recordings never get published.
The Shortcut: Record and "Edit" in One Step
The four edits above, trim, zoom, captions, clean audio, are exactly the things Cubix Capture does automatically. It records your Mac screen and then, with no timeline and no manual cropping:
- Smooths the cursor so it glides instead of darting.
- Auto-zooms into your clicks with cinematic motion, the edit that normally takes the longest.
- Captures system audio and your voice together.
- Exports a polished, share-ready video.
In other words, it collapses "record" and "edit" into a single step. If you would rather weigh your options first, compare the best screen recorders for Mac or browse every built-in recording method on Mac.
Don’t miss the next one.
Join our newsletter for exclusive tips, product updates, and the latest from the Cubix team.