The Lenovo ThinkPad is legendary. Known for its durable design, incredible keyboard, and the iconic red TrackPoint in the center, it is the ultimate machine for business, engineering, and serious schoolwork. Because ThinkPads are used to get things done, there is a high chance you will eventually need to explain a complex task or demonstrate a workflow to someone else.
When that time comes, typing out a long email is the slowest way to communicate. A quick screen recording is infinitely faster and much easier for the other person to understand.
If you are looking at your ThinkPad keyboard wondering how to start recording, you do not need to be a tech expert. Here is the straightforward guide to capturing your screen on a Lenovo ThinkPad using the free tools you already have, and how to make sure those videos actually look professional.
The Built-In Windows Methods
Your ThinkPad runs on the Windows operating system, which means Microsoft has already provided you with free, built-in ways to capture your screen without downloading any extra software.
Method 1: The Snipping Tool (For Windows 11)
If you are using a newer ThinkPad, it is likely running Windows 11. The Snipping Tool has recently been upgraded from just taking screenshots to recording excellent video.
- Open your Windows Start Menu, type "Snipping Tool," and hit enter.
- At the top of the application, click the Video Camera icon.
- Click the New button. Your screen will dim, allowing you to click and drag your mouse to select the exact area of the screen you want to capture.
- Check the top toolbar to make sure your microphone is turned on if you want to record your voice.
- Click Start. When you are finished, hit the red stop button, and save the MP4 video file to your computer.
Method 2: The Xbox Game Bar (For Windows 10 & 11)
If you just need to quickly record a single web browser or application, the Game Bar is a very fast shortcut.
- Open the specific application you want to record.
- Press the Windows key + G on your ThinkPad keyboard.
- A dark overlay will appear. Find the "Capture" widget, ensure your microphone is unmuted, and click the circular Record button. (Note: The Game Bar is somewhat limited; it cannot record your main desktop or file explorer, and it stops recording if you switch to a different app).
The TrackPoint Problem (and the Tiny-Text One)
The Snipping Tool and Game Bar are fine for a quick note to a coworker. But ThinkPads are built for serious, detailed work, the kind you most often need to demonstrate to a client or a new team member, and that is exactly where raw captures break down.
The ThinkPad's signature input is its red TrackPoint pointing stick. It is precise and beloved, but it moves the cursor in small, twitchy increments and is prone to a slow "drift" when you let go. On video, that reads as a pointer that jitters and wanders on its own, which is distracting and makes a careful demo look shaky.
Quick ThinkPad tip: If your TrackPoint drifts on screen, lift your finger fully off it for a second to let it recalibrate, and turn on Settings → Bluetooth & devices → Mouse → enhanced pointer precision off for steadier motion while recording.
Then there is the display. Whether you are on a matte FHD ThinkPad panel or a high-res 2.8K OLED, recording the full screen means the text that looks fine to you shrinks the moment a colleague opens the video on a phone. Precise work deserves a recording people can actually read.
The Effortless, Professional Upgrade
Recalibrating the TrackPoint helps, but it will never produce the smooth, guided cursor motion a polished walkthrough needs, and it does nothing for the tiny-text problem. For that, you want a recorder that frames and steadies the shot for you.
Cubix Capture is built for exactly that. On a ThinkPad it works as a quiet director sitting behind your demo:
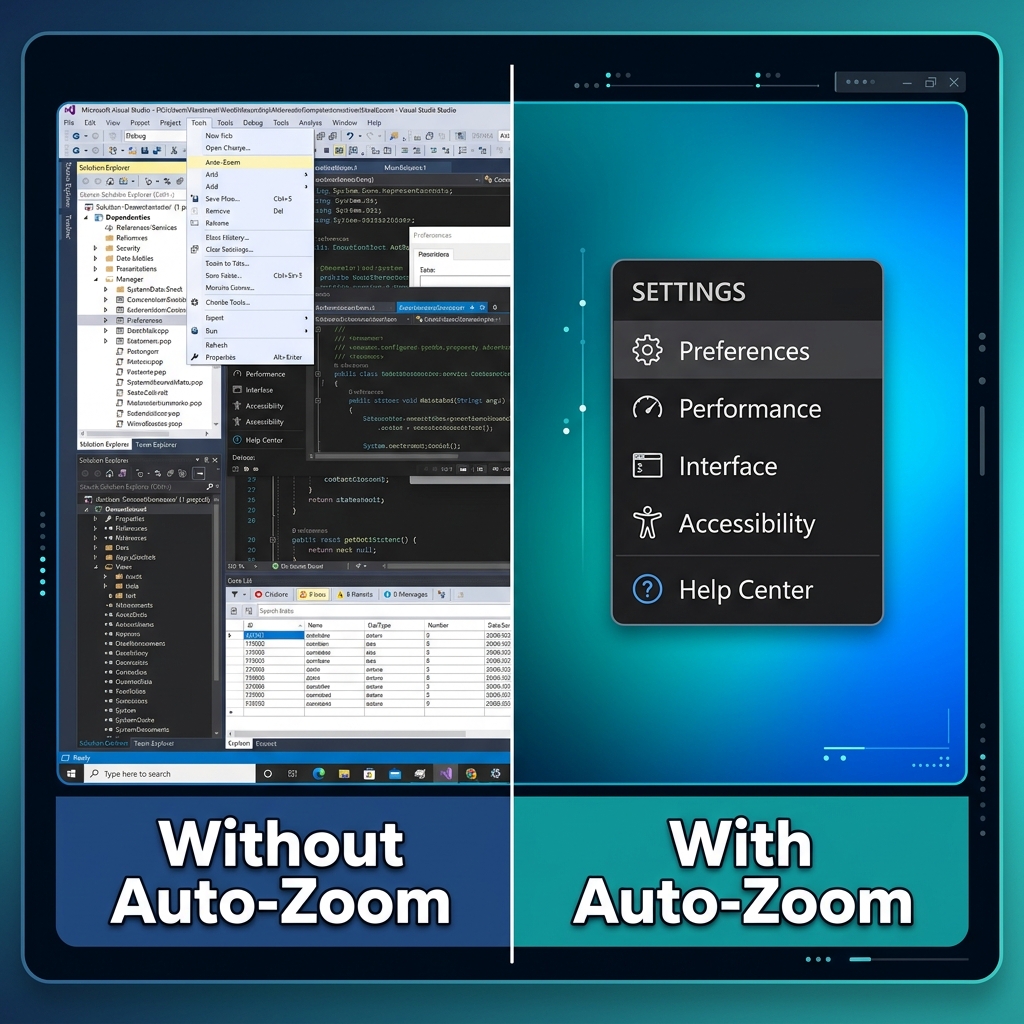
- Action tracking: It follows where you are working and eases the zoom in, so every menu is legible even on a phone screen.
- Cursor smoothing: The TrackPoint's twitch and drift are rendered as one calm, deliberate path.
- Professional backdrop: Flip on your webcam and your real surroundings are swapped for a clean studio look, no green screen.
The native shortcuts are a great foundation. The same approach applies across brands, compare the Dell and Surface Pro guides, or read the full Windows 11 screen recording walkthrough. When you are teaching something that matters, let the recorder handle the framing so your ThinkPad demo comes across as polished as your work.