For a long time, recording your screen on Windows required hunting down and downloading external software. Whether you wanted a simple clip or a full tutorial, you had to install programs that often came with watermarks, time limits, or resource-heavy requirements.
Fortunately, Windows 11 has changed this. Microsoft has integrated quiet, powerful recording tools directly into the operating system. You can now capture high-quality videos of your desktop or individual applications instantly without installing a single thing.
Here is the straightforward guide to recording your screen on Windows 11 using only built-in tools, and how to make sure those raw recordings actually look professional.
The Native Options Already on Your PC
Windows 11 includes two distinct pre-installed utilities designed to capture your screen depending on your workflow.
Method 1: The Snipping Tool (Best for Selected Screen Areas)
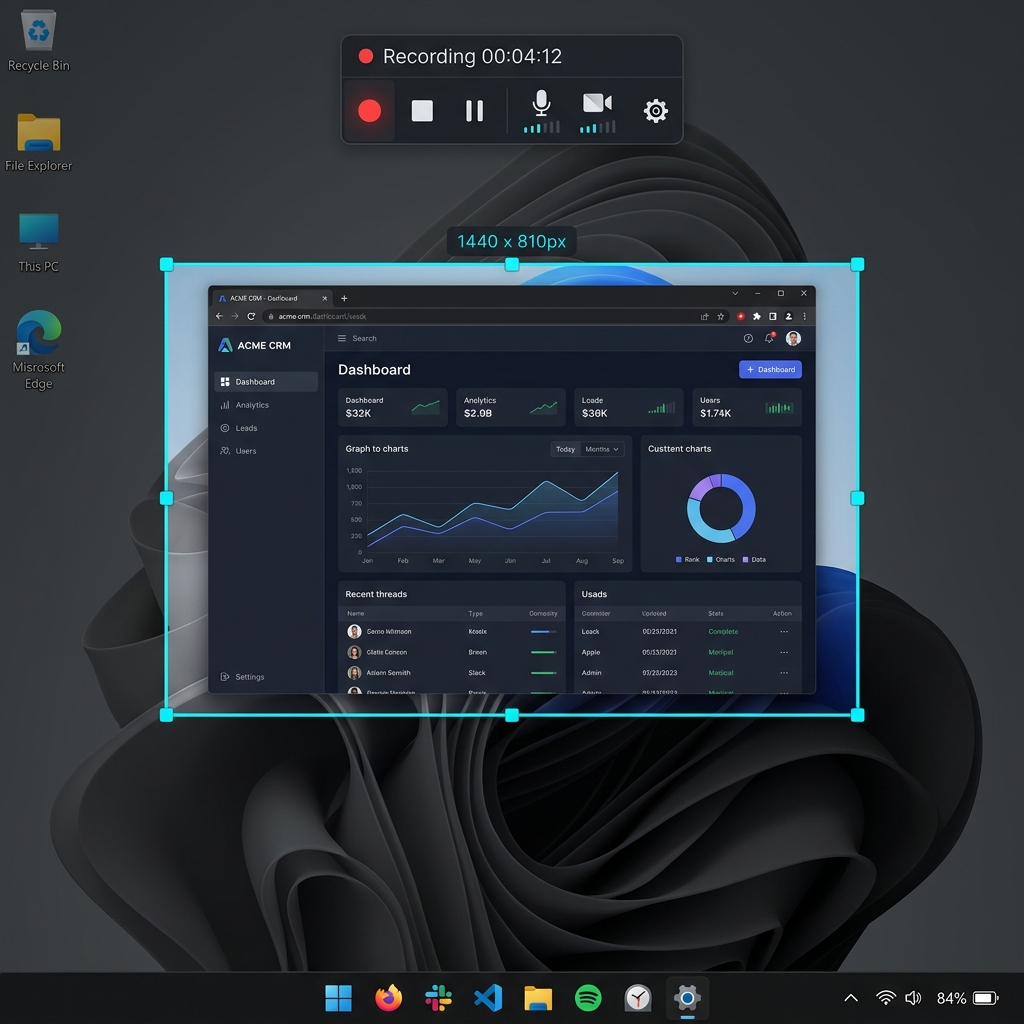
Most Windows users associate the Snipping Tool with static screenshots, but recent Windows 11 updates have turned it into a highly convenient screen video recorder.
- Open your Windows Start Menu, search for "Snipping Tool," and launch the application.
- Tap the Video Camera icon at the top menu bar to switch from screenshot mode to recording mode.
- Click the New button. Your screen will dim, and a crosshair will appear.
- Click and drag your cursor to select the precise portion of the display you want to record (or select the entire screen).
- Toggle your audio settings in the top toolbar to enable or disable your microphone and system audio.
- Click Start. When you are done, click the red stop button, and save your video as an MP4 file.
Method 2: The Xbox Game Bar (Best for Single App Recording)
If you want to quickly record a browser window or a specific application without selecting borders, the Xbox Game Bar is a fast keyboard shortcut.
- Open the application you want to record.
- Press Windows key + G to open the dark Game Bar overlay.
- Locate the Capture widget and click the circular Record button (or use the shortcut Windows key + Alt + R). (Note: Xbox Game Bar is optimized for games and apps, meaning it cannot record your Windows desktop or File Explorer, and it automatically stops recording if you minimize the active window).
Why "Without Installing" Matters
For a lot of people this is not just a preference, it is a hard requirement. If you are on a managed work laptop, a school computer, or any machine where you do not have administrator rights, you simply cannot install new software. The download is blocked before it starts. The built-in Snipping Tool and Game Bar are the answer precisely because they ship with Windows and need no permissions, no setup, and no IT ticket.
So if your goal is a fast capture on a restricted PC, you are already done, the two methods above are all you need. (If even Game Bar is disabled by policy, here is how to record without Xbox Game Bar at all, and if it throws an error, see Xbox Game Bar Not Working, Fix It.)
When the Built-In Recording Isn't Enough
The trade-off for "no install" is that these tools only ever produce raw, flat footage. On your own monitor it looks fine, but shared to a phone or a smaller laptop, the menus shrink and a jittery trackpad cursor makes the tutorial hard to follow.
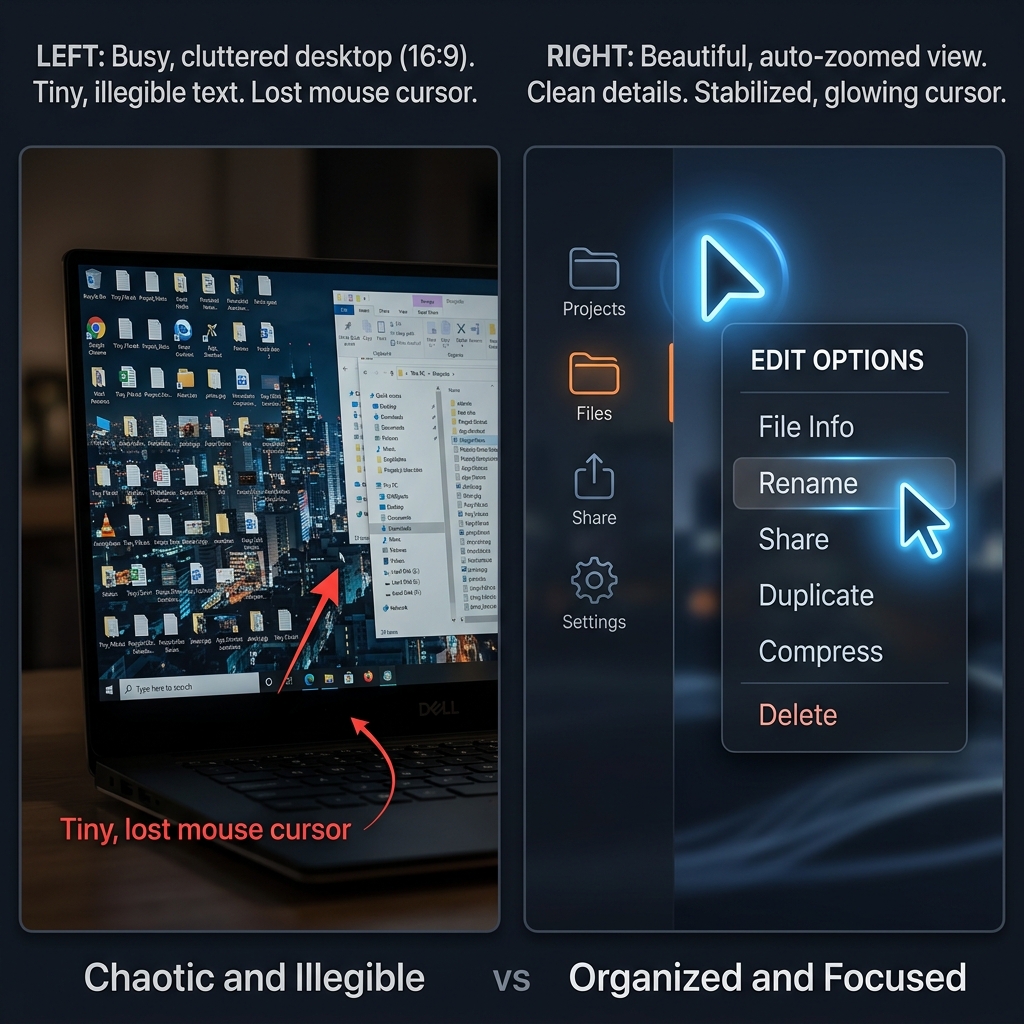
If it is your own machine and the recording is something clients or students will watch, that is the point where a real recorder earns its install. Cubix Capture turns raw screen footage into a polished presentation as you record:
- Auto-zoom follows your clicks and keeps every menu legible on any device.
- Cursor smoothing converts jittery trackpad motion into a clean, deliberate path.
- Instant webcam backgrounds swap your real room for a tidy studio look, no green screen.
Recording on a locked-down PC is a perfect job for the built-in tools, and the full set of native options lives in our Windows 11 screen recording guide. When you own the machine and the video really matters, the upgrade is worth the two-minute download.