It is a scenario that happens all the time. The tutorial was explained perfectly, the presentation was flawless, and the final point was made clearly. But then comes the awkward moment of panic: how do you actually stop the recording?
If you are using the built-in capture tools on macOS, finding the stop button is not always obvious. This often leads to a ruined ending where the mouse pointer frantically circles the screen while the presenter tries to figure out how to turn the video off.
Whether you are finishing up a quick demonstration for a coworker or concluding a professional tutorial, ending your video smoothly is just as important as starting it. Here are the two easiest ways to stop a screen recording on a Mac.
Method 1: The Menu Bar Icon
This is the most common way to end a recording, relying simply on a visual button.
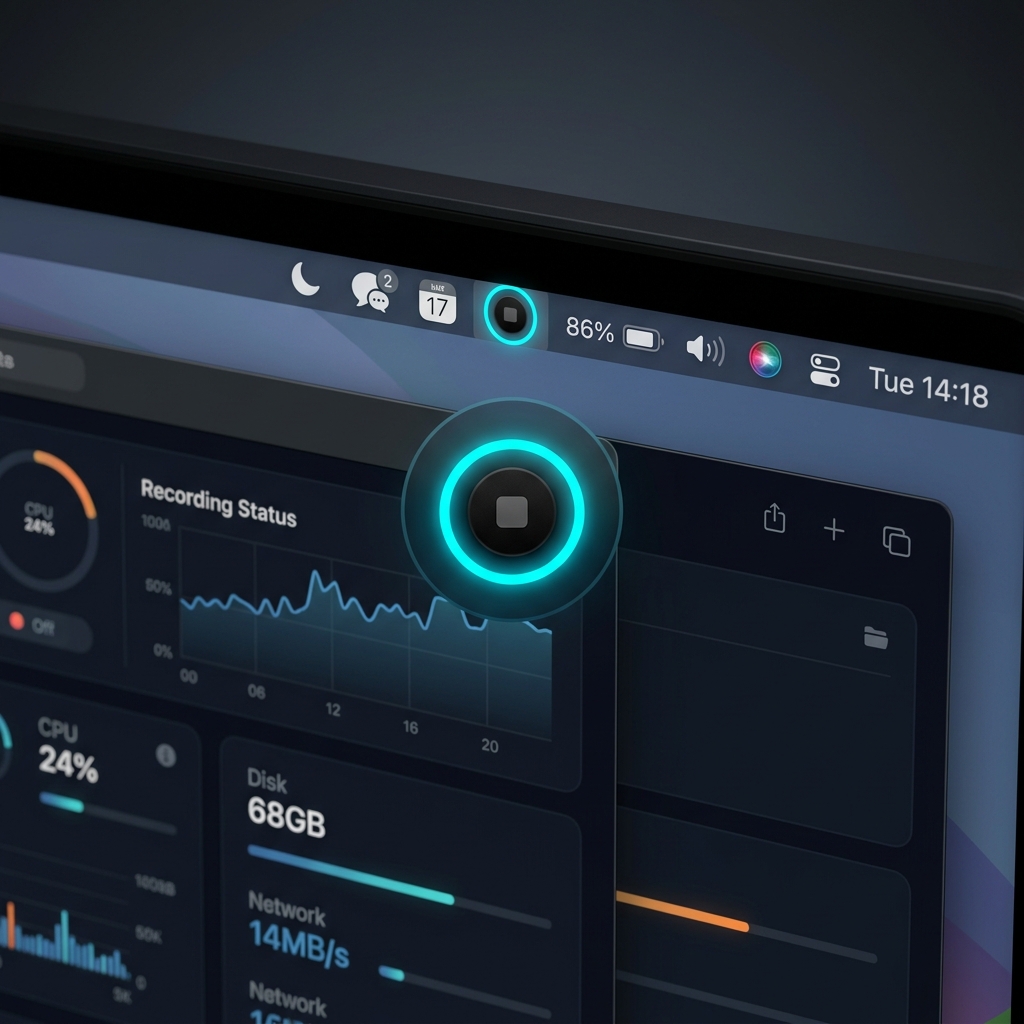
When you start capturing your screen using the Mac’s native tool (Command + Shift + 5), a tiny recording indicator automatically appears at the very top of your display.
- Look at your Menu Bar in the top right corner of your Mac screen, right next to your Wi-Fi and battery icons.
- Find the Stop Icon. It looks like a small circle with a dark square inside of it.
- Click that icon once.
Your video will immediately stop, and a thumbnail of the recording will appear in the bottom right corner of your desktop, indicating that the file has been saved.
Method 2: The Keyboard Shortcut (The Professional Way)
While clicking the menu bar icon is easy, it has one major flaw: your viewers have to watch your mouse drag all the way across the screen to click the stop button at the end of every video. If you want your recording to end cleanly without that distracting mouse movement, you should use the keyboard shortcut.
- When you are ready to finish your video, keep your mouse perfectly still.
- On your keyboard, press Command + Control + Esc at the same time.
The recording will instantly end. This is the best method to use if you want to avoid trimming the last three seconds off every video you make.
Enjoying this read?
Get weekly insights on video editing, AI workflows, and creator growth straight to your inbox.
What If the Recording Won't Stop?
Occasionally the stop button seems to vanish, or the recording keeps running after you click it. Before you panic, work through these in order:
- Look in the menu bar, not the Dock. The stop square lives in the top-right status area near the clock, not at the bottom of the screen. On a Mac with a notch, it can sit just to the left of the camera housing.
- Fall back to the keyboard shortcut. If you cannot spot the icon, Command + Control + Esc ends any recording started from the Command + Shift + 5 toolbar without a single click.
- Check Control Center. On recent versions of macOS, an orange Screen Recording indicator appears in Control Center (the cluster of toggles in the top-right corner). Clicking it also stops the capture.
- Force the frozen app. If you recorded with QuickTime Player and it has hung, press Command + Option + Esc to open Force Quit and close it. In most cases the file is still written to its destination even after a force quit.
If you keep losing the last few seconds of a clip to a cursor racing toward the stop button, that is a trimming chore you should not have to repeat on every video. The cleanest fix is a recorder that ends on a keystroke and lets you cut the tail automatically.
Stopping the Video is Only Half the Battle
Learning how to stop screen recording on Mac elegantly solves the problem of an awkward ending. However, ensuring the entire video is actually helpful and easy to watch is an entirely different challenge.
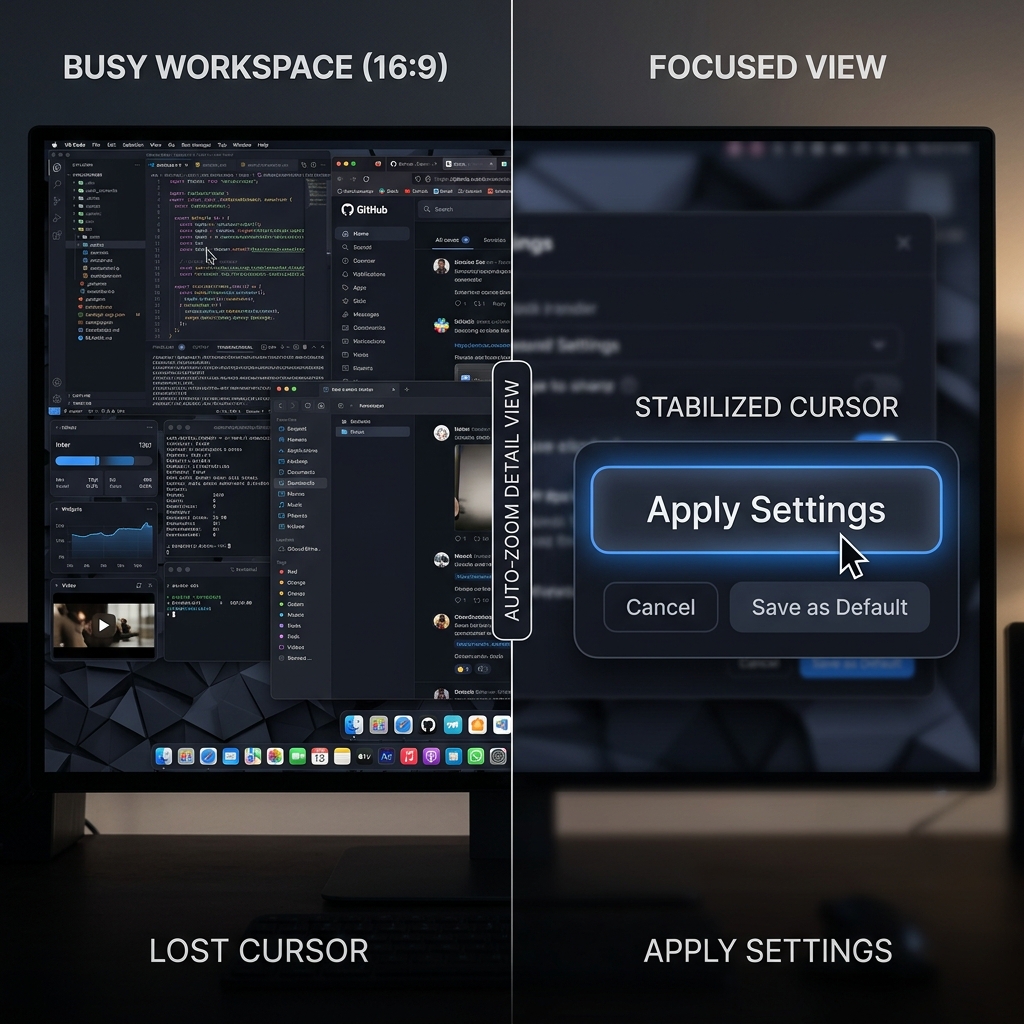
When you capture a high-resolution Mac screen, everything looks incredibly small to the person watching the video, especially if they are viewing it on a mobile phone. Viewers often struggle to read the text you are highlighting or see which tiny menu button you are clicking. Furthermore, natural trackpad movements can make the mouse cursor jump around, creating a distracting and exhausting viewing experience.
Effortless, Human-Friendly Recordings
You can try to fix these visual issues manually by bringing your video into heavy editing software, zooming in on specific actions, and cutting out erratic mouse movements. But this takes a massive amount of time.
If your goal is to provide real-life solutions and helpful information without spending hours editing, the smartest approach is to use a tool that does the visual heavy lifting for you. This is where Cubix Capture completely changes the workflow.
Cubix Capture is designed to make your tutorials look incredibly professional the moment you hit the stop button:
- Auto-Zoom: It acts as an automatic director, smoothly zooming in on the exact areas of the screen you are interacting with, ensuring your audience never misses a detail.
- Smooth Cursor: It removes the jittery, nervous movements of a standard trackpad, replacing them with a sleek, calm cursor glide that guides the viewer’s eye naturally.
- Live Backgrounds: If you are recording your face alongside the tutorial, it instantly replaces messy environments with clean, distraction-free backgrounds.
Ending your recording smoothly is a great start. By combining a clean ending with tools designed to provide flawless visual clarity, your screen recordings will immediately become more professional, engaging, and genuinely useful to anyone watching them.
Related reading:
- How to Screen Record on Mac: All Methods for 2026
- How to Screen Record on Mac and Edit It
- Where Do Screen Recordings Go on Mac?
Don’t miss the next one.
Join our newsletter for exclusive tips, product updates, and the latest from the Cubix team.