When you search the internet for the best screen recording software, one name constantly dominates the conversation: OBS Studio (Open Broadcaster Software). It is completely free, open-source, leaves no watermarks, and imposes zero time limits on your recordings.
However, when you actually download and open OBS for the first time, it can be incredibly intimidating. Because it is the industry standard for professional Twitch streamers and live broadcast television, the interface is packed with complex audio mixers, transition panels, and streaming keys.
If your goal is simply to record a clean video of your desktop for a YouTube tutorial, a presentation, or a software bug report, you can ignore 90% of those buttons. Here is the absolute beginner’s guide to setting up OBS Studio strictly for screen recording.
Step 1: The Auto-Configuration Wizard
The best thing about modern OBS is that it can optimize itself based on your computer's hardware.
- Download OBS Studio from the official website and open the application.
- Upon opening, a box called the Auto-Configuration Wizard will appear.
- Choose the option that says "Optimize just for recording, I will not be streaming."
- Click Next, leave the resolution and frame rate on their default settings, and click Apply Settings. OBS has now quietly configured the best video quality for your specific machine.
Step 2: Understanding Scenes and Sources
To make OBS work, you only need to understand two concepts in the bottom-left corner of the screen: Scenes and Sources.
- Think of a Scene as an empty stage. (OBS gives you a default blank Scene when you open it).
- Think of Sources as the actors you place on that stage like your screen, your microphone, or your webcam.
Step 3: Adding Your Screen
Now, we need to tell OBS to look at your computer monitor.
- In the Sources box, click the (+) icon.
- If you are on Windows, select Display Capture. If you are on a Mac, select macOS Screen Capture.
- Name it (e.g., "My Desktop") and click OK.
- A preview window will appear showing a mirror effect of your screen. Click OK again. You will now see your desktop filling the dark canvas in the middle of OBS.
Enjoying this read?
Get weekly insights on video editing, AI workflows, and creator growth straight to your inbox.
Step 4: Adding Your Audio
You want to make sure your audience can hear you.
- Go back to the Sources box and click the (+) icon again.
- Select Audio Input Capture. Name it "My Microphone" and click OK.
- A dropdown menu will appear. Select your headset or USB microphone from the list, and click OK.
- If you look at the Audio Mixer panel in the bottom center, you should now see a green bar bouncing when you speak.
Step 5: Record and Save
You are fully set up! Look to the far right side of the screen under the Controls panel.
- Click Start Recording.
- Minimize OBS, do your presentation on your desktop, and when you are finished, open OBS back up and click Stop Recording.
- To find your video file, go to the top menu bar, click File, and select Show Recordings.
The Massive Drawback of Raw OBS Files
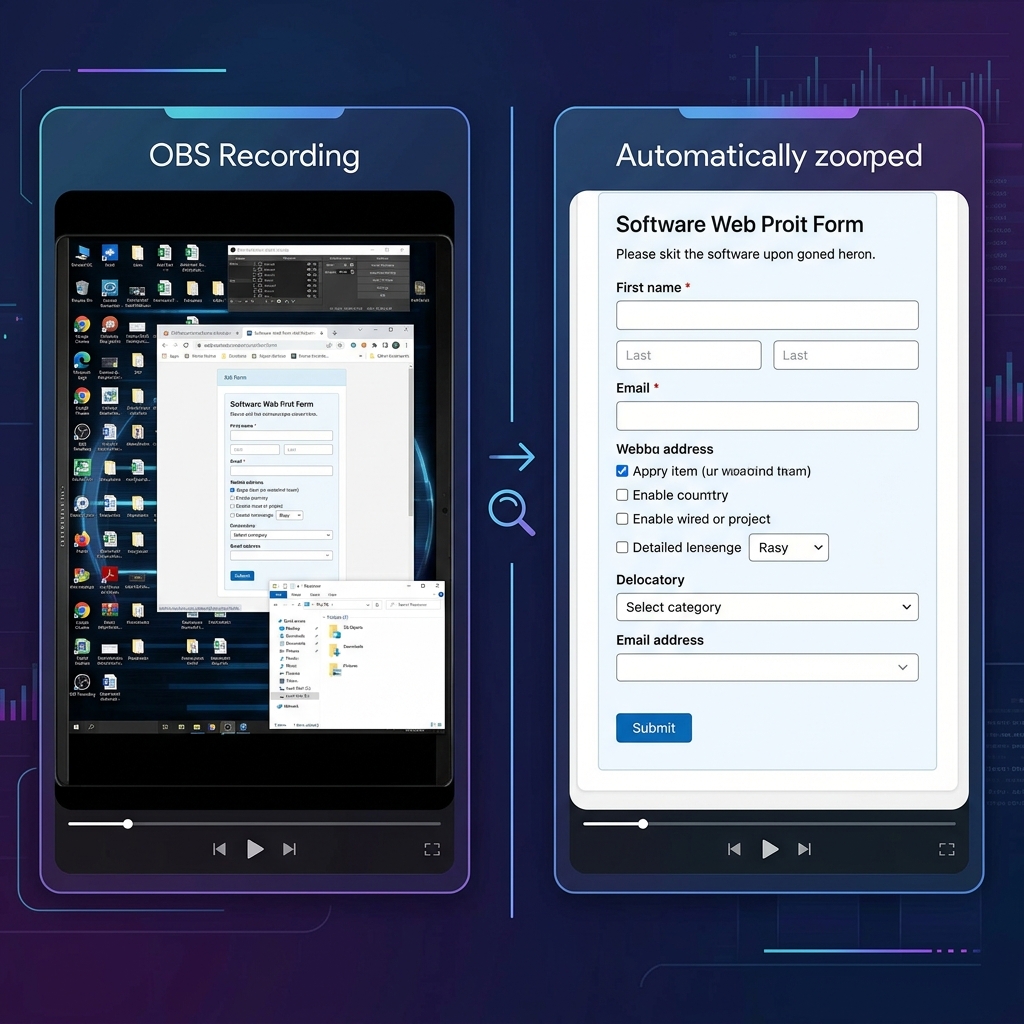
Learning the basics of OBS is a fantastic technical milestone. It gives you a pristine, high-quality video file. But there is a hidden catch: OBS captures exactly what it sees. It acts as a passive security camera for your monitor.
If you are recording a tutorial on a 27-inch desktop monitor, your software menus look perfectly readable to you. However, when you upload that raw OBS file and a viewer watches it on their smartphone, your entire desktop is shrunk down to fit a 6-inch screen. Your text becomes microscopic.
Additionally, navigating with a physical mouse creates jumpy, erratic cursor movements. To fix this "tiny text" and shaky mouse problem, you have to take your heavy OBS file, drop it into a complex editor like Premiere Pro, and spend hours manually adding zoom keyframes and transitions.
📖 Keep reading: OBS screen recorder setup, tips, and alternatives, OBS vs Cubix Capture: which should you use, and how to fix an OBS black screen recording.
The Frictionless Alternative for Creators
If your goal is to create content that genuinely engages and teaches your audience, you should not have to spend three hours editing a five-minute video. Instead of wrestling with a massive broadcast tool and heavy post-production, the modern solution is to use software that actively edits your presentation while you record it.
This is exactly why Cubix Capture is the ultimate replacement for heavy desktop recorders. Rather than capturing a flat, static pixel map of your monitor, Cubix operates as an intelligent workflow engine that polishes your video instantly:
- Adaptive Viewport Cropping: It automatically analyzes the dimensions of your active application and dynamically crops out dead desktop space, elegantly framing the active window so mobile viewers can read every single detail without straining.
- Dynamic Keystroke Visualization: Instead of just recording a screen, it actively translates your complex keyboard shortcuts (like Ctrl+Shift+P) into beautiful, non-intrusive visual overlays on the screen, making technical tutorials infinitely easier to follow.
- Zero-Render Instant Export: While OBS requires you to manage massive local file sizes and endure long video rendering times in an editor, Cubix packages your visually perfect, auto-zoomed presentation instantly, providing a lightweight, shareable link the moment you finish speaking.
Knowing how to set up a basic scene in OBS Studio is a great skill for general recording. But when it is time to build a professional tutorial, guide a client, or share an important digital lesson, upgrading to a platform that guarantees effortless visual editing ensures your audience actually enjoys and understands the message you are sharing.
Don’t miss the next one.
Join our newsletter for exclusive tips, product updates, and the latest from the Cubix team.