If you have ever searched for "best free screen recorder," you have undoubtedly been told to download OBS Studio. Open Broadcaster Software is the undisputed heavyweight champion of the video world. It is completely free, open-source, and imposes absolutely zero watermarks or time limits on your recordings.
However, because OBS is built to handle professional live television broadcasts and high-end Twitch streams, opening it for the first time can feel like sitting in the cockpit of a commercial airliner.
If you just want to record a clean tutorial, a webinar, or a software demo, you do not need to understand 90% of the buttons on the screen. Here is a streamlined guide on how to set up OBS, a few pro-tips to guarantee quality, and the best alternatives if the software is simply too heavy for your needs.
Step-by-Step OBS Setup for Beginners
You can get OBS running perfectly in less than three minutes by following a few simple steps and letting the software do the heavy lifting.
1. The Auto-Configuration Wizard
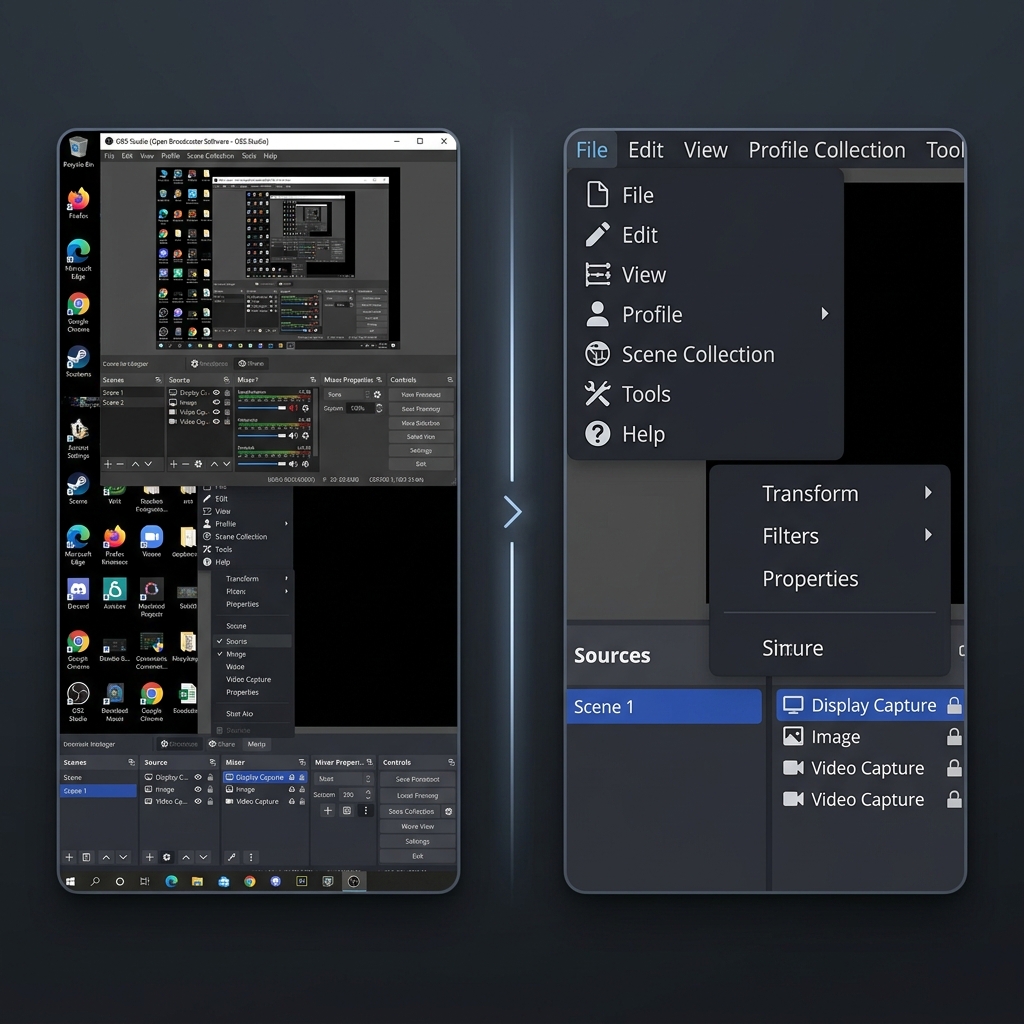
When you launch OBS for the first time, a wizard will pop up. If it doesn't, go to Tools > Auto-Configuration Wizard.
- Select "Optimize just for recording, I will not be streaming."
- Leave the base resolution matched to your monitor and let it auto-select your framerate (usually 60 FPS).
- OBS will run a quick benchmark test on your computer and automatically apply the best video encoding settings for your specific hardware.
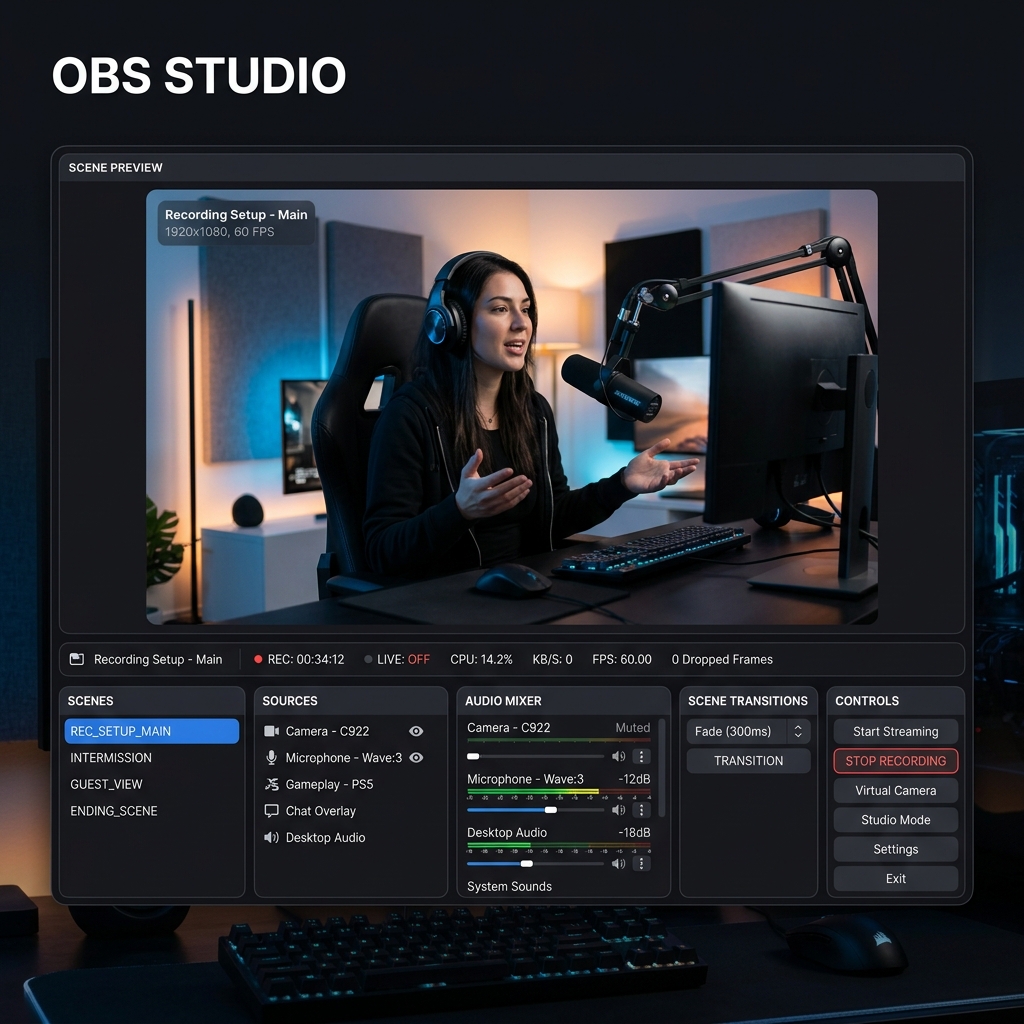
2. Create Your Scene
Look at the bottom-left corner of the window. You will see a box labeled Scenes. (By default, there is already one blank scene). Think of a scene as an empty stage.
3. Add Your Display and Audio Sources
Next to the Scenes box is the Sources box. This is where you add elements to your stage.
- Add the Screen: Click the (+) icon and select Display Capture (or macOS Screen Capture if on a Mac). Name it, and click OK. You will see a preview of your monitor.
- Add Your Voice: Click the (+) icon again and select Audio Input Capture. Select your headset or external USB microphone from the dropdown list.
- Note: OBS will usually capture your internal computer sound automatically under the "Desktop Audio" track in the mixer.
4. Hit Record
Look to the far right under the Controls panel. Click Start Recording. When you are done, click Stop Recording. You can find your file by clicking File > Show Recordings at the top left of the screen.
3 Pro-Tips for Flawless Recordings
If you want to move past the absolute basics, tweak these three settings to ensure your videos are fail-proof.
- Record in MKV, Not MP4: Go to Settings > Output > Recording and change the Recording Format to
.mkv. If OBS crashes or your computer loses power while recording an MP4, the entire video file is corrupted and permanently lost. If an MKV recording crashes, the file is safely preserved right up to the second it stopped. (You can instantly convert it later by clicking File > Remux Recordings). - Separate Your Audio Tracks: In the Output settings, you can tell OBS to record your microphone and your desktop audio on two different tracks. This is a lifesaver for editing. If your game or system audio is too loud, you can lower it in post-production without lowering the volume of your speaking voice.
- Use Game Capture for Gaming: If you are recording a PC game, never use "Display Capture." Use Game Capture. It hooks directly into the graphics card, using fewer resources and preventing lag, while ensuring accidental desktop pop-ups do not ruin your footage.
Enjoying this read?
Get weekly insights on video editing, AI workflows, and creator growth straight to your inbox.
The Problem With Raw Capture Software
Learning to configure OBS gives you complete control over your bitrates and audio routing. However, OBS operates exactly like a security camera it blindly captures whatever is on your monitor.
If you are recording a software tutorial on a large desktop screen, the interface looks perfect to you. But when you upload that raw OBS file and a client watches it on their smartphone, the entire presentation shrinks. The text becomes microscopic, and the viewer has to squint just to see where your mouse is. Furthermore, navigating with a physical mouse creates erratic, jumpy cursor movements on video.
To fix the "tiny text" and shaky cursor problems, you have to take your heavy OBS file, import it into a complex editing program like Premiere Pro, and spend hours manually adding zoom keyframes.
📖 Keep reading: a beginner's guide to recording your screen with OBS, how OBS Studio compares to every other screen recorder, and why OBS is overkill for most screen recordings.
The Best OBS Alternatives in 2026
If you do not want to deal with complex audio routing, heavy file sizes, and hours of post-production editing just to make a video readable, you need a different tool. Here are the best alternatives to OBS Studio this year.
1. Cubix Capture - The Ultimate Visual Producer
If you want to create flawless, professional tutorials without the headache of editing, Cubix Capture is the premier alternative. Rather than blindly capturing a flat image of your desktop, it acts as an intelligent workflow engine that edits your video while you speak:
- Algorithmic Screen Choreography: It completely solves the mobile-viewing problem. The software actively tracks your intent and seamlessly scales up your active windows, ensuring your text is beautifully legible on any device without manual zooming.
- Frictionless Cursor Fluidity: It intercepts the erratic, nervous shakes of a physical mouse and translates your movements into a cinematic, elegant glide that guides the viewer's eye perfectly.
- Zero-Render Polish: Unlike OBS, which requires heavy local files and long export times, Cubix processes your optimized, automatically framed presentation instantly, allowing you to share a polished link the moment you finish recording.
2. Loom - The Quick Messenger
If your only goal is to fire off a rapid, casual message to a coworker and you do not care about cinematic quality or zoom tracking, Loom is fantastic. It lives in your browser, captures your screen and webcam, and provides a shareable link instantly. It is perfect for asynchronous office communication, though its free tier is limited to short clips.
3. Camtasia - The Heavy Editor
If you specifically want a traditional recording experience but with an easier editing timeline than professional broadcast editors, Camtasia remains a solid choice. It captures your screen reliably and drops the footage directly into a built-in timeline where you can manually add callouts, arrows, and transitions. It requires manual labor and has a steep price tag, but it is much more user-friendly for beginners than enterprise software.
OBS Studio is a phenomenal piece of engineering. But when it is time to build a professional tutorial, guide a client, or share an important digital lesson effortlessly, upgrading to a platform tailored for visual clarity ensures your audience actually enjoys and understands the message you are sharing.
Don’t miss the next one.
Join our newsletter for exclusive tips, product updates, and the latest from the Cubix team.