
If you scroll through YouTube or browse high-end online academies, it is easy to look at the crisp video quality, pristine audio, and cinematic camera zooms and assume you need a multi-thousand-dollar studio setup to compete. You picture heavy boom mics, DSLR cameras, and complex lighting grids cluttering your workspace.
But here is a refreshing truth: You don't.
In 2026, the equipment framework for producing elite tutorials has shifted. Audiences no longer care about overly engineered studio spaces; they care about clarity and pacing. If they can hear your voice clearly, see your screen flawlessly on a mobile device, and follow your steps without getting bored, your tutorial has succeeded.
Whether you are teaching coding, digital design, business spreadsheets, or online courses, here is the ultimate, no-nonsense equipment blueprint to create professional tutorial videos on any budget.
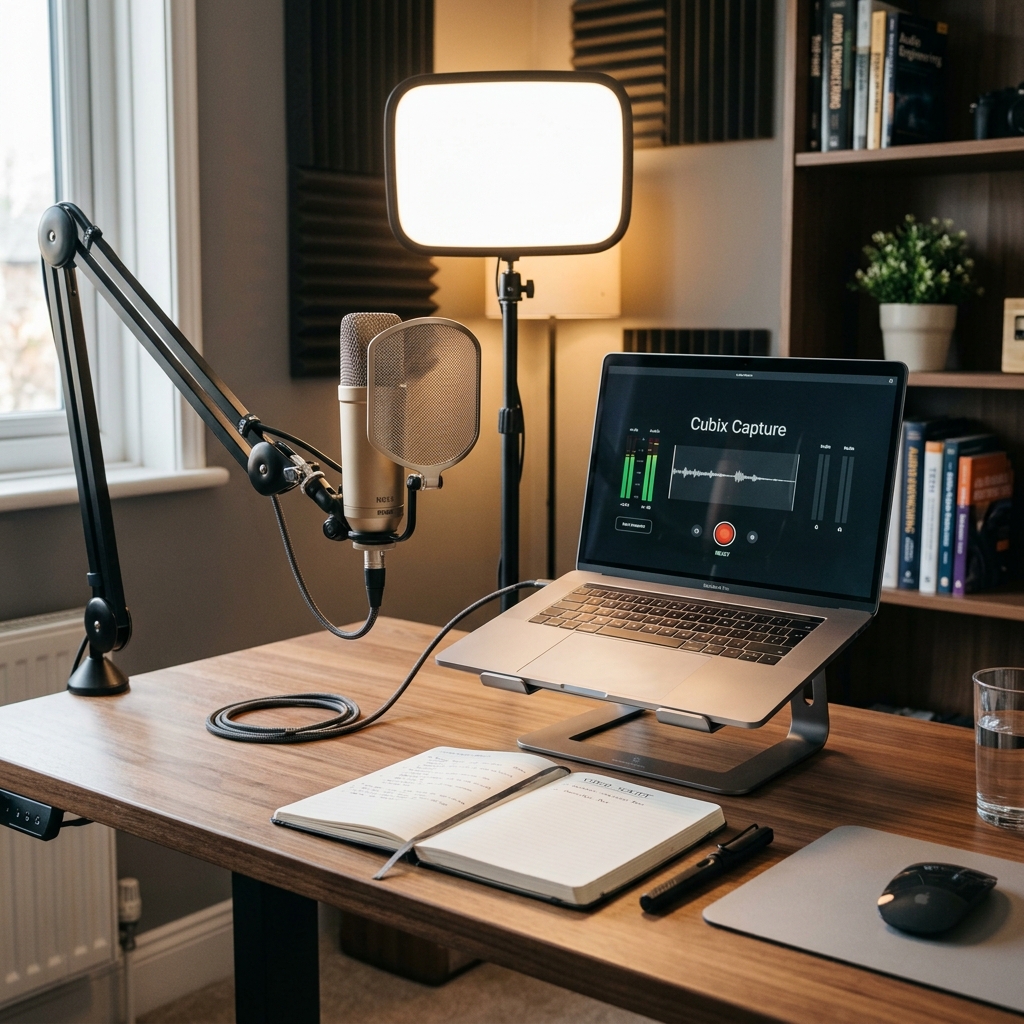
1. The Core Engine: Your Computer
Your computer is your production hub. You don’t need an overpowered gaming rig, but you do need enough processing headroom to encode video files smoothly without lagging your system.
- The Baseline: A computer with at least 16GB of RAM and a modern processor (such as an Apple M-Series chip or an Intel Core i5/AMD Ryzen 5 and above).
- The Storage Rule: Video files eat up local memory rapidly. Always aim to have at least 50GB of free space on your internal drive, or invest in a fast, external Solid State Drive (SSD) to offload your recorded modules.
2. Audio: Your Most Critical Investment
If your video resolution drops slightly, your audience will keep watching. But if your audio has a loud background hiss, room echoes, or sounds like you are presenting inside a tin can, viewers will click away within ten seconds. Good audio builds immediate trust and authority.
- The Trap to Avoid: Never use the built-in microphone on your laptop or the mic attached to your wired smartphone earbuds. They pick up immense ambient room noise, typing clacks, and internal computer fan whirs.
- The Budget Champion (~$50 - $100): A reliable USB Condenser or Dynamic Microphone (like the Audio-Technica ATR2100x-USB or Blue Yeti Nano). These plug directly into your computer with no extra gear required and deliver immediate studio-grade warmth to your voice.
- The Pro Standard (~$150+): A dedicated dynamic microphone paired with a simple USB audio interface (like the Røde PodMic or Shure MV7). Dynamic mics are exceptional because they naturally reject background noise, like air conditioners or distant traffic.
3. Lighting: Maximizing Your Visual Polish
You don't need expensive cinema lights, but you do need to be easily visible to your students. Proper lighting removes grainy digital artifacts from your webcam and ensures your expressions look natural.
- Free Alternative: Position your desk directly in front of a bright window. Diffused, natural daylight is the most flattering light source available—just ensure the window is in front of you, not behind you (which creates a dark silhouette).
- The Desktop Fix (~$30 - $60): A simple LED Ring Light or Desktop Key Light mounted directly behind your monitor. Position it slightly above your eye level and angle it downward to eliminate harsh shadows under your eyes.
Enjoying this read?
Get weekly insights on video editing, AI workflows, and creator growth straight to your inbox.
4. Video: The Camera
While your screen content is the main event, showing your face in an introductory bubble or a concluding wrap-up adds an essential human element to your online lessons.
- The Simple Route: A standard 1080p USB External Webcam (like the Logitech C920 or Anker PowerConf). They are inexpensive, highly reliable, and plug directly into your system.
- The Mobile Hack: Use your smartphone. Modern iPhones and Android devices house cameras that rival entry-level DSLRs. You can use native tools (like Apple's Continuity Camera) or apps like Camo to stream your phone's crisp back camera feed straight into your PC as a premium webcam.
5. Software: The Digital Camera Operator
The traditional way to make tutorials is highly inefficient: you record your raw screen using a basic tool, dump the file into a complex multi-track timeline editor, and waste hours manually cropping frames, smoothing out mouse lines, and adding zoom keyframes.
Modern tutorial makers bypass this post-production bottleneck entirely by using automated presentation recording engines like Cubix Capture.
Instead of acting like a passive recorder, Cubix Capture functions as a smart virtual director while you speak:
- Algorithmic Auto-Zooming: Over half of your viewers watch tutorials on small smartphone screens. Cubix Capture automatically tracks your cursor targets and clicks, smoothly panning and magnifying dropdown menus or code blocks in real-time so your content is perfectly legible on mobile without manual timeline keyframing.
- AI Cursor Path Smoothing: It intercepts naturally frantic or jittery micro-movements from your physical trackpad or mouse and translates them into an elegant, cinematic glide.
- Instant Studio Framing: It automatically isolates your open application windows and frames them against gorgeous canvas backgrounds, while placing your webcam into a clean, floating geometric bubble with automated background blurring natively.
Studio Deployment Blueprint
Once you have gathered your gear, setting up your recording zone correctly takes less than five minutes. Follow this procedural framework before hitting record:
-
Set Up Your Microphone Proximity: Position your audio capsule for maximum vocal depth. Mount your microphone on a desktop stand or boom arm. Position it roughly 4 to 6 inches away from your mouth, angled slightly toward your chin. This close proximity ensures your voice sounds rich and warm while naturally minimizing room echo.
-
Configure Your Presentation Lighting: Avoid harsh shadows and digital grain. Turn on your desktop LED light or face your natural window light. Ensure your primary light source sits directly behind your camera lens—never position a bright window or lamp directly behind your back, as it will wash out your webcam frame.
-
Sanitize Your Desktop Canvas: Eradicate background visual noise before filming. Hide your physical Windows or Mac desktop icons, close irrelevant browser tabs, and hide your browser bookmarks bar (
Ctrl + Shift + B). Most importantly, toggle your operating system settings to Do Not Disturb mode to block personal alerts from popping up mid-sentence. -
Run a 10-Second Test Record: Execute a brief audio and video check. Open your recording software, look at your input channels, and record a brief 10-second test snippet of you speaking while moving your mouse. Play it back to ensure your microphone volume is crisp, your webcam is in focus, and your software is capturing your targeted application flawlessly before filming the full lesson.
Summary Equipment Checklist
| Studio Layer | Budget Setup | Professional Setup |
|---|---|---|
| Computer Engine | 16GB RAM Laptop (Mac or PC) | 32GB RAM Dedicated Desktop Workstation |
| Audio Capture | USB Condenser Mic (~$50) | XLR Dynamic Mic + Audio Interface (~$250+) |
| Visual Framing | Native Phone Camera or 1080p Webcam | Mirrorless DSLR Camera + Cam Link 4K |
| Lighting Layer | Natural Window Daylight | Adjustable Desktop LED Panel Light |
| Workflow Engine | Cubix Capture (Automated Studio) | High-End Multi-Track Timeline Editor |
Ultimately, your audience isn't analyzing the price tag of your gear; they are focusing on how easily they can absorb your knowledge. By securing a reliable USB microphone, sitting in front of a bright window, and letting an automated recorder like Cubix Capture handle the zooming, framing, and cursor smoothing for you, you can produce studio-grade educational content without the studio-grade cost.
Related reading:
- How to Record Screen and Webcam Simultaneously
- How to Record Your Screen Without Background Noise
- Why Your Screen Recordings Look Unprofessional (And How to Fix It)
📖 Keep reading: once your gear is sorted, dial in the perfect screen recording settings for tutorial videos.
Don’t miss the next one.
Join our newsletter for exclusive tips, product updates, and the latest from the Cubix team.