You spent forty minutes tuning a prompt. The model finally returns a clip with cinematic lighting, believable motion, and texture that actually feels shot on camera—not pasted together.
Then you try to save it.
Maybe the platform gates 1080p or 4K downloads behind a paid tier. Maybe you are building a YouTube tutorial and need to show the process: prompt panel, seed settings, render queue, and the finished output in one narrative. You hit record with a built-in snipping tool, play the clip full-screen, and export something that looks nothing like what you saw in the player—banding in the shadows, stutter in the motion, colors that look washed out on upload.
Teaching the workflow (not just the render)? Cubix Capture auto-zooms prompts and outputs so viewers on phones can read every step—no Premiere keyframe pass. Get started free · Windows · Mac
This guide covers preserving generative AI video quality when you cannot download the master file—plus when OBS high-bitrate capture is the right salvage move. File-size help: Screen Recording File Too Large.
Why AI video is harder to capture than a spreadsheet demo
Traditional screen recordings fail on two different problems:
1. Compression vs. detail density
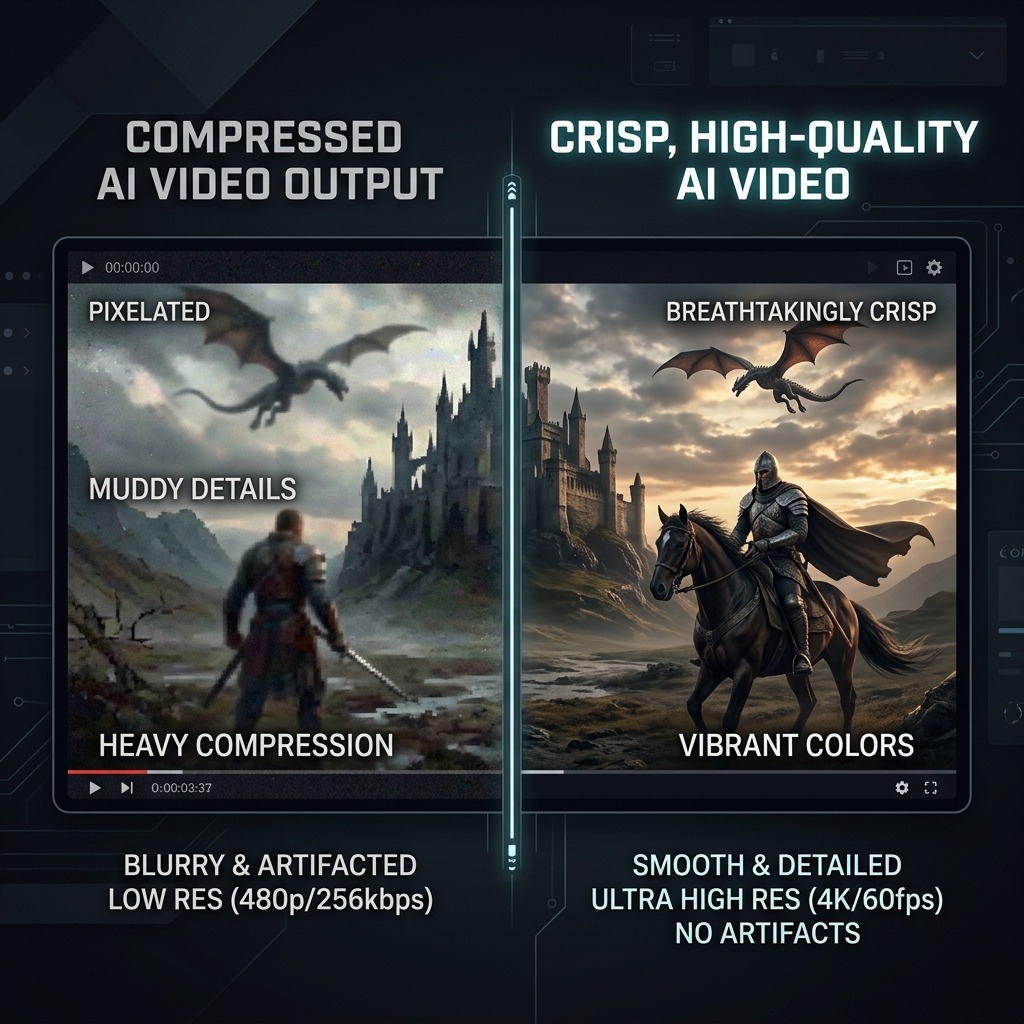
Models like Runway, Pika, Sora-class tools, and Veo outputs often contain high-frequency detail: grain, hair, water, smoke, bokeh. Aggressive encoders (default Snipping Tool, lightweight browser extensions) optimize for small files. They treat that detail as noise and throw it away—hence the muddy, blocky result.
2. Frame-rate and playback mismatch
If the player renders at 24 fps but your recorder samples the desktop at 60 fps (or the opposite), you get judder and duplicated frames. AI motion is already subtle; stutter makes it look cheap.
| Symptom | Likely cause | First fix |
|---|---|---|
| Color banding in gradients | Low bitrate + 4:2:0 subsampling | Higher bitrate or native download |
| Stuttering motion | FPS mismatch | Match recorder FPS to player |
| Soft, blurry UI text | Upscaling a small player window | Full-screen player or native file |
| Huge files, still bad | Recording entire 4K desktop | Capture only the player region |
Decision tree: download, extract, or record?
Before you open any recorder, ask which outcome you need:
| Goal | Best path |
|---|---|
| Archive the final clip for editing or reposting | Native download or network extract |
| Prove settings/prompts in a tutorial | Presentation capture (readable UI + output) |
| Stream a live preview to social | High-bitrate OBS region capture |
Grabbing the source file always beats re-encoding pixels off your monitor—when the platform allows it.
Method 1: Use the platform download (when available)
Obvious but skipped: export at the highest tier your account allows, then verify dimensions in your OS file inspector (not just the in-app label). If you plan to edit in the Cubix video editor afterward, import the native MP4/MOV rather than a screen capture—you keep generation detail for color work and reframes.
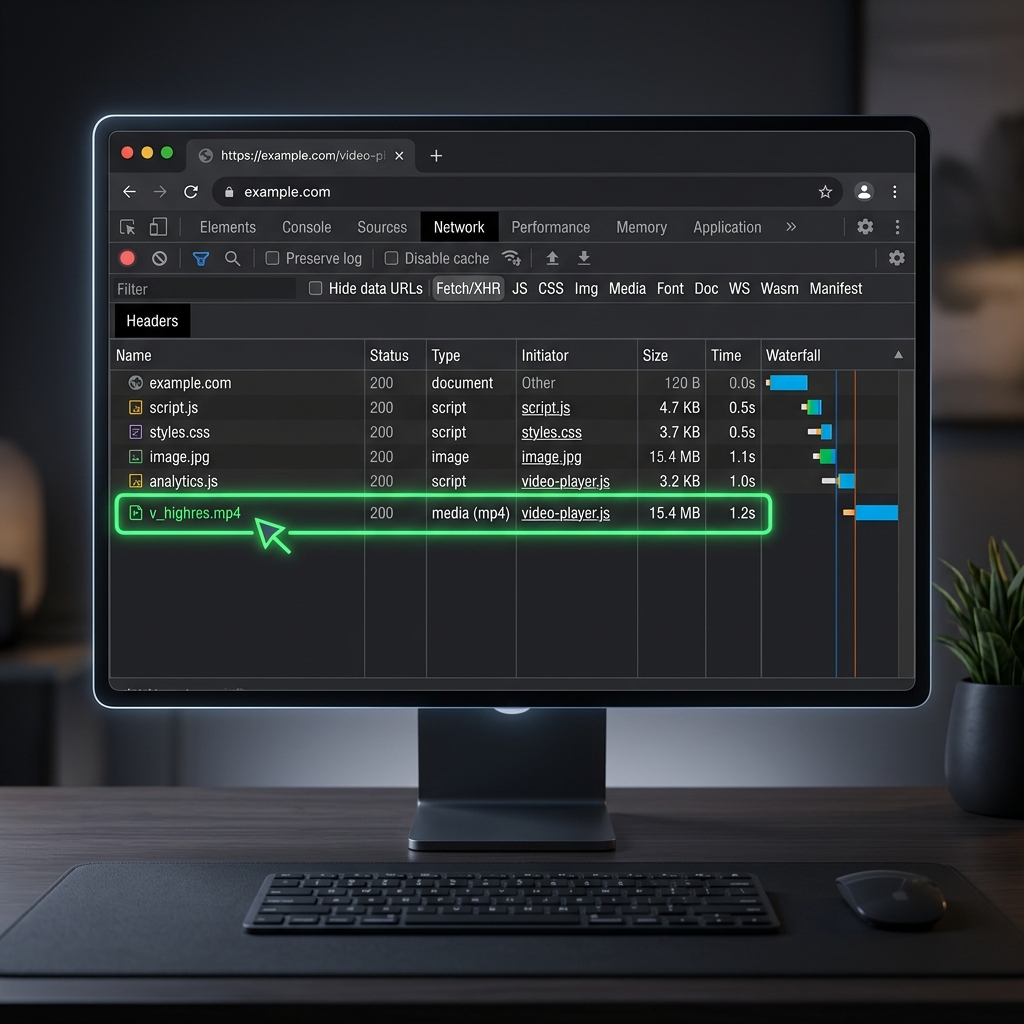
Method 2: Extract the .mp4 from the browser (Network tab)
Many web UIs stream a finished .mp4 even when the download button is paywalled or hidden.
- Open Developer Tools (F12) → Network.
- Filter by Media or search
mp4. - Play the generation once; watch for a large media request.
- Open in a new tab → Save As.
You are not bypassing licensing—you are avoiding an unnecessary generation loss from screen capture. Always respect the tool's terms of service and export rights.
When this fails: Some players use encrypted streams or blob URLs that are not a direct file. Fall back to Method 3.
Enjoying this read?
Get weekly insights on video editing, AI workflows, and creator growth straight to your inbox.
Method 3: High-bitrate OBS capture (when you must record the player)
When download/extract is impossible, OBS Studio with deliberate settings beats default OS capture for AI footage.
Recommended starting points:
- Settings → Output → Advanced → Recording
- Encoder: Hardware (NVENC / Apple VT) if playback stutters on software x264
- Rate control: CQP or quality-prioritized VBR (not low CBR)
- CQP: Try 16–20 (lower = higher quality, larger files; 18 is a common starting point)
- Color: Rec. 709, Full range when available
- Canvas: Match the player region, not the whole 4K desktop
- FPS: Match the player (often 24 or 30)
Full-screen the player before recording. Scaling a tiny preview in post destroys resolution permanently.
For OBS philosophy vs. presentation recorders, read OBS vs Cubix Capture: Why Most People Should Switch—OBS wins raw flexibility; it does not auto-frame your UI for mobile viewers.
Method 4: Recording the AI workflow (not just the output)
Educators need three beats in one video: prompt, controls, and result. A wide static capture makes all three unreadable on a phone.
That is a different problem from bitrate—it is framing. Presentation recorders apply auto-zoom and cursor smoothing at capture time so each step stays legible without a Premiere keyframe pass. Cubix Capture is built for that job: zoom follows typing and clicks, the cursor reads calm under magnification, and live backgrounds stage the app instead of your desktop clutter.
Pair capture with post only when needed: rambling voiceover trim or captions belong in an AI editor like Cubix after you have a clean master—not in a low-bitrate second capture.
Common mistakes that ruin AI footage
- Recording the whole monitor instead of the player—wastes pixels and bitrate.
- Double compression—screen capture → upload → platform re-encode. Start from the highest-quality source you can.
- Ignoring audio—if you narrate over the clip, record voice on a separate track when possible.
- Confusing "AI video" with "AI screen recorder"—this article is about generative outputs (model renders). For intelligent zoom on software demos, read What Is Auto-Zoom Screen Recording?.
Bottom line
- Saving the render: Prefer download or Network extraction over screen recording.
- Must record the player: OBS with CQP/VBR, matched FPS, full-screen player, tight region.
- Teaching the workflow: Use capture-time framing so prompts and outputs stay readable—Cubix Capture on Windows or Mac.
AI & capture cluster:
- AI vs Traditional Screen Recorder (2026)
- How Creators Use AI Screen Recording in 2026
- The Death of Manual Screen Editing
Related reading:
- 4K Screen Recording: When You Need It and When You Don't
- Screen Recording File Too Large? Here's the Fix
- How to Compress Video for YouTube
Don’t miss the next one.
Join our newsletter for exclusive tips, product updates, and the latest from the Cubix team.