Whether you are saving a digital receipt, capturing a weird error message to send to IT, or grabbing a visual reference for a design project, taking a screenshot is a daily necessity.
If you recently switched to macOS or if you just never bothered to learn the exact keystrokes you might not realize how powerful Apple's built-in screen capture engine actually is. You do not need to download clunky third-party apps or browser extensions to get the perfect shot. Apple has mapped every type of screenshot you could possibly need to a few simple keyboard combinations.
Consider this your master cheat sheet: a fast, scannable reference built for muscle memory rather than long explanations. If you want the full deep dive with every hidden setting, file-format option, and troubleshooting fix, read our complete guide to every screenshot method on Mac instead. Just switched from a PC and want the single fastest answer? Start with how can I screenshot on Mac. This page is the quick-glance cheat sheet for everything else.
The Essential Cheat Sheet
Here are the three core combinations you need to know. By default, all of these shortcuts will automatically save the image as a .png file directly to your Desktop.
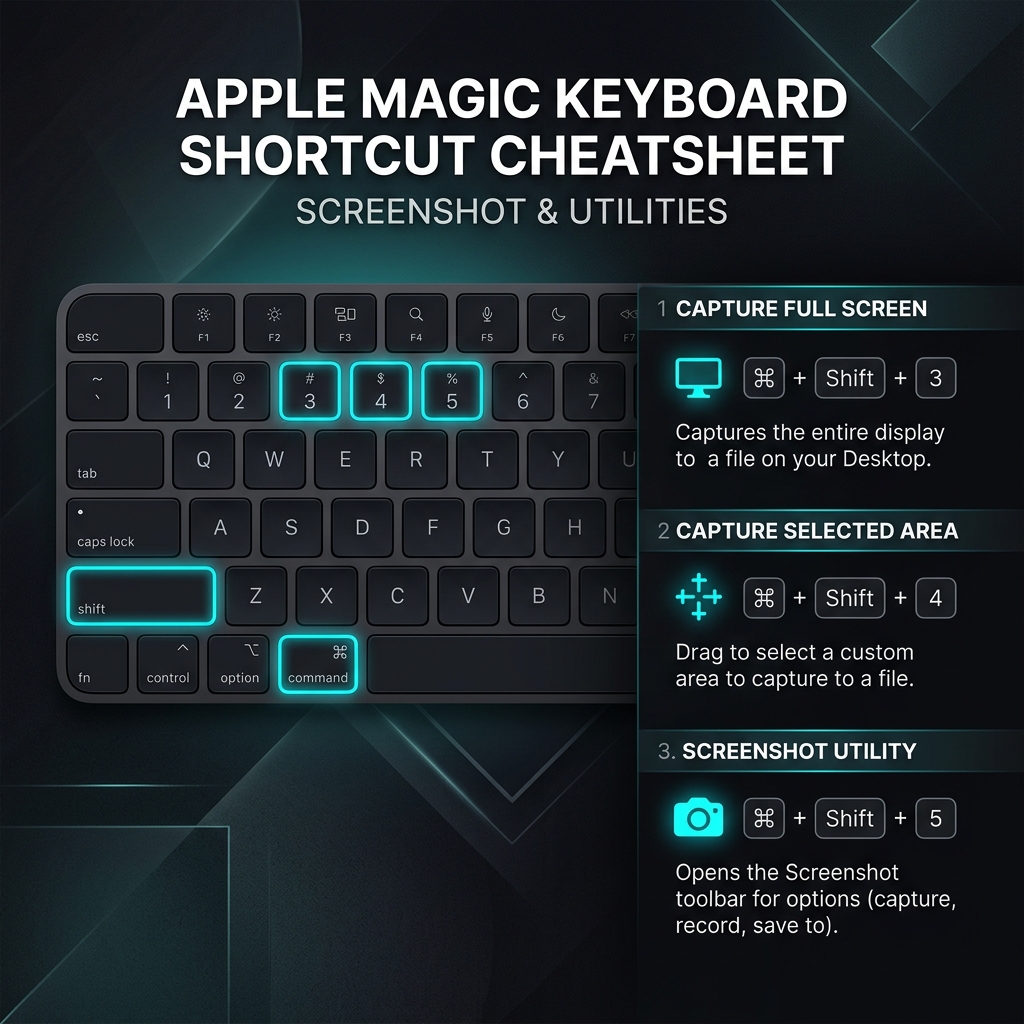
1. Capture the Entire Screen
Command + Shift + 3
The fastest and most basic method. Press this to instantly capture absolutely everything visible on your monitor. You will hear a camera shutter sound, and a small thumbnail will temporarily appear in the bottom right corner of your screen.
2. Capture a Specific Area (The Crosshairs)
Command + Shift + 4
You rarely need a picture of your entire messy desktop. This shortcut turns your mouse pointer into a small crosshair icon.
- Click and drag a box over the exact area you want to capture.
- Release your mouse button to take the shot.
3. Capture a Clean, Specific Window
Command + Shift + 4, then hit the Spacebar
This is the hidden gem of macOS. If you want to capture a specific application (like your web browser or a Slack message) without trying to manually trace the edges perfectly with the crosshairs, use this.
- Press the shortcut.
- Hit the Spacebar (your crosshair will turn into a small camera icon).
- Hover over any open window (it will highlight in blue) and Click to capture it.
- Bonus: It automatically adds a professional drop shadow and a transparent background.
Enjoying this read?
Get weekly insights on video editing, AI workflows, and creator growth straight to your inbox.
The Master Control Panel (and Video Recording)
Command + Shift + 5
If you can only remember one shortcut, make it this one. Pressing this combination summons a floating toolbar at the bottom of your screen that gives you total control over your captures.
From left to right, this toolbar lets you:
- Capture the entire screen.
- Capture a selected window.
- Capture a selected portion.
- Record a video of your entire screen.
- Record a video of a selected portion.
The "Options" Menu: Click "Options" on this toolbar to change exactly where your screenshots save (Desktop, Documents, or Mail), set a 5-second or 10-second timer, and choose whether to include your mouse pointer in the final image.
Power User Modifiers
Want to level up your screenshot game? Add these keys to your workflow.
The Clipboard Trick (Control)
By default, your Mac clutters your desktop with image files. If you just want to take a screenshot and immediately paste it into a Google Doc or a chat window, add the Control key to any shortcut (e.g., Command + Control + Shift + 4). Your Mac will bypass the desktop entirely and instantly copy the image to your invisible clipboard so you can just hit Command + V to paste it.
Fix Your Selection Box (Spacebar or Shift)
If you are using Command + Shift + 4 and realize you started drawing your box in the wrong place, don't let go of the mouse!
- Hold down the Spacebar to drag your entire selection box around the screen.
- Hold down the Shift key to lock the box in place and drag just a single edge to adjust the size perfectly before capturing.
Chasing a more specific task? We have focused walkthroughs for capturing a precise area on Mac, taking a scrolling screenshot of a long page, and even screenshotting your Mac without a keyboard.
Coming soon: Cubix Snap. Once you've nailed the capture with these shortcuts, Snap will make it look stunning in seconds — beautiful backgrounds, clean annotations, and instant background removal.
Going Beyond the Static Image
Once these shortcuts live in muscle memory, capturing any part of your Mac screen takes a fraction of a second. But a still frame can only ever show one moment, never a sequence of clicks, a setting change, or a bug that only appears mid-action.
When you need to explain rather than simply capture, a quick screen recording carries far more than a marked-up image ever could. If you would like to record your Mac screen and turn it into a clean, auto-zoomed video without opening an editor, Cubix Capture is the natural next step.
Don’t miss the next one.
Join our newsletter for exclusive tips, product updates, and the latest from the Cubix team.