
There is a unique kind of dread that sets in when you finish recording a flawless, high-energy software tutorial or gameplay module, load up the playback file, and realize your video and audio are completely disconnected. You watch your cursor click a menu or see your mouth form a word, but the actual sound wave lags behind or arrives a split second too early.
In digital video production, this is known as asynchronous audio drifting. Most forums will tell you to simply throw a random millisecond delay onto your mic and hope for the best. But if your audio is drifting progressively meaning it starts in perfect sync but gets wider apart the longer you record a simple static delay won't fix it.
To fix it permanently, you need to address the actual systemic bottlenecks inside your Windows or Mac architecture. Here is "the real fix" to restore absolute synchronization to your OBS workflow.
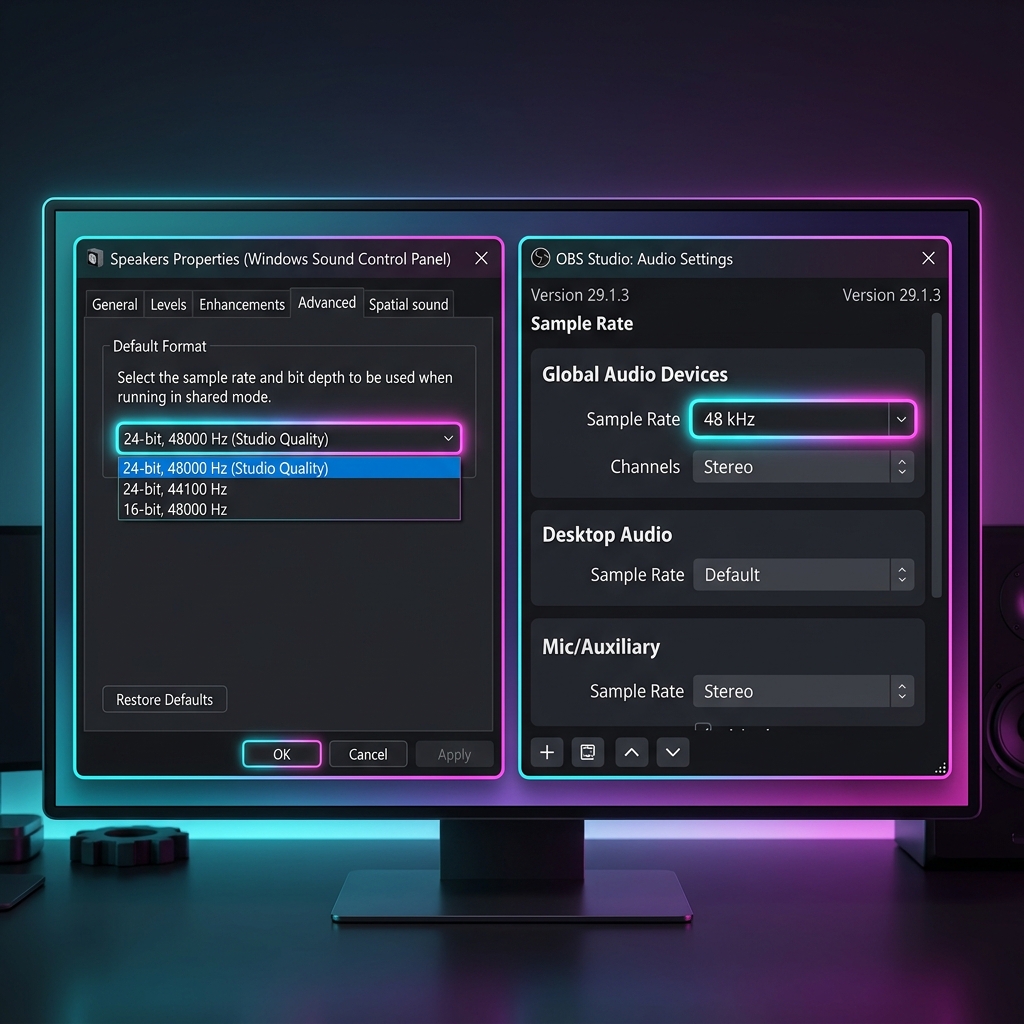
The Primary Culprit: The Sample Rate Clock Mismatch
If your audio starts out perfectly matched but slowly drifts out of sync over a 10, 20, or 30-minute recording window, you are experiencing a Sample Rate Mismatch.
Your computer’s internal sound card and external USB/XLR microphones process audio data at a specific digital clock frequency typically 44.1 kHz (44,100 samples per second) or 48 kHz (48,000 samples per second). If OBS is configured to decode audio at a speed that doesn't match the exact frequency your operating system hardware is outputting, your audio track will gradually separate from your video frames.
-
Audit Your Windows Sound Control Panel: Identify your hardware's true clock rate. Press the Windows Key + R, type
mmsys.cplinto the box, and hit Enter. Under the Playback tab, right-click your active headphones/speakers and select Properties. Open the Advanced tab and write down the exact default format frequency (e.g.,24-bit, 48000 Hz). Crucial: Repeat this exact process under the Recording tab for your physical microphone. Both hardware pieces must match. -
Navigate to OBS Audio Preferences: Open internal platform configuration. Launch OBS Studio, click on Settings in the bottom-right corner of the interface, and select the Audio tab from the left sidebar.
-
Synchronize the Sample Rate Value: Lock your software to your hardware speed. Locate the Sample Rate dropdown at the very top of the window. If your Windows hardware panels read 48000 Hz, switch OBS to 48 kHz. If your hardware panels read 44100 Hz, select 44.1 kHz.
-
Apply Changes and Restart OBS: Force the visual and audio kernels to reset. Click Apply, click OK, and restart OBS Studio completely. This forces both your computer hardware and your capture software to process audio data along the exact same time axis.
The Secondary Culprit: Fixed Hardware Delays (Sync Offset)
If your audio isn’t progressively drifting, but instead has a constant, unmoving lag from the very first second of the video (e.g., your voice always arrives exactly a quarter-second after your webcam frames or mouse movements), your computer is experiencing hardware processing latency. You can correct this instantly using OBS's manual calibration deck.
- Locate the Audio Mixer deck at the bottom center of the main OBS interface.
- Click the three dots icon next to your microphone or desktop audio bar and select Advanced Audio Properties.
- Find your microphone or desktop audio row and navigate to the column labeled Sync Offset (ms).
- Input a precise millisecond correction ($1\text{ second} = 1000\text{ ms}$):
- If your voice arrives BEFORE the video action: You need to delay the sound. Input a positive integer (e.g.,
200to hold back the audio track by one-fifth of a second). - If your voice arrives AFTER the video action: You need to pull the sound forward. Input a negative integer (e.g.,
-200).
- Close the window, record a brief 10-second test clip of you clapping your hands loudly, and verify the playback alignment.
Enjoying this read?
Get weekly insights on video editing, AI workflows, and creator growth straight to your inbox.
Step 3: Uncheck "Use Device Timestamps"
When OBS pulls digital inputs from an external USB microphone or webcam array, it occasionally attempts to read the hardware manufacturer's internal clock stamps to map synchronization. If those hardware chips drift by even a fraction of a millisecond, OBS will introduce erratic processing delays trying to compensate.
- The Fix: Double-click your physical microphone source inside your OBS Sources list (or head back to Advanced Audio Properties). Scroll to the bottom configuration details and uncheck the box labeled "Use Device Timestamps". This forces OBS to read the audio packets raw as they land on your motherboard.
Tired of Calculating Millisecond Delays?
While OBS Studio remains an unrivaled open-source powerhouse for live broadcasters who need advanced multi-track hardware mapping, dealing with sample rate math, device timestamp offsets, and millisecond sync calculations can completely ruin your creative momentum.
If your primary objective is simply producing crisp software tutorials, web walkthroughs, onboarding modules, or digital course lessons without spending your afternoons acting as an audio support technician, it is time to move your creator stack to Cubix Capture.
Instead of running like a complex, manual broadcast mixing board that leaves alignment tracking entirely up to you, Cubix Capture uses a modernized, automated capture engine:
- Flawless Unified Syncing: It completely eliminates millisecond sync calculations. It locks onto your active microphone hardware, app audio lines, and desktop visual frames simultaneously via an automated hardware clock matrix, guaranteeing flawless alignment from start to finish.
- Algorithmic Focal Zooming: Because over half of your audience watches tutorials on smartphones, full-monitor screen recordings make application labels look microscopic. Cubix Capture automatically tracks your cursor targets and smoothly glides the camera inward to magnify dropdown menus, text blocks, and settings panels dynamically while you talk.
- AI Cursor Path Smoothing: It catches naturally frantic micro-movements from your physical trackpad or mouse and smooths them into an elegant, cinematic glide that anchors student attention.
If you are a streaming engineer building an advanced live multi-camera broadcast stream, syncing your sample rates inside the system sound panel will restore your OBS audio layer. But if your goal is to save your schedule, avoid technical troubleshooting, and output polished, mobile-optimized tutorials the exact millisecond you click stop recording, moving your creator setup to a smart, automated platform like Cubix Capture handles the entire pipeline for you seamlessly.
Keep Reading
- OBS Audio Delay - How to Fix Audio Sync Issues
- OBS No Audio - How to Fix Desktop Audio Not Working
- OBS Desktop Audio Not Working Windows 11
- OBS Best Settings for Screen Recording in 2026
- How to Record Screen and Audio Together on Windows
Don’t miss the next one.
Join our newsletter for exclusive tips, product updates, and the latest from the Cubix team.